Aller au contenu principal
Pour réparer ensemble - Je crée un compte

Vitamix 5200 Drive Socket Replacement

Ce dont vous avez besoin

    1. Vitamix 5200 Drive Socket Replacement, Drive Socket: étape 1, image 1 de 3 Vitamix 5200 Drive Socket Replacement, Drive Socket: étape 1, image 2 de 3 Vitamix 5200 Drive Socket Replacement, Drive Socket: étape 1, image 3 de 3
      • Unplug the motor from its external power source.

      • Remove the blender jar from the motor base.

      Demander à FixBot

      Ajouter un commentaire

    2. Vitamix 5200 Drive Socket Replacement: étape 2, image 1 de 2 Vitamix 5200 Drive Socket Replacement: étape 2, image 2 de 2
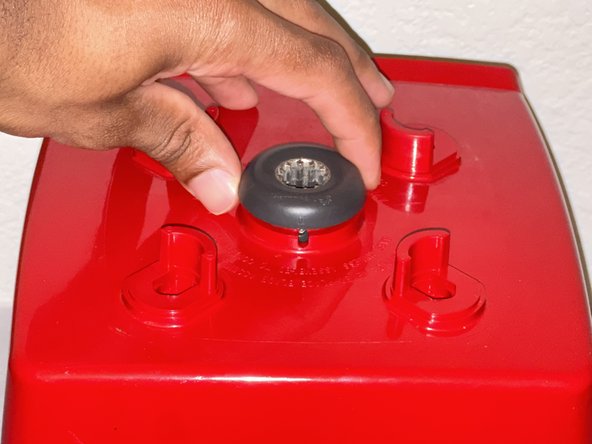
      • Lift up and remove the rubber jar pad surrounding the drive socket.

      Demander à FixBot

      Ajouter un commentaire

    3. Vitamix 5200 Drive Socket Replacement: étape 3, image 1 de 2 Vitamix 5200 Drive Socket Replacement: étape 3, image 2 de 2
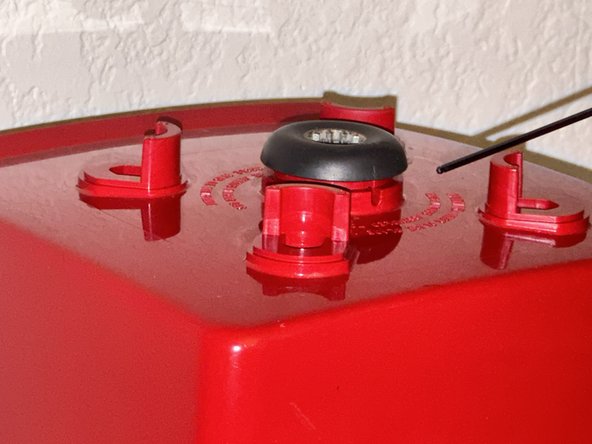
      • Align the Vitamix logo and arrow to the small hole at the base of the drive socket.

      Demander à FixBot

      Ajouter un commentaire

    4. Vitamix 5200 Drive Socket Replacement: étape 4, image 1 de 3 Vitamix 5200 Drive Socket Replacement: étape 4, image 2 de 3 Vitamix 5200 Drive Socket Replacement: étape 4, image 3 de 3
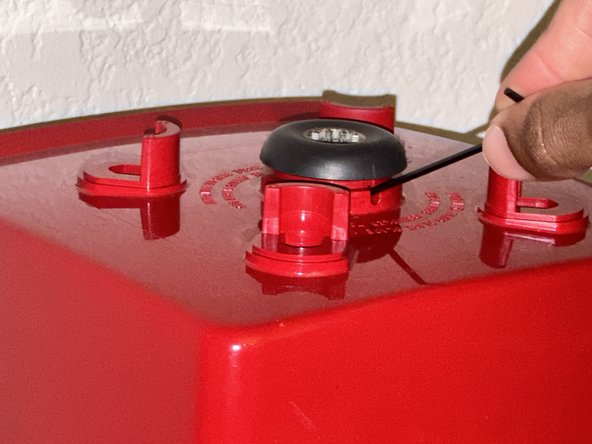
      • Using a 5/64th Allen wrench, place it at a 45-degree angle into the small hole and twist leftward to loosen the drive socket.

      • Only loosen to the point of freeing the socket. Loosen too much and you risk dropping the screw into the motor.

      Demander à FixBot

      Ajouter un commentaire

    5. Vitamix 5200 Drive Socket Replacement: étape 5, image 1 de 2 Vitamix 5200 Drive Socket Replacement: étape 5, image 2 de 2
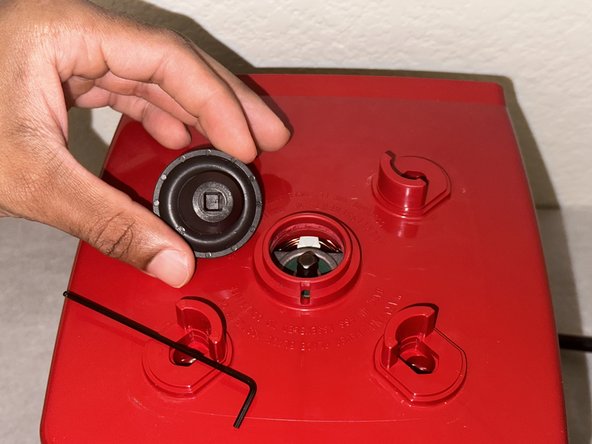
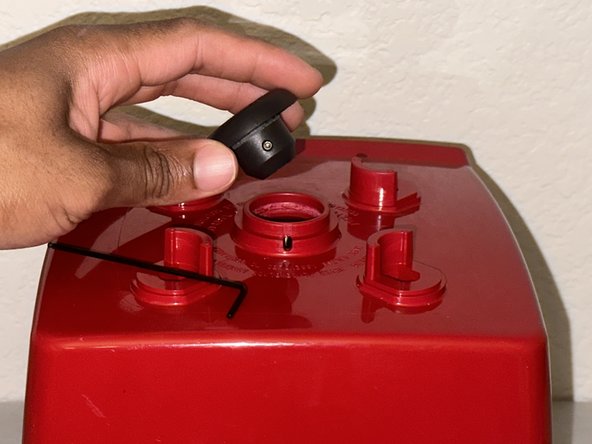
      • Remove the old drive socket.

      Demander à FixBot

      Ajouter un commentaire

    6. Vitamix 5200 Drive Socket Replacement: étape 6, image 1 de 3 Vitamix 5200 Drive Socket Replacement: étape 6, image 2 de 3 Vitamix 5200 Drive Socket Replacement: étape 6, image 3 de 3
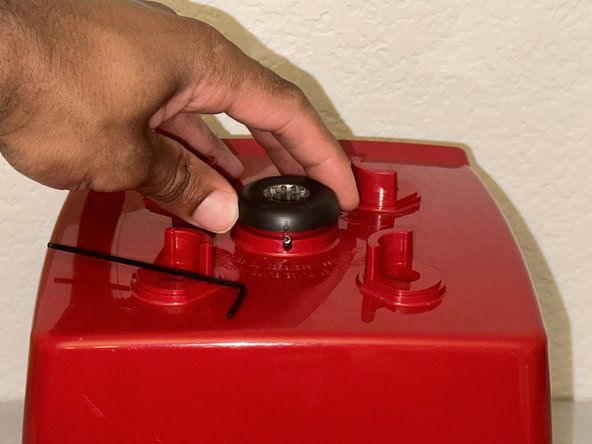
      • Place the new drive socket on the square nut.

      • Realign the logo and arrow with the small hole at the sockets base.

      Demander à FixBot

      Ajouter un commentaire

    7. Vitamix 5200 Drive Socket Replacement: étape 7, image 1 de 1
      • Twist the Allen wrench rightward to tighten the new drive socket into place.

      Demander à FixBot

      Ajouter un commentaire

Conclusion

To reassemble your device, follow these instructions in reverse order.

Annulation : je n'ai pas terminé ce tutoriel.

4 autres ont terminé cette réparation.

Courtland Brown

Membre depuis le 09/21/23

275 Réputation

1 tutoriel rédigé

Équipe

4 commentaires de tutoriel

Excelente explicativo. Normalmente a estos equipos hay que observar que las dos llaves estén en buenas condiciones, sobre todo el pulsador, la mayoría de las veces es el problema principal que el equipo funcione mal. Saludos EXITOS

Carlos Soto - Réponse Partager

Très pratique

Hamissou Nhour - Réponse Partager

What should I do when the motor stocked. Not rolling but making a buzz sound.

Fresh Swag - Réponse Partager

You can use a 2mm hex key if you don't have a 5/64" hex key as they are almost exactly the same size. Note also that the angle for hex key insertion is not 45° - it's closer to 30° from the horizontal plane. If you have a ball-end hex key of either size it is easier to fit the hex key. Also, if you back out the cap screw too far and drop it on the floor and the dog swallows it, the replacement size is a #2-56 x 3/16" stainless steel cap screw.

jgealy - Réponse Partager

Ajouter un commentaire

Nombre de vues :

Dernières 24 heures : 7

7 derniers jours : 50

30 derniers jours : 214

Total : 4,372