Aller au contenu principal

Vtech InnoTab 3S USB Port Replacement

Ce dont vous avez besoin

  1. Vtech InnoTab 3S USB Port Replacement, Rear Panel: étape 1, image 1 de 3 Vtech InnoTab 3S USB Port Replacement, Rear Panel: étape 1, image 2 de 3 Vtech InnoTab 3S USB Port Replacement, Rear Panel: étape 1, image 3 de 3
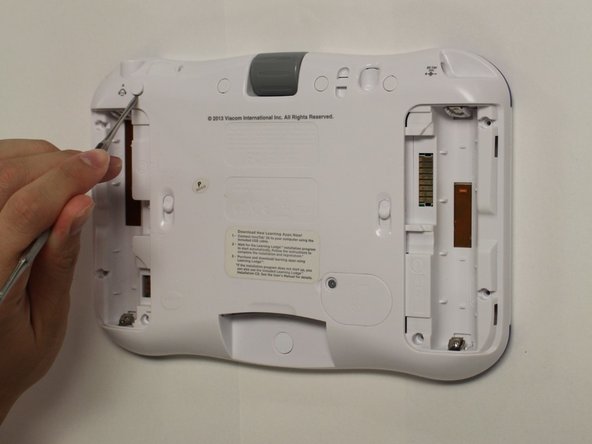
    • While holding the battery compartment locks down, slide the two battery doors outwards from the sides of the device.

    • Remove the batteries from the device.

  2. Vtech InnoTab 3S USB Port Replacement: étape 2, image 1 de 2 Vtech InnoTab 3S USB Port Replacement: étape 2, image 2 de 2
    • Remove six 7 mm screws from the interior of the battery compartment using a Phillips #1 screwdriver.

  3. Vtech InnoTab 3S USB Port Replacement: étape 3, image 1 de 3 Vtech InnoTab 3S USB Port Replacement: étape 3, image 2 de 3 Vtech InnoTab 3S USB Port Replacement: étape 3, image 3 de 3
    • Using a nylon spudger, remove the five caps that hide the screws.

    • Potential for device damage: Be careful not to scrape the plastic from the device using the spudger.

    • When removing the caps, hold the spudger vertical to the board to make removal easier. Also try to push in with your spudger pointing towards the bottom of the device.

    • Remove the five 5 mm Phillips #1 screws from the rear panel of the device.

  4. Vtech InnoTab 3S USB Port Replacement: étape 4, image 1 de 1
    • Carefully remove the rear panel from the front panel of the device.

    • Once the rear panel is removed, you'll be able to see the motherboard and other components within the Vtech InnoTab 3s.

  5. Vtech InnoTab 3S USB Port Replacement, Motherboard: étape 5, image 1 de 2 Vtech InnoTab 3S USB Port Replacement, Motherboard: étape 5, image 2 de 2
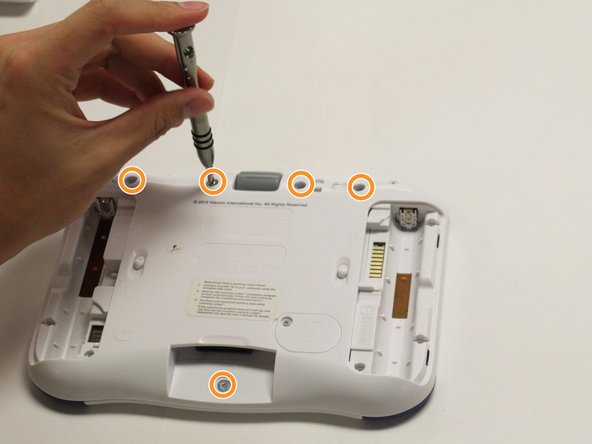
    • Remove the six screws that secure the motherboard to the front panel of the device using a Phillips #1 screwdriver.

    • Remove the other 5mm screws that secure the charger port and the buttons to the inside of the front panel.

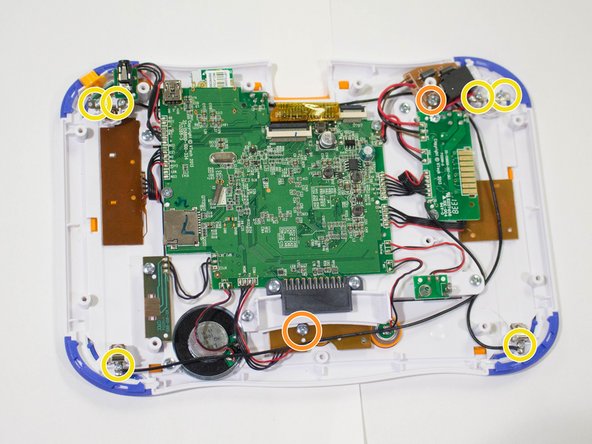
    • Remove the six 3 mm screws securing the battery clip.

  6. Vtech InnoTab 3S USB Port Replacement: étape 6, image 1 de 1
    Outil utilisé dans cette étape :
    Tweezers
    $4.99
    J'achète
    • Using the tweezers, remove one battery clip from each corner (four total) of the Vtech InnoTab 3s.

    • With the tweezers, unsecure the charging port, headphone port, and the light switch button from the front panel of the device.

    • Potential for device damage: Avoid forceful movements when removing the motherboard to prevent damage of device components.

  7. Vtech InnoTab 3S USB Port Replacement, USB Port: étape 7, image 1 de 3 Vtech InnoTab 3S USB Port Replacement, USB Port: étape 7, image 2 de 3 Vtech InnoTab 3S USB Port Replacement, USB Port: étape 7, image 3 de 3
    • The mini USB port is located near the top of the device and is secured by four metal prongs underneath the port.

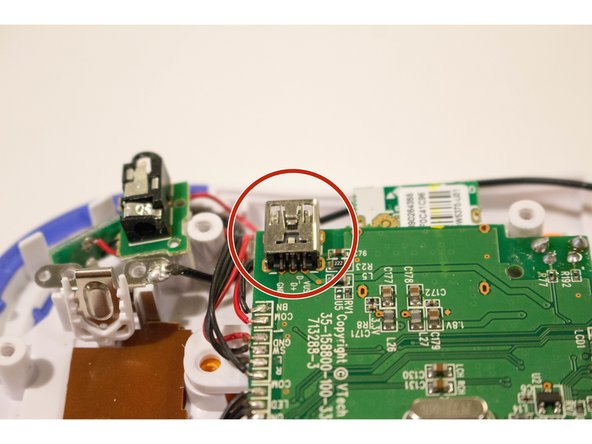
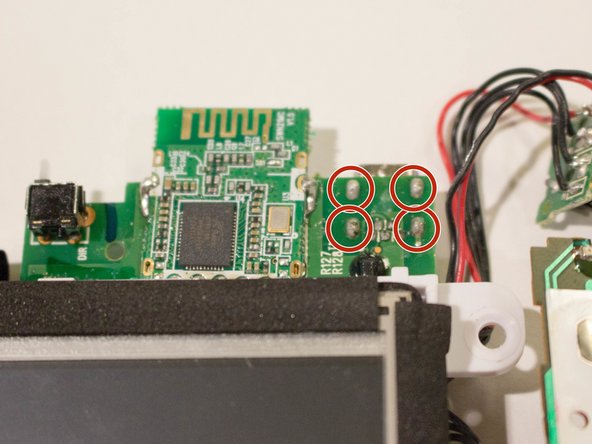
    • Facing the underside of the USB port, solder the metal prongs securing the USB port to the device.

    • Avoid forceful movements when soldering to prevent damage of device components and avoid personal injury.

Conclusion

To reassemble your device, follow these instructions in reverse order.

taweewatchulikavit

Membre depuis le 08/27/15

341 Réputation

3 tutoriels rédigés

Équipe

USF Tampa, Team 8-2, Eyestone Fall 2015 Membre de l'équipe USF Tampa, Team 8-2, Eyestone Fall 2015

USFT-EYESTONE-F15S8G2

4 membres

9 tutoriels rédigés

0 commentaires

Ajouter un commentaire

Nombre de vues :

Dernières 24 heures : 0

7 derniers jours : 2

30 derniers jours : 4

Total : 1,283