Ce dont vous avez besoin
-
-
Hold the on/off button for 3 seconds until the screen is black.
-
Remove batteries by placing thumb on battery plate cover sliding it down to expose batteries.
-
Turn camera upside down to allow the batteries to fall out.
-
-
-
There are 5 (4.5mm in length) screws on the sides of the camera that need to be removed. Use a Phillips #000 screwdriver to remove all screws.
-
Remove 2 screws on the right side of the camera, and store them on a magnetic mat.
-
Remove 2 screws on the bottom of the camera, and store them on a magnetic mat.
-
Remove 1 screw on the left side of the camera, and store it on a magnetic mat.
-
-
-
-
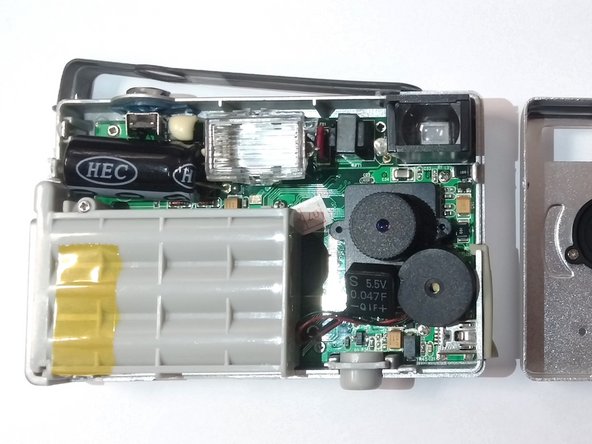
Using a prying tool or fingernail, gently separate the back plate from the front plate, exposing the inside of the camera.
-
-
-
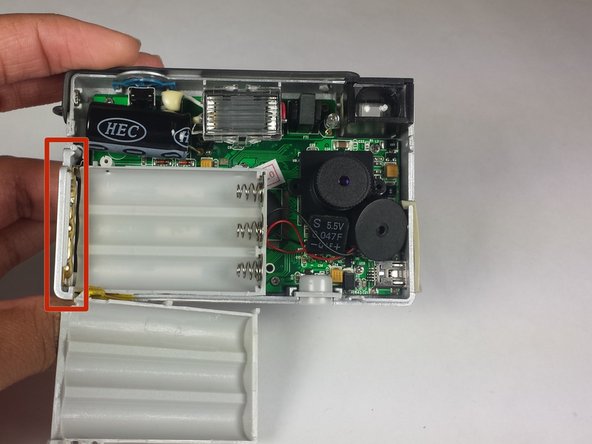
With your fingers, gently pull the two pieces of the battery case apart. At this point, the battery door should be exposed
-
-
-
With your fingers, gently remove the battery door.
-
Now you are free to repair or replace the battery door! Follow these steps in reverse order to reassemble the camera.
-


To reassemble your device, follow these instructions in reverse order.
To reassemble your device, follow these instructions in reverse order.
Annulation : je n'ai pas terminé ce tutoriel.
2 autres ont terminé cette réparation.
Équipe

Baylor, Team 8-15, Williams Fall 2014 Membre de l'équipe Baylor, Team 8-15, Williams Fall 2014
BU-WILLIAMS-F14S8G15
3 membres
5 tutoriels rédigés