Introduction
Au cas où vous n'auriez pas suivi, il y a une nouvelle Switch sur le marché : il s'agit de la Nintendo Switch Lite, et elle embarque moins de choses pour vous coûter moins cher. Distraits un moment par les nouvelles couleurs plutôt chouettes, nous nous sommes finalement rappelés que nous avions l'intention de faire un démontage. Sortez vos outils et démontons ensemble la nouvelle Switch Lite !
YouTube ? Instagram ? Twitter ?
Facebook ? Donnez-nous un coup de pouce et ne manquez aucune de nos futures vues éclatées. Si vous êtes plutôt style newsletter, c'est aussi dans nos cordes.
Ce dont vous avez besoin
Vidéo d'introduction
-
-
Oh une Switch Lite sauvage ! Qu'en dit le Nintendex ?
-
Processeur Tegra NVIDIA personnalisé
-
Écran LCD tactile capacitif intégré de 5,5 pouces et d'une résolution de 1280 sur 720 pixels
-
Stockage interne de 32 Go (jusqu'à 2 To d'espace de stockage supplémentaire via carte microSDHC ou microSDXC)
-
Wi-Fi 802.11 a/b/g/n/ac, Bluetooth 4.1, NFC, port USB Type-C (juste puur la rehcharge) et prise jack de 3,5 mm
-
Accéléromètre et gyroscope intégrés
-
Batterie lithium-ion rechargeable d'une autonomie de 3 à 7 heures de jeu
-
Évolution avec des manettes non amovibles
-
-
-
Avant de commencer, nous nous adressons au génie des rayons X, gracieusement mis à disposition par nos amis de chez Creative Electrons.
-
Quand on pense aux smartphones modernes, le cadre de cet écran paraît bien large. Notre fond d'écran habituel ne sera donc pas aussi spectaculaire que d'habitude. Peut-être que nous devrions procéder à un épluchage complet…
-
-
-
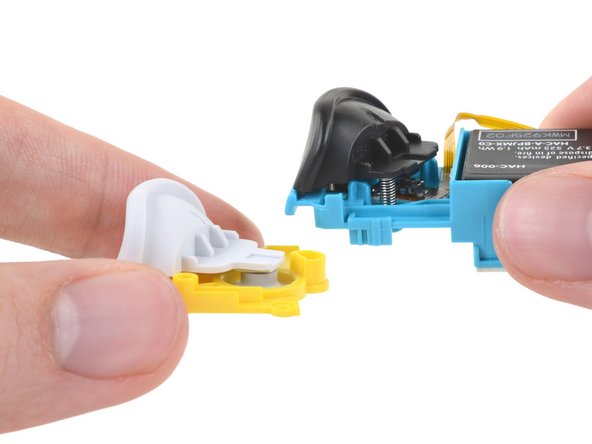
Nous forçons à fond sur les manettes dans l'espoir de récupérer deux nouveaux superbes Joy-Cons jaunes. Peine perdue, elles ne se détachent pas.
-
Il faudra donc avoir recours à une méthode de démontage plus traditionnelle.
-
Les manettes intégrées comprennent cependant une bonne vieille croix directionnelle.
-
Autres modifications visibles : la caméra infrarouge de la Joy-Con droite est passée à la trappe et les haut-parleurs ont été déplacés de l'avant (Switch d'origine) à la tranche inférieure (Switch Lite).
-
Le pied de la Switch d'origine s'est également escamoté. Voici la Switch la plus aérodynamique du monde !
-
-
-
La route est barrée par quelques infranchissables vis (tri-point). Impossible de continuer sans mettre la main sur l'outil adéquat.
-
Pas de quêtes annexes aujourd'hui ! Nous sommes en mission et avons embarqué tous les outils nécessaires pour gagner la partie. Tournevis Y00, à l'attaque !
-
Sous la coque arrière se trouve… une autre coque. Continuons !
-
Nous remarquons que le lecteur de carte SD est maintenant fixé à la carte mère. À ce niveau, nous l'avions déjà retiré de l'ancienne Switch.
-
La modularité, c'est toujours bon pour la réparation. Voilà donc un pas en arrière à nos yeux.
-
Soulevons un peu la plaque de protection métallique pour jeter un premier coup d'œil aux composants internes à la lumière du jour.
-
-
-
-
Posons-nous un instant pour ouvrir la version 2019 de la Switch et faire quelques petites comparaisons.
-
La modification la plus importante : la batterie n'est plus à l'envers. Rien que cette découverte valait la peine d'effectuer le démontage.
-
Voici les autres changements, à vous de trouver le canular ! (1) La batterie, plus petite, se trouve à côté d'un caloduc de plus petit calibre. (2) La prise jack est entièrement modulaire. (3) Le chewing-gum fixant le dissipateur thermique est maintenant parfumé à la cerise.
-
En détachant la batterie, nous trouvons… de l'essuie-tout mouillé ? Peut-être que quelqu'un a essayé d'essuyer l'adhésif poisseux de la batterie.
-
D'après Nintendo, la batterie de 13,6 Wh suffit pour jouer entre 3 et 7 heures. C'est bien plus que ce que vous pouviez tirer de la Switch d'origine et de sa batterie de 16 Wh (mais moins que de la Switch mise à jour qui tient jusqu'à 9 heures).
You should add the dimension of the battery among other parts. I am finding it very hard to find this information.
I don’t know how you removed the battery on this thing, but I destroyed a few tools prying the bigger off. Plus the battery itself got bent beyond repair where I had to order a new one. Whether the water made the adhesive extra sticky I don’t know. (When I found the Switch, it had water damage)
The battery is definitely pretty difficult to remove. It just takes time and patience! Our guide details the process: Remplacement de la batterie de la Nintendo Switch Lite
-
-
-
Des composants plus efficaces permettent non seulement d'allonger l'autonomie de la batterie, mais aussi de gaspiller moins d'énergie sous forme de chaleur. Nous sommes donc peu surpris de voir que cette Switch embarque un dissipateur thermique et un ventilateur plus petits.
-
Autre légère différence : les anciennes gâchettes gauche et droite appuyaient directement sur le bouton d'un circuit imprimé, mais les nouvelles gâchettes s'enfoncent sur une touche à membrane. Cela pourrait contribuer à améliorer leur étanchéité, et leur confère une course allongée, définivement plus agréable.
-
Les haut-parleurs ressemblent à ceux de la Switch d'origine, mais leur boîtier est tout nouveau.
-
Non seulement ils émettent vers le bas, mais ils se sont également élargis dans l'espace qu'occupaient les batteries des deux Joy-Con. Bien que nous n'ayons pas fait de comparaison directe du son, nous serions surpris que la Lite ne remporte pas la bataille.
-
-
-
Nous mettons de côté une mini-carte dédiée à la Joy-Con et nous emparons d'une source de controverses récentes : le joystick.
-
À première vue, les joysticks ressemblent beaucoup à ceux de la Switch 2019 lorsque nous les décortiquons — mais la conception des attaches sur les côtés est légèrement différente, et le boîtier est plus facile à ouvrir.
-
Dans l'espoir de trouver une amélioration liée au phénomène de drift, nous ouvrons les joysticks de la Switch Lite et de la Switch 2019 (en bas) et les rangeons l'un à côté de l'autre pour le plaisir des yeux.
-
Les composants internes ne semblent pas si différents, mais nous remarquons tout de même un nouveau tracé de circuit imprimé, un bouton cliquable plus étroit et des curseurs en métal légèrement plus larges.
Ich habe die neue Version der analog sticks genauer unter die Lupe genommen, sie mit meinem problembehafteten verglichen und dabei etwas festgestellt. Ich habe es in einem Tweet zusammengefasst
Just replaced my left joystick, I didn’t even take off the main heatshield to disconnect the battery (had been dead for awhile). The ribbon cables went back in easily with a drop of de-oxit for lubrication. This is a smart design because the left joystick gets much more abuse than the right. PROTIP: The ribbon cables are all fixed in place via a clasp that must be lifted up first. Failure to do so will damage the ribbon cables and your board. The riskiest part of this repair is losing screws. PH000 and Y00 drivers are needed. About a 30 minute repair for a first timer.
-
-
-
Nous ôtons la carte et remarquons au passage que le stockage flash autrefois modulaire est maintenant soudé. (Changer le stockage soi-même ne marchait pas dans la Switch d'origine, mais c'était au moins physiquement possible.)
-
Face A de ce capybara en silicium :
-
Nvidia ODNX10-A1 : système sur une puce (SoC) Tegra X1, probablement une version sur mesure de la variante T210B01
-
2x DRAM LPDDR4X K4U6E3S4AM-MGCJ 16 Gb Samsung (4 Go au total)
-
Stockage flash eMMC KLMBG2JETD-B041 de 32 Go Samsung
-
ST Microelectronics ST21NFCD contrôleur NFC et contrôleur d'écran tactile FingerTip
-
Codec audio ALC5639 Realtek
-
Système sur une puce (SoC) Wi-Fi 802.11ac + Bluetooth 5.0 CYW4356X Cypress
You mention the Cypress chip to be Bluetooth 5.0, but list in the tech specs as Bluetooth 4.1. Which is it?
Nintendo’s official specs for the Switch Lite say BT 4.1. The Cypress chip is an off-the-shelf design that may have some un-utilized capabilities.
Is it possible to resolder ram chips with highrler capacity to boost a performance?
-
-
-
Retournons notre mignon rongeur pour dénicher d'autres puces :
-
Microcontrôleur STM32F038C6 avec flash 32 KB flash ST Microelectronics
-
B1913 GCBRG HAC STD T1056719A1 MCU secure (probable)
-
CI de gestion d'alimentation MAX77620HEWJ Maxim Integrated
-
Contrôleur d'alimentation USB-C BM92T10MWV-Z Rohm
-
CI de gestion de la charge de la batterie BQ24193 Texas Instruments
-
Jauge de carburant de batterie MAX17050 Maxim Integrated
-
Régulateur Buck-Boost 1.5 A RP602Z330C Ricoh
深蓝色框框里的芯片是什么芯片?
Maxim Integrated MAX17050 Battery Charge Meter.
-
-
-
Alors, comment s'en sort la Switch Lite ?
-
Un petit peu de chaleur et un léger coup de levier suffisent à dissocier l'écran du châssis. Jusqu'ici, tout va bien.
-
Nous insistons un peu pour séparer complètement le numériseur de l'écran. Ça marche ! La bonne réputation de la gamme Switch reste donc intacte.
I’d say IPS would made sense since in whatever posture the Switch Lite fell to ground the screen won’t be directly contacted (joysticks and buttons acts like a cushion layer), it does not appear often to encounter a fractured screen so swapping to IPS gives better visual experience and more chassis space(for batteries?)
Given that the majority of replacements are screen-related, this is a really poor explanation. What about the gasket? The adhesive? You didn’t touch on that at all - and it’s SUPER important to get right.
As stated in the banner at the top of the page, these are not instructions. Our hardware teardowns are intended to give a first look at the device and assess it for repairability, and that’s all. Step-by-step repair guides will come later! You can use this document for reference, but it’s not meant to be exhaustive.
la verdad es que en el desmontaje y separacion no os habeis esmerado pero nada de nada, una foto de un despiece que ademas no tiene ni un resto de pagamento y creo que no va aser tan facil como decis y menos el volver a montar, como se monta? que adhesivo? no queda nada nada claro nada.
I agree with the posters above - it’s the most important and dangerous step (separating the screen from the digitizer) and they choose to go with “something magic happens here”! Disappointing and frustrating.
Looking at replacing a LCD, is the LCD glued to the glass or just adhesive around the edge?
It’s just a strip of black adhesive all the way around - not glue. Just warm it up with a heat gun or hair dryer and carefully peel apart the LCD and digitizer. That said, if you’re replacing a broken LCD it might be easier just to get the complete LCD+digitizer assembly (the digitizer is cheap).
-
-
-
Fini de dépecer la Lite et de déblatérer finances et caractéristiques. Tirons quelques conclusions !
-
La modularité a définitivement souffert du régime de la Switch. Impossible de remplacer les manettes, le stockage et le lecteur de carte SD.
-
L'écran et le numériseur non laminés sont de bon augure, de même que le lecteur de cartouche et la prise jack remplaçables.
-
Moins cool que la Switch et moins surchargée que la 3DS, la Lite semble avoir trouvé le juste milieu. Mais qu'en est-il du score de réparabilité ?
-
- La plupart des pièces sont fixées à l'aide de vis plutôt que d'adhésifs.
- Beaucoup de pièces, dont les joysticks, le ventilateur et la prise jack, sont modulaires et peuvent être remplacés individuellement.
- La batterie, bien que solidement collée, se remplace rapidement une fois la coque arrière retirée.
- Le numériseur et l'écran ne sont pas laminés, mais néanmoins fermement collés.
- Le stockage flash et le lecteur de carte SD sont désormais directement soudés à la carte mère.
- Les vis tri-point non standard sont un obstacle à la réparation.


Dernières pensées
Indice de réparabilité


(10 étant le plus facile à réparer)
Merci à ces traducteurs :
93%


Ces traducteurs nous aident réparer le monde ! Vous voulez contribuer ?
Commencez à traduire ›
34 commentaires
The L and R triggers on the old style joycons pressed onto a fragile PCB mounted tactile switch, and were both fragile and a common point of failure. The new ones will hopefully be more robust, especially important as now they are part of the main unit and not a replaceable accessory.
Ethan…..first of all why is it important that you posted first? Second of all, you said, “Looks like the Switch Lite is based off of the original Switch.” Really, Ethan? You think? Sorry for the sarcasm but c’mon man, how is your comment helping?
You are getting waeker and weaker. No exact descripton or OEM of the fan. Boy that’s weak for because the bearing of the fan can be an issue over time too. Sleevebearings would be horror for a unit like this. I hope it is ball or hydrodynamic. This fan has to run high speeds becaus of its small diameter.
So now this begs the question, can you reuse the joycons from the OG switch, remove the buttons and place them into the lite?
Say if you wanted a different color for your buttons, seems the triggers are a nono since they use a different button system but what about a,b,x,y,+,- ect?
awful teardown guide, please give better details regarding screw placement, etc
The top of the teardown explicitly says it’s not a service guide. iFixit does have separate guides on Switch repair.
You might find the repair guides more helpful, they highlight all the screws and everything :)
Probably -
Just bought a turquoise lite and it comes with standard phillips screws
The four screws on the top and bottom of the switch lite’s case are PH000, while the 4 on the back are Y00. Look again. The screws inside are all PH000 as well.
walczyk -
Would anyone know where one could source the ‘dedicated mini-joycon board’? They seem to be the one part you cannot find anywhere.
How easy would it be for a total novice to take this apart for the purposes of re-painting the switch? I was thinking about taking it apart and doing a custom paint job on it but wanted to see if anyone else has tried it before I give it a go.
I'm a total novice and did this its very straight forward just don't get the screws mixed up and be mindful of ribbon cables also have the right tools otherwise you will strip the
Does anyone know where to get a replacement fan for the lite (in the UK). Mine sounds like its grating rocks most of the time.
Can someone point me in the direction of which ribbon connectors/sockets are for which function?
I took my boys apart to replace a snapped analogue stick and now it has sound and come on but the screen is blank, not even back-lit, and I'm not sure where I need to go next to troubleshoot it.
Took mine apart today and there are three ribbon cables that come from the screen two are under the gamecard slot those are for picture and backlight the power runs to the otherside near the battery
I’m just curious in respect to future repairability of my own switch lite - if I was to theoretically crack it open and replace the right stick (since that’s the only one that’s shown any issues whatsoever with my original set of joycons, also very pleased to see that one at least looks reasonably easy to get at) - would I need to replace the thermal compound? Or would it be fine if I just put it all back together as is?
I think it might be fine/preferable to leave/reuse the purple goop between the heatpipe and the topmost shield, as that seems to be quite a bit more spreadable than usual thermal paste used on computers.
For the blue/greyish goop between the heatsink and the SoC shield, and between the SoC shield and the SoC, you might be able to scoop up some of the excess goop that seeped out that are still kinda liquid, and slap it back on to the chip die and copper part of the shield. Though decent thermal paste aren’t all that expensive.
If you were to break a corner of the game card reader (brother decided to rip instead of gently unscrew a stripped screw), where could we get a replacement card reader? My understanding is that the switch lite and switch have different game card reader parts.
I for one disagree with this repairability score. If you’re fixing any handheld electronic and you don’t have access to a tri-wing screwdriver, you are probably just new to fixing these things. Every Nintendo handheld since the original gameboy has had them and apple adopted the use of the same bit in their very popular iPhone 7 (albeit a tad smaller). Also the adhesive on the digitizer comes off like butter with a guitar pick and some heat. Getting a new digi on without taking out the MB is an exercise in futility so that is a bit annoying, but overall I think this handheld is pretty easy to work on all things considered.
agreed regarding the Y0 driver bits, your toolkit should have them and if they don’t then you are gonna be ordering replacement parts anyway…
walczyk -
Broke my power/volume flex cable trying to put it back into the connector, anyone know when i can get a replacement, if at all?
omg that sucks, how would you break it putting it back in? I don’t know if mine is fully inserted, but de-oxit helped. BTW I found them on ebay for $7 just google something “Nintendo “Switch Lite” Power Volume Button Ribbon Flex Cable” and do not buy the non switch-lite version since they are different.
walczyk -
Why are there NO videos or howtos that show the trick in separating the digitizer from the LCD? I’ve disassembled everything but I’m stuck at that point. My LCD is good - just the digitizer is scratched and I don’t want to crack the LCD separating it from the digitizer. What’s the trick? Just a heat gun and careful prying? Note the Switch is different from the Lite - in the Switch the LCD and digitizer are not glued together, so it’s simple to replace just one. Not in the Lite tho. Any suggestions?
Okay, I took the plunge and tried separating the LCD and digitizer - it worked! The trick is to use a heat gun to heat one end of the digitizer side and then very carefully and slowly bend/peel it back from the LCD. There is a thin frame (about 2 mm wide) of black adhesive that goes all the way around. Once you’ve pulled them apart you’ll need to peel off that adhesive strip and move it to the new digitizer (if that’s what you’re replacing). Reattach the digitizer to the Switch Lite frame (reuse or use new clear adhesive if necessary), and then carefully align and stick the LCD to the backside of the digitizer. Then just reassemble everything and you’re good to ho.
¿sonde podré encontrar la tarjeta del joycon, la que aparece en la imagen uno del paso 7? vivo en Guatemala, de preferencia si la puedo conseguir en Latino américa, muchas gracias por su respuesta
japanese versions have only phillips screws
I’m interested in whether or not it is possible to add some kind of rumble motors (small, slim profile, like used in mobile phones) to the Switch Lite, there seems to be space inside the casing but does anyone know if there is an output on the board that could be used? Tied into the speakers somehow perhaps?
Also, I can’t see a NFC antenna anywhere in this tear down, yet it’s on the right stick as per the joy-cons. Is it just missing from the tear down or is it physically built into the right stick this time around?
What chip can I replace to restore video? I get audio, but no video. And No, its NOT the backlight or backlight cable/connector.
Does anyone know where exactly the NFC touch point is? I couldn’t see it in any of the pictures.
I would love it if there was an update to this video to replace the wifi antenna, as I can see the connections, but it glanced over on the video. Because this is essential to it's operation, that would be a great thing to inclue.
Is there a guide without all the cringe pokemon references? Preferably one where the first two steps are actually steps.
Harley Stout - Réponse
This isn’t a guide, this is a teardown.
Duck -