Introduction
Dans son histoire, Apple sort parfois des objets inattendus et différents... par exemple la Smart Battery Case, une «laideur». Les rumeurs concernant cet accessoire inattendu vont très vite et rapidement, ouvrons-la pour voir comment elle fonctionne.
Pour plus d'amusement pendant les vacances, suivez-nous sur Instagram, Twitter ou Facebook.
Ce dont vous avez besoin
-
-
Certaines spécifications «Smart» pour votre culture :
-
Jusqu'à 25 heures de temps de conversation, 18 heures d'utilisation sur LTE et 20 heures de lecture vidéo.
-
Connecteur de charge Lightning
-
Intérieur en microfibre, extérieur en silicone
-
Compatible avec le connecteur de dock Lightning iPhone
-
-
-
Imprimé sur la doublure en microfibre, nous repérons le numéro de modèle de la coque de la batterie : A1585.
-
Avec une conduite intelligente, Apple a transformé le haut-parleur du bas en un haut-parleur frontal.
-
Le microphone est également frontal et possède la même grille supplémentaire que le port du haut-parleur.
-
-
-
L'arrière de la coque de batterie présente sa caractéristique la plus importante : un sac à dos pour iPhone 4 !
-
... Probablement.
-
Alors que la Smart Battery a besoin de son propre connecteur de charge Lightning externe pour charger et transmettre des données à l'iPhone, une prise casque 3,5 mm est fournie sous la forme ... d'un trou.
-
Comme prévu, le trou de passage est parfaitement dimensionné pour les Apple Earpods inclus avec votre iPhone.
-
Cependant, pour quelque chose de plus grand, vous aurez besoin d'une sorte d'adaptateur. Pas de jacks taille studio pour cette coque.
-
-
-
Vous, les roses dorés, vous allez souffrir de devoir réduire votre effet flash, car cette coque couvre la majorité du corps en métal brillant.
-
La coque
comporte un "design charnière en élastomère douxest pliée au-dessus du renflement de la batterie, pour permettre de glisser le téléphone vers l'intérieur et vers l'extérieur. -
Cela fonctionne très bien. Vous ne voudrez probablement pas le faire tous les jours, mais il y a probablement un truc qui renforce le tout (plus à ce sujet plus tard).
-
-
-
-
Tout comme pour le dernier appareil "Smart" d'Apple, s'annonce un démontage inévitablement destructeur. Attachez vos ceintures !
-
Un iOpener chaud ramollit l'adhésif fixant la doublure douce, puis un certain effort de levier décolle la couche de tissu.
-
Une fois la doublure décollée, nous examinons d'abord l'aluminium "brossé" en dessous.
-
Nous trouvons également une interface de grille qui renforce la charnière en silicone, ce qui évite les dommages causés par l'usure. Sympa !
-
-
-
Un petit trou dans la microfibre permet de faire briller l'indicateur de charge de LED – un indicateur que vous verrez seulement si vous rechargez votre batterie vide de son iPhone.
-
Donc, presque jamais.
-
Après avoir découvert un set de vis T3 Torx (inattendues !), nous continuons avec ce que nous faisons de mieux !
-
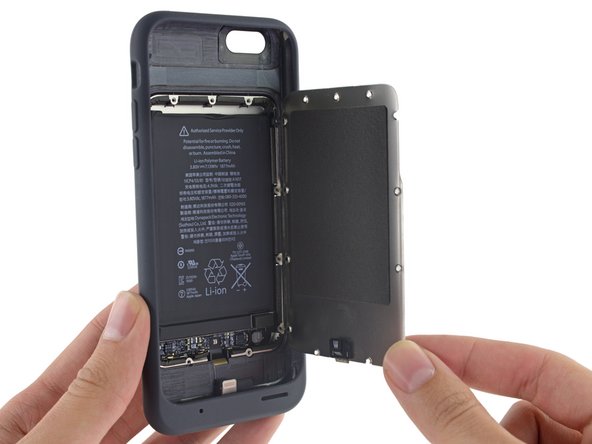
Cette plaque métallique est la porte pratique du compartiment de la batterie et sert à renforcer la coque et à protéger la batterie.
-
-
-
Sympa, un connecteur de batterie !
-
Tout d'abord, nous débranchons la batterie pour éviter les courts circuits ou décharges accidentels. Toujours agréable de voir une batterie avec un connecteur comme celui-ci, nous n'avons donc pas besoin de faire chauffer le fer à souder.
-
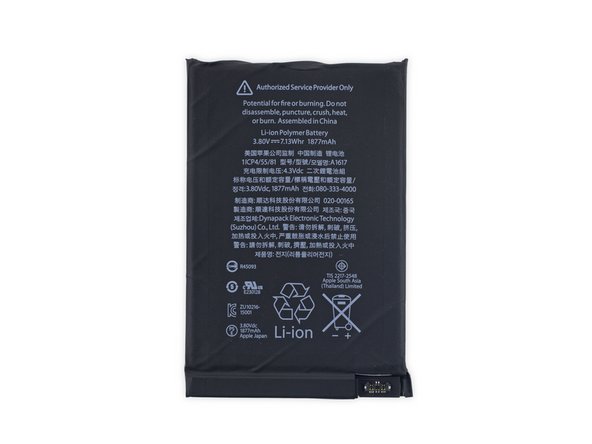
La batterie est fortement collée en place, probablement afin de renforcer la coque et de protéger son précieux chargement, votre nouvel iPhone 6s.
-
Avec une capacité de 7,13 Wh (1877 mAh à 3,8 V), cette batterie fait plus que doubler la capacité de votre iPhone 6s (6,55 Wh).
-
Même si la puissance brute est ce que vous attendez, il y a plein d'autres options, qui doublent la puissance de la Smart Battery Case.
-
-
-
Une fois la batterie sortie, nous commençons à insister sur la carte mère ... suivie de sa nappe profondément enterrée dans les méandres plastiques en bas de la coque.
-
On dirait que nous allons de toute façon devoir couper notre chemin, nous prenons donc un raccourci et brisons un morceau de cette barre Kit-Kat.
-
Lorsque la partie inférieure de la coque est enlevée, nous arrivons à couper la gaine en plastique. L'ensemble de la coque (à l'exception de la charnière flexible) est en plastique dur, entièrement recouvert de silicone doux. Coriace, mais agréable au toucher.
-
-
-
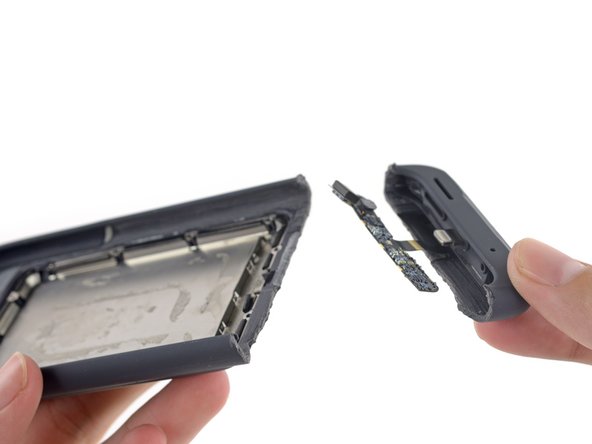
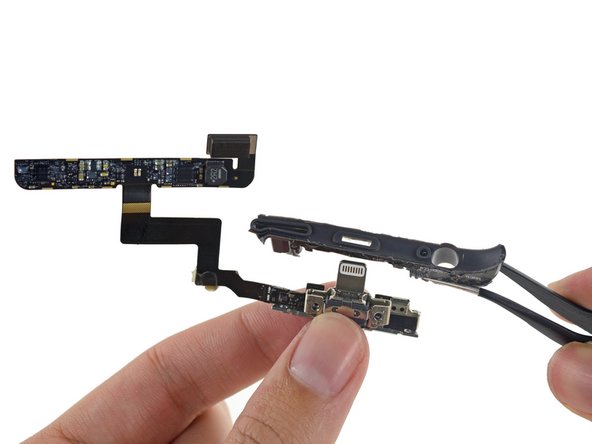
Nous sommes libres ! D'un coup de griffe bien visé, qui nous rappelle les vues éclatées d'antan, nous sortons les pièces qui rendent cette batterie Smart.
-
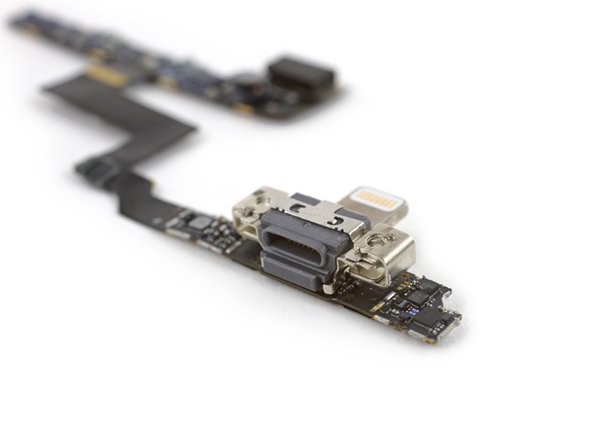
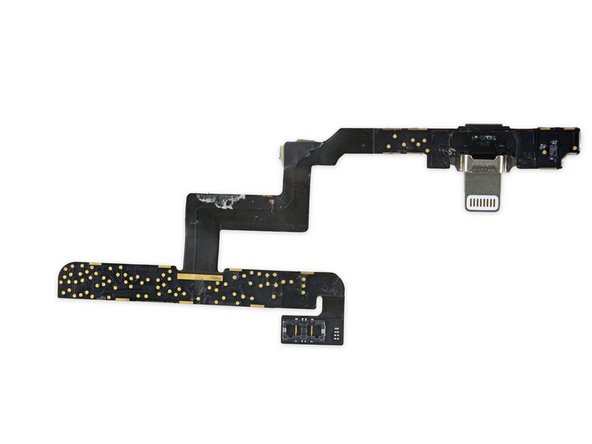
Les deux connecteurs de charge Lightning sont logés sur la même carte, avec son câble de connexion enroulé autour d'un cadre en plastique.
-
-
-
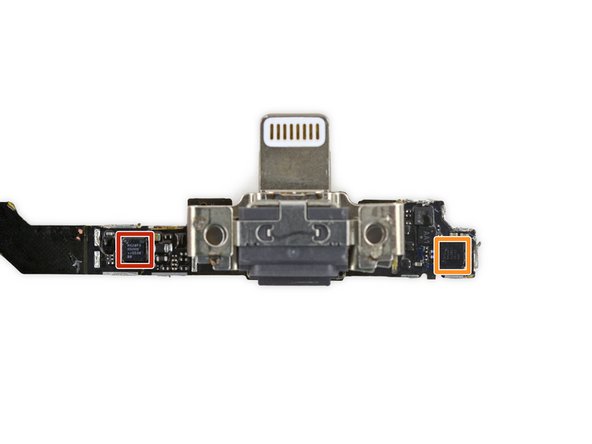
Pour une telle Smart Battery, il semble que la plupart des cellules grises se trouvent probablement dans un logiciel de votre iPhone. Nous ne trouvons que des circuits intégrés rudimentaires à l'intérieur :
-
Interrupteur de charge NXP NX20P3, également trouvé dans les câbles Lightning à USB
-
IC de recharge NXP 1608A1
-
-
-
La réparabilité de la Smart Battery mérite un 2 sur 10 (10 étant le plus facile à réparer) :
-
Les vis T3 Torx non-propriétaires rendent les réparations plus accessibles, mais sont recouverts d'une doublure en microfibre fortement adhérente.
-
Le remplacement de la batterie est possible, mais détruira probablement le revêtement en microfibre.
-
La seule réparation possible, le remplacement de la batterie, est rendue difficile par un adhésif très résistant.
-
Aucune autre réparation n'est possible sans détruire l'appareil.
I got my phone case wet and now it doesnt charge anymore is there anything i can do
-


Merci à ces traducteurs :
92%

Ces traducteurs nous aident réparer le monde ! Vous voulez contribuer ?
Commencez à traduire ›

28 commentaires
So it's a workaround for all the dead phones that can't charge because of U2 chip failure from non-Apple charger usage. Make and sell an external U2 chip-on-a-backpack to provide your phone with an externally chargeable battery. Way to spin that one Apple. Nice save.
The phone still uses it's own charging IC, this IC is most likely only used for charging the battery in the case and feeding battery charge data (from the Ti chip in the base of the battery) back via the lightning port.
Just one simple question. Dose this set of chips work for all lightning iDevices?
I know the case size does't fit the iPhone 6/6S Plus and iPhone 5/5S. However, you guys have it teared down. At this stage, certainly you can give it a shot for other iDevices. Why test this? Well, if this set of chip works with other iDevices, we may able to see Apple or third party Battery Case soon. Since those cases on the market is not able to show the battery usage in the notification centre yet.
no, it dont work
sacor22 -
I dont understand why Apple never added a better speaker into the bottom of the case.
So does it pass through the 3V of the LiPo or does it (inefficently) go 3V --> 5V then make the phone go 5V --> 3V like every other iPhone external battery?
I would think the 3V (3.6-3.7) is a limit set by the battery technology. Why if it's gonna charge over the lightning contact it needs to be transformed to 5V. I'm afraid that the current phone designs will not allow for any other way.
Maye though one could go for 6V with dual battery cells, and then bring it down to 5V.
But that would more than double the risk for a faulty battery, and complicate the charging circuits that would need to balance the cells, and make sure it would not charge if one cell is broke. If balancing would fail the result could be fire and explosion.
So just the risk would have Apple not to opt for a 2 cell version.
T Est -
Rather than peeling the case apart, it looks like you could place a template over this case and cut through the backing only where needed to remove the plate. That would cause virtually no functional damage.
Why would you want to remove the plate?
If the 'smarts' in this case are actually in the phone -that would suggest the features which set this case apart could be available for any battery case.
The only thing that's different is the iphone has some way of 'knowing' that this case is an Apple one.
I'm sure someone can make an app, possibly it would have to be a jailbreak tweak, that makes the iphone recognize all battery cases, not just the official apple one and we'd have the same 'smart' features for any case.
I wonder since the Iphone 7 doesn't have a headphone jack.. Might they put a DAC into the bottom to restore it? Since they iPhone 7 is a bit thinner too, it might have less battery capacity. Though they did say they were able to "add" some more battery capacity because of the removed headphone jack, and the A10 (might) use less power. That would be a win-win for people who want more battery life, don't "mind the bump", and grumble about the lost headphone jack. But it might be harder to sell AirPods. Especially if we have a “AirpodFallingOut-gate”.
And defeats the purpose of removing it to begin with to force people to "move on". And get researchers to figure out how to make a lossless Bluetooth codec that can reliably synchronize with video and remove (most of) the "buffering time" when the connection drops out. Maybe go lossy for a bit, continue real-time audio, and re-build the buffer at the same time. I don't know much about codecs, so that idea might be completely off-base.
my phone case got wet what can i do
Dry it with a towel, use a vacuum cleaner to suck all the water out of the openings then put it in rice for about 5 or 6 days.
Where could I find that battery? Looks like if I was just replacing that battery it wouldnt be very difficult, wouldnt damage much of anything, once you peel that felt off, it wouldnt look the prettiest after re-attaching but thats all behind the phone out of site anyway. Anyone/>?
If you use hot air to warm the whole case up (like how samsung use a small low temp oven for their phones) the felt should come off in one piece and stick back like new (warm it back up to reseal).
I am looking to add a D ring into the corners of the case next to the headphone jack and the speakerphone to make this case into a purse. Is there anything in the corners that I would compromise?
I’m wondering if I can drill a hole in the headphone jack to make it a bit larger and fit my new headphones. Does anyone know if this would destroy the device?
What are the dimension for the actually battery?
Does anyone know any links to batteries that would fit in the charging case? For iPhone 7 plz
I just teared down my smart battery case and i didn’t have to cut the bottom part of. You just have to remove the glue form the cornes and push with a small screwdriver the female connector. I didn’t have to destroy the device like you said.
Mine went to the swimming pool and my friend(the one that pushed me into) tried to removed the cover and broken the cover lighting connector i can find a place to buy just the connector.
Its was very useful! So sad!
Hi, my case has stopped charging, the phone picks up the case but there is only a 1/100 chance of the case charging by replugging the plug. Do you have any clues on why? Or how to fix it?
Is there a place that I can send mine in for repair?