Aller au contenu principal

Wacker Pump PG1 2014 Carburetor Replacement

Ce dont vous avez besoin

  1. Wacker Pump PG1 2014 Carburetor Replacement, Safety precautions: étape 1, image 1 de 2 Wacker Pump PG1 2014 Carburetor Replacement, Safety precautions: étape 1, image 2 de 2
    • Before beginning repairs, disconnect and remove all hoses.

    • Flip the motor ignition switch into the OFF position.

  2. Wacker Pump PG1 2014 Carburetor Replacement, Remove the engine cover: étape 2, image 1 de 1
    • Use a 4 mm hex key to remove the bolt securing the engine cover.

  3. Wacker Pump PG1 2014 Carburetor Replacement: étape 3, image 1 de 2 Wacker Pump PG1 2014 Carburetor Replacement: étape 3, image 2 de 2
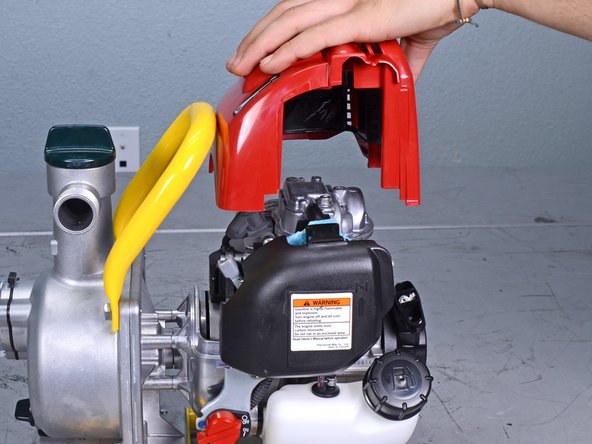
    • Lift up to remove the engine cover.

  4. Wacker Pump PG1 2014 Carburetor Replacement, Remove the air box cover: étape 4, image 1 de 2 Wacker Pump PG1 2014 Carburetor Replacement, Remove the air box cover: étape 4, image 2 de 2
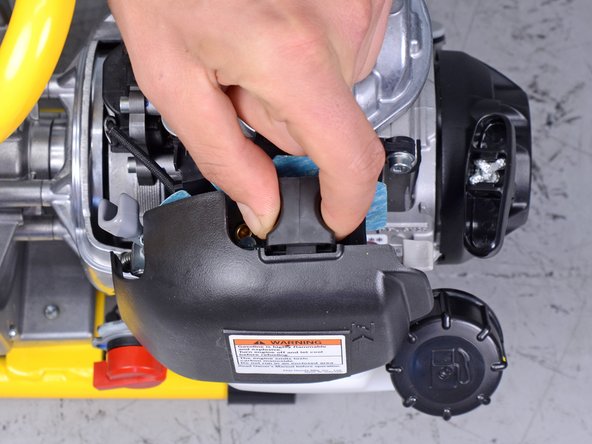
    • Use your fingers to pinch the locking tab on the top of the air box cover.

  5. Wacker Pump PG1 2014 Carburetor Replacement: étape 5, image 1 de 3 Wacker Pump PG1 2014 Carburetor Replacement: étape 5, image 2 de 3 Wacker Pump PG1 2014 Carburetor Replacement: étape 5, image 3 de 3
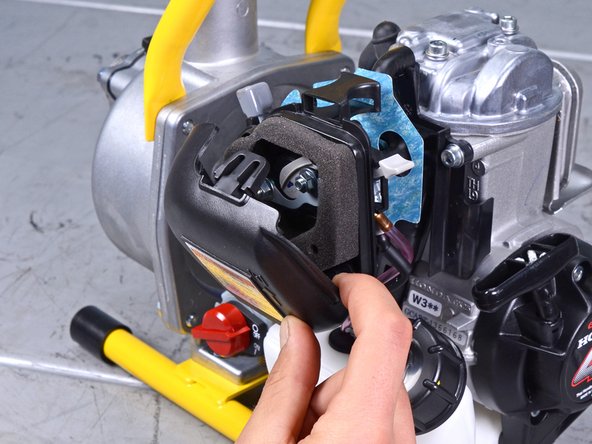
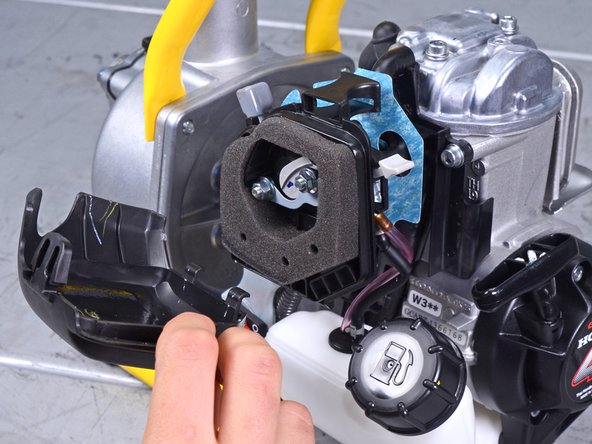
    • Tilt the unlocked air cleaner cover down and pull it away from the air box to unhook it.

    • Remove the air box cover.

  6. Wacker Pump PG1 2014 Carburetor Replacement, Remove the air box nuts: étape 6, image 1 de 1
    • Use a 6 mm socket to remove the two nuts securing the air box.

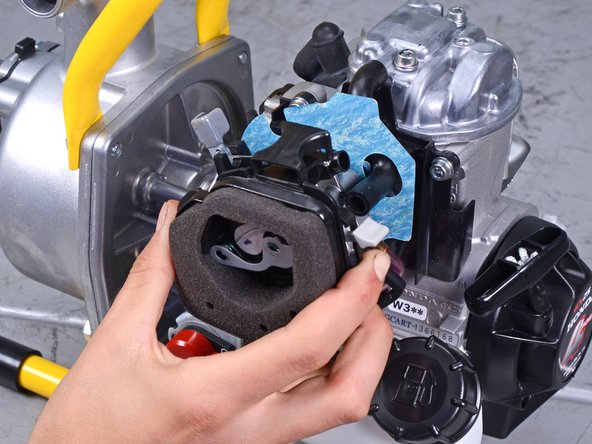
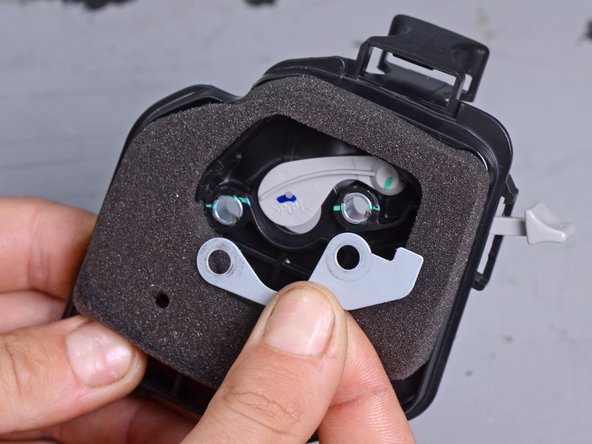
  7. Wacker Pump PG1 2014 Carburetor Replacement, Remove the air box: étape 7, image 1 de 3 Wacker Pump PG1 2014 Carburetor Replacement, Remove the air box: étape 7, image 2 de 3 Wacker Pump PG1 2014 Carburetor Replacement, Remove the air box: étape 7, image 3 de 3
    • Pull the air box directly away from the motor to remove it.

    • Once removed, the metal bracket inside of the air box will become loose. Don't lose it.

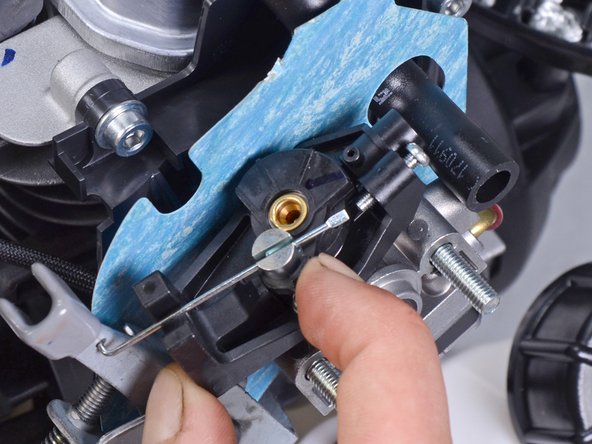
  8. Wacker Pump PG1 2014 Carburetor Replacement, Depress the throttle pulley: étape 8, image 1 de 2 Wacker Pump PG1 2014 Carburetor Replacement, Depress the throttle pulley: étape 8, image 2 de 2
    • Use your finger to pull down the spring-loaded throttle pulley.

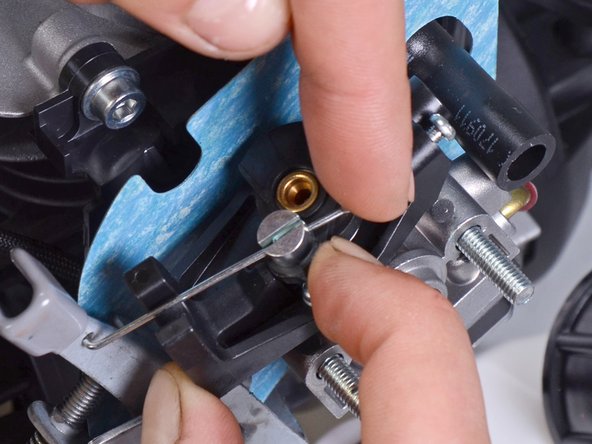
  9. Wacker Pump PG1 2014 Carburetor Replacement, Remove the throttle linkage: étape 9, image 1 de 2 Wacker Pump PG1 2014 Carburetor Replacement, Remove the throttle linkage: étape 9, image 2 de 2
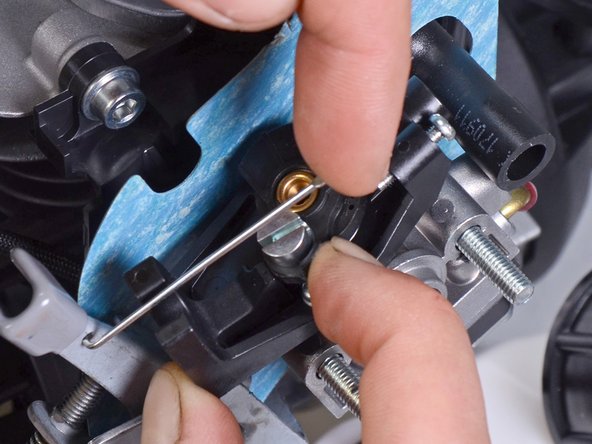
    • While pulling down on the throttle pulley, use your finger to lift the throttle linkage out of its slot on the pulley.

  10. Wacker Pump PG1 2014 Carburetor Replacement, Remove the carburetor from the motor: étape 10, image 1 de 3 Wacker Pump PG1 2014 Carburetor Replacement, Remove the carburetor from the motor: étape 10, image 2 de 3 Wacker Pump PG1 2014 Carburetor Replacement, Remove the carburetor from the motor: étape 10, image 3 de 3
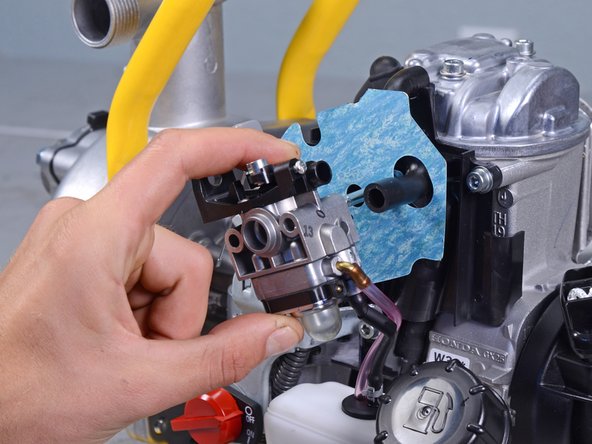
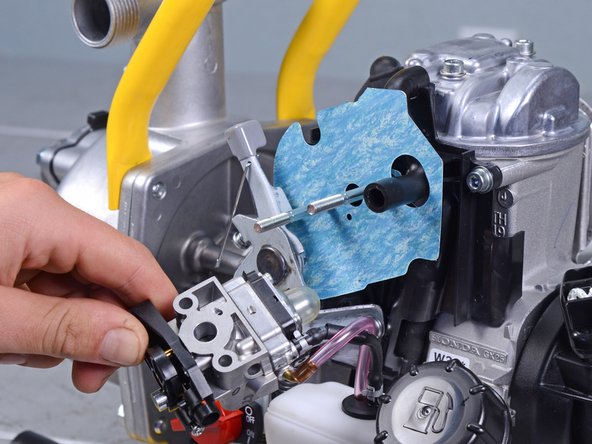
    • Pull the carburetor off of the two threaded shafts.

    • The carburetor is still attached to fuel lines, so don't attempt to completely remove it yet.

    • Don't let the carburetor put tension on the fuel lines—hold onto it and continue to the next step.

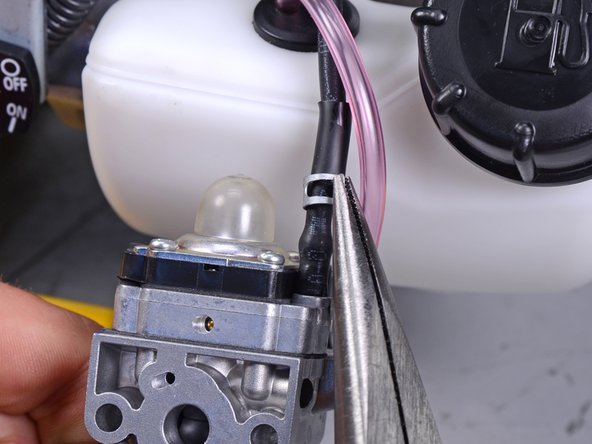
  11. Wacker Pump PG1 2014 Carburetor Replacement, Remove the fuel lines: étape 11, image 1 de 3 Wacker Pump PG1 2014 Carburetor Replacement, Remove the fuel lines: étape 11, image 2 de 3 Wacker Pump PG1 2014 Carburetor Replacement, Remove the fuel lines: étape 11, image 3 de 3
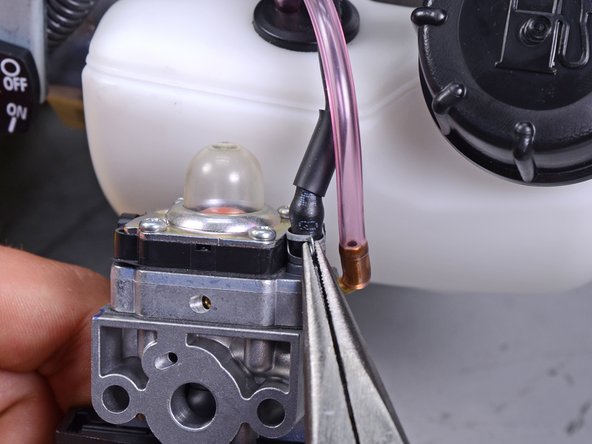
    • Use a pair of needle nose pliers to compress the two hose clamp tabs on the black hose.

    • While compressing the tabs, slide the hose clamp up and off of the carburetor nipple.

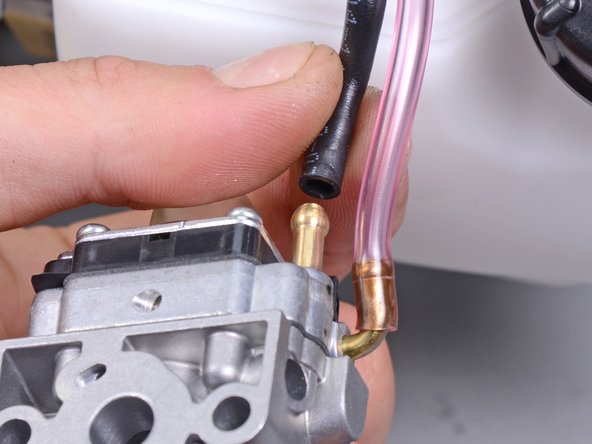
  12. Wacker Pump PG1 2014 Carburetor Replacement: étape 12, image 1 de 2 Wacker Pump PG1 2014 Carburetor Replacement: étape 12, image 2 de 2
    • Residual fuel in the carburetor or hoses may leak out during the following steps. Have shop towels or rags handy to catch any drips.

    • Use your fingers to pull the black hose off of the straight carburetor nipple.

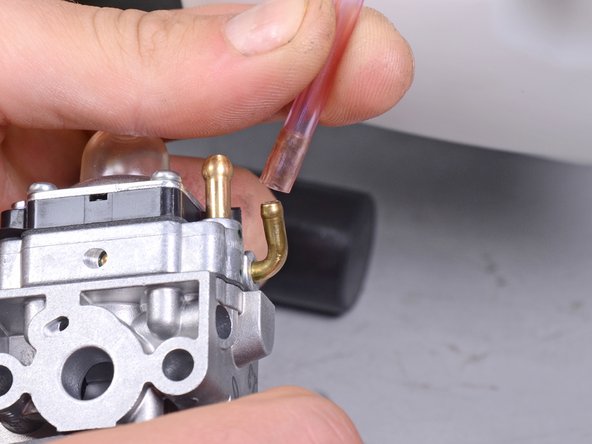
  13. Wacker Pump PG1 2014 Carburetor Replacement: étape 13, image 1 de 2 Wacker Pump PG1 2014 Carburetor Replacement: étape 13, image 2 de 2
    • Use your fingers to pull the pink hose off of the angled carburetor nipple.

  14. Wacker Pump PG1 2014 Carburetor Replacement: étape 14, image 1 de 1
    • Only the carburetor remains.

Conclusion

To reassemble your device, follow these instructions in reverse order.

Une autre personne a terminé cette réparation.

Carsten Frauenheim

Membre depuis le 03/10/20

113 086 Réputation

338 tutoriels rédigés

Équipe

iFixit Membre de l'équipe iFixit

Staff

135 membres

16 767 tutoriels rédigés

0 commentaires

Ajouter un commentaire

Nombre de vues :

Dernières 24 heures : 0

7 derniers jours : 0

30 derniers jours : 0

Total : 122