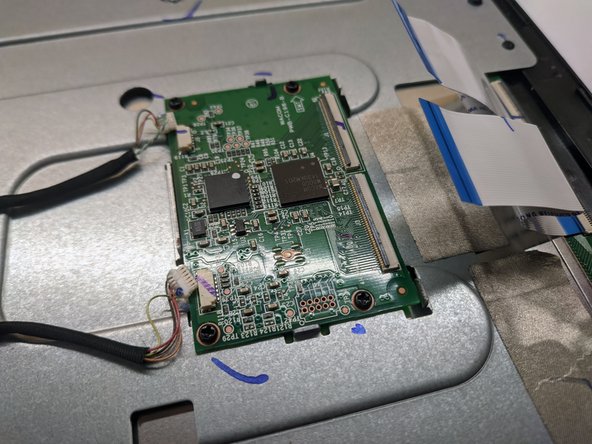
Aller au contenu principal

Wacom DTU-1031X Disassembly

Ce dont vous avez besoin

  1. Wacom DTU-1031X Disassembly, Wacom DTU-1031X Disassembly: étape 1, image 1 de 1
    • Place the tablet with the screen facing down the surface.

    • (Optional) Remove the plastic dummy plug in the pen holder

  2. Wacom DTU-1031X Disassembly: étape 2, image 1 de 2 Wacom DTU-1031X Disassembly: étape 2, image 2 de 2
    • Remove 4 rubber feet

    • Unscrew 4 Phillips #0screws

  3. Wacom DTU-1031X Disassembly: étape 3, image 1 de 2 Wacom DTU-1031X Disassembly: étape 3, image 2 de 2
    • Unclip the bottom casing

    • The clips are very strong and require substantial amount of force to unclip

    • The easiest start point to start prying is around the USB port

    • See the second image to locate the position of the clips

  4. Wacom DTU-1031X Disassembly: étape 4, image 1 de 3 Wacom DTU-1031X Disassembly: étape 4, image 2 de 3 Wacom DTU-1031X Disassembly: étape 4, image 3 de 3
    • To remove the USB daughter board, unscrew 3 Philips #00 screws

    • One of the screws are hiding under the tape

    • Disconnect the cable and remove the board

  5. Wacom DTU-1031X Disassembly: étape 5, image 1 de 3 Wacom DTU-1031X Disassembly: étape 5, image 2 de 3 Wacom DTU-1031X Disassembly: étape 5, image 3 de 3
    • To remove the mainboard, unscrew 4 Phillips #00 screws

    • Removal of the yellow kapton tape will be required

    • Unplug the 40-pin LVDS flex cable

    • The transparent tape holding the 40-pin LVDS cable to the mainboard is a part of the cable, and should not be separated

    • Unplug two cables connecting the digitizer daughter board to mainboard

    • Unplug the USB daughter board cable

  6. Wacom DTU-1031X Disassembly: étape 6, image 1 de 3 Wacom DTU-1031X Disassembly: étape 6, image 2 de 3 Wacom DTU-1031X Disassembly: étape 6, image 3 de 3
    • To remove the digitizer daughter board, unscrew 4 Phillips #00 screws

    • Unclip two flex cables connecting the digitizer to the digitizer board

    • Unclipped connector will have it's black plastic part facing up

    • Disconnect two cables connecting the daugher board with the mainboard

  7. Wacom DTU-1031X Disassembly: étape 7, image 1 de 2 Wacom DTU-1031X Disassembly: étape 7, image 2 de 2
    • Unplug the 40-pin LVDS cable from the LCD display

    • Unscrew 11 Phillips #00 screws holding the metal piece to the front plastic casing

  8. Wacom DTU-1031X Disassembly: étape 8, image 1 de 3 Wacom DTU-1031X Disassembly: étape 8, image 2 de 3 Wacom DTU-1031X Disassembly: étape 8, image 3 de 3
    • Unscrew 9 wide Phillips #00 screws holding the LCD panel to the front plastic casing

    • One of the screws is hiding under the metalic tape

    • The LCD display will now be loose, and can be removed

    • The front glass is glued to the front plastic casing

Conclusion

To reassemble your device, follow these instructions in reverse order.

00004707

Membre depuis le 07/23/20

1 055 Réputation

5 tutoriels rédigés

0 commentaires

Ajouter un commentaire

Nombre de vues :

Dernières 24 heures : 0

7 derniers jours : 0

30 derniers jours : 14

Total : 90