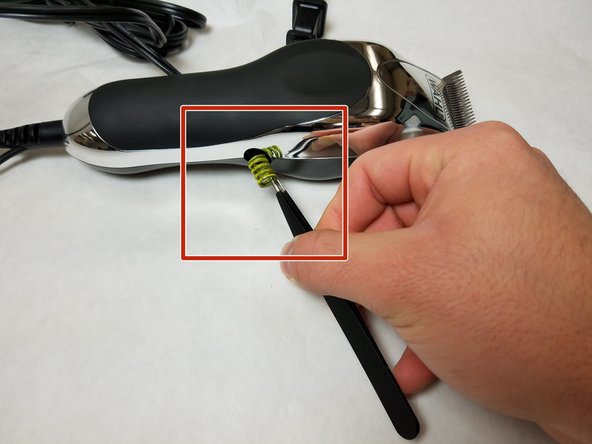
Aller au contenu principal

Wahl Chrome Pro Power Case Guide

Ce dont vous avez besoin

  1. Wahl Chrome Pro Power Case Guide, Case: étape 1, image 1 de 1
    • Remove the two 5.0 mm JIS #1 screws to loosen the cutting blades.

    • Make sure your device is not connected to power before you begin.

  2. Wahl Chrome Pro Power Case Guide: étape 2, image 1 de 1
    • Lift the bottom blade straight up from the device body to remove it.

  3. Wahl Chrome Pro Power Case Guide: étape 3, image 1 de 1
    • Remove the three 9.0 mm JIS #1 screws attaching the base of the blade assembly to the body.

  4. Wahl Chrome Pro Power Case Guide: étape 4, image 1 de 1
    • Lift the base of blade assembly straight up off of the body.

  5. Wahl Chrome Pro Power Case Guide: étape 5, image 1 de 1
    • Remove the two 12.0 mm JIS #1 screws on the back of the device body.

  6. Wahl Chrome Pro Power Case Guide: étape 6, image 1 de 1
    • Remove the 13.0 mm Phillips #2 screw on the side of the device body.

    • This screw is located on the opposite side of the body from the switch.

  7. Wahl Chrome Pro Power Case Guide: étape 7, image 1 de 1
    • Remove the spring on the side of the body using tweezers.

  8. Wahl Chrome Pro Power Case Guide: étape 8, image 1 de 1
    • Pry the body case off of the device using a spudger.

Conclusion

To reassemble your device, follow these instructions in reverse order.

Une autre personne a terminé cette réparation.

Ashley Dale

Membre depuis le 11/09/17

285 Réputation

2 tutoriels rédigés

Équipe

IUPUI, Team S7-G3, Baechle Fall 2017 Membre de l'équipe IUPUI, Team S7-G3, Baechle Fall 2017

IUPUI-BAECHLE-F17S7G3

3 membres

4 tutoriels rédigés

0 commentaires

Ajouter un commentaire

Nombre de vues :

Dernières 24 heures : 1

7 derniers jours : 3

30 derniers jours : 9

Total : 1,012