Aller au contenu principal

Waring Pro SB30 Plastic Leg and Rubber Stoppers Replacement

Ce dont vous avez besoin

  1. Waring Pro SB30 Plastic Leg and Rubber Stoppers Replacement, Back Panel: étape 1, image 1 de 1
    • Remove the screws on the back panel with the #1 Phillips screwdriver bit.

    • The screws in the rubber legs of the burner do not need to be removed.

    • If the back panel has never been opened before, the screws may be more difficult to unscrew.

  2. Waring Pro SB30 Plastic Leg and Rubber Stoppers Replacement: étape 2, image 1 de 2 Waring Pro SB30 Plastic Leg and Rubber Stoppers Replacement: étape 2, image 2 de 2
    • Using a wrench, remove the bolt from the center of the back panel.

  3. Waring Pro SB30 Plastic Leg and Rubber Stoppers Replacement: étape 3, image 1 de 1
    • The back panel can now be easily lifted off.

  4. Waring Pro SB30 Plastic Leg and Rubber Stoppers Replacement, Plastic Leg and Rubber Stoppers: étape 4, image 1 de 2 Waring Pro SB30 Plastic Leg and Rubber Stoppers Replacement, Plastic Leg and Rubber Stoppers: étape 4, image 2 de 2
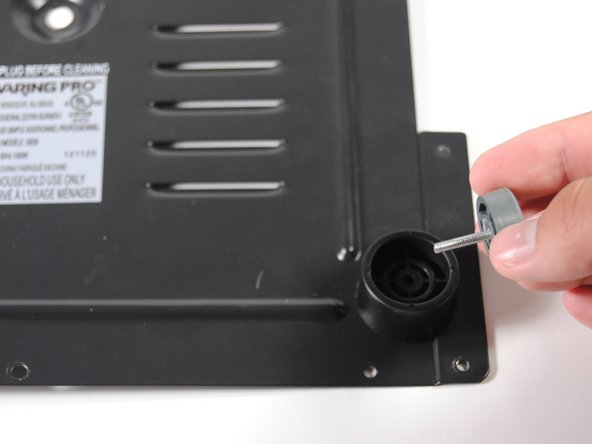
    • While using the wrench to hold the bolt, use the screwdriver to remove the screw.

    • The leg is two separate pieces, the plastic leg and rubber stopper.

    • Careful not to lose the bolts and washers as they are very small.

Conclusion

To reassemble your device, follow these instructions in reverse order.

Sun Fai Lau

Membre depuis le 09/22/14

588 Réputation

5 tutoriels rédigés

Équipe

USF Tampa, Team 10-7, Brown Fall 2014 Membre de l'équipe USF Tampa, Team 10-7, Brown Fall 2014

USFT-BROWN-F14S10G7

3 membres

5 tutoriels rédigés

0 commentaires

Ajouter un commentaire

Nombre de vues :

Dernières 24 heures : 0

7 derniers jours : 1

30 derniers jours : 2

Total : 182