Introduction
This guide provides the steps needed to disassemble the washing machine so that you can open the water drain pump.
Ce dont vous avez besoin
-
-
UNPLUG POWER CORD; TURN OFF WATER SUPPLY.
-
Check machine details on the inside of the main door.
-
-
-
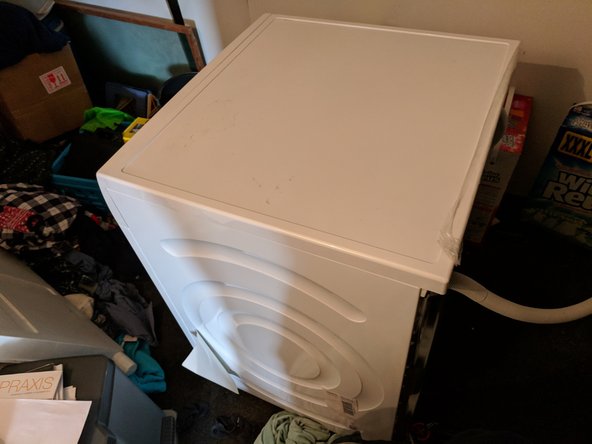
Move washing machine away from wall to make rear and front accessible.
-
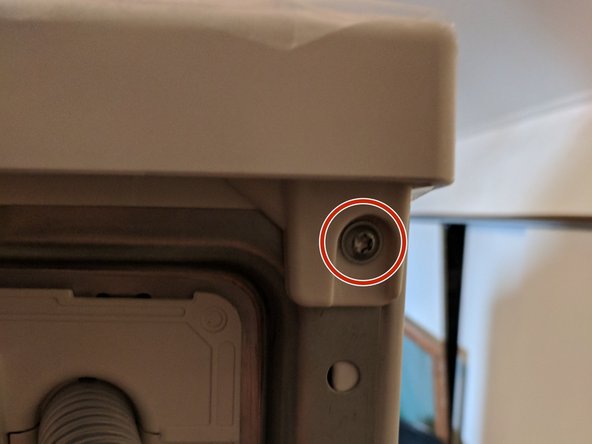
Using Torx T20, unscrew two screws (top left and top right on rear side) .
-
Slide top backwards, lift it off, and put it aside.
If you don’t mind a little bending and if you don’t need to remove the pump, then you can save time by skipping some steps. Skip steps 2 through 7, follow step 8, and in step 9 only remove the bottom two screws of the front panel, but don’t bother about the two hidden screws that hold the front panel at the top. After removing the bottom screws, you can lift the front panel at the bottom forward. This is easier if you tilt the machine backwards. There is then just enough room to undo the drain hose clamp and clean the pump from that side.
-
-
-
Push down blue part in the middle to release the tray, and pull it out completely.
-
Unscrew three T20 screws; the one on the lower right is shorter.
-
-
-
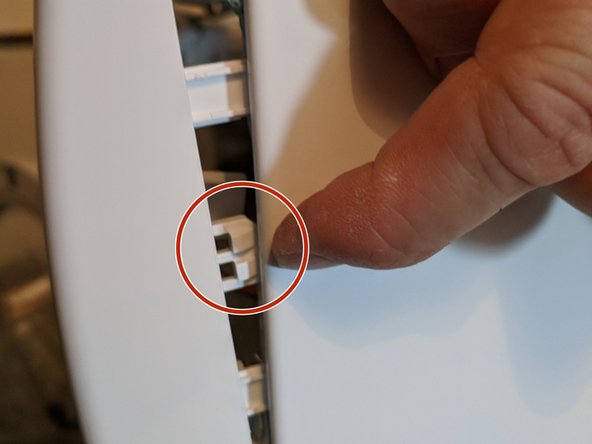
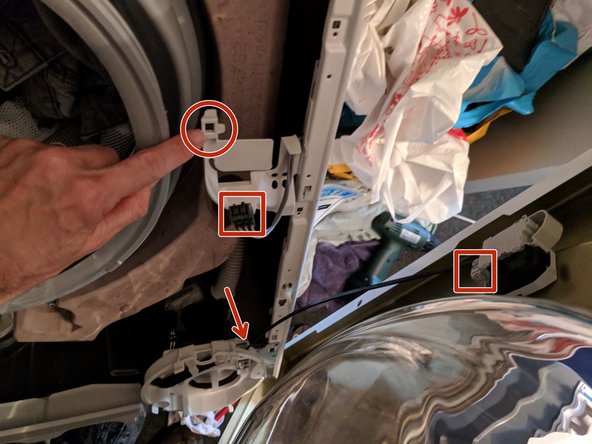
Unhook three hooks at the top (two shown).
-
On the inside, on the right, there is another hook (marked), sitting between two guiding notches without hooks.
-
-
-
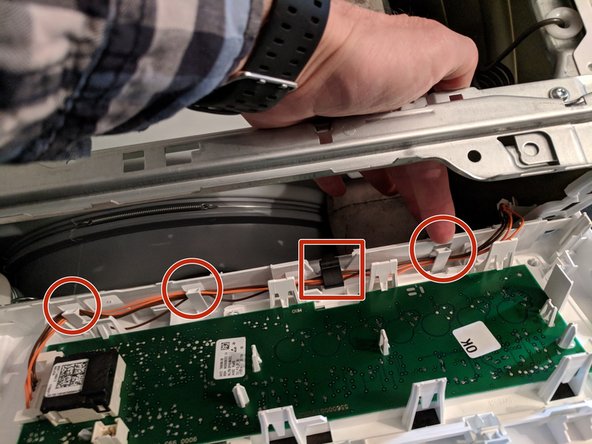
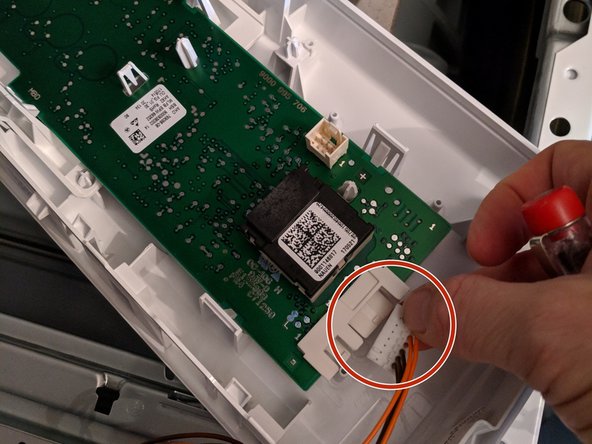
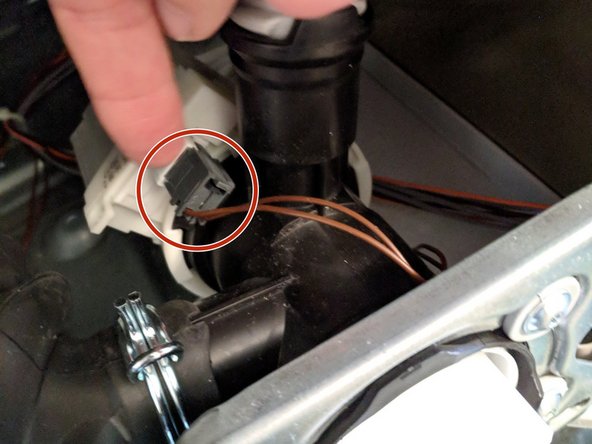
Release the cables by gently pressing the hooked guides. Note that the black part (marked by a rectangle) must be unlocked.
-
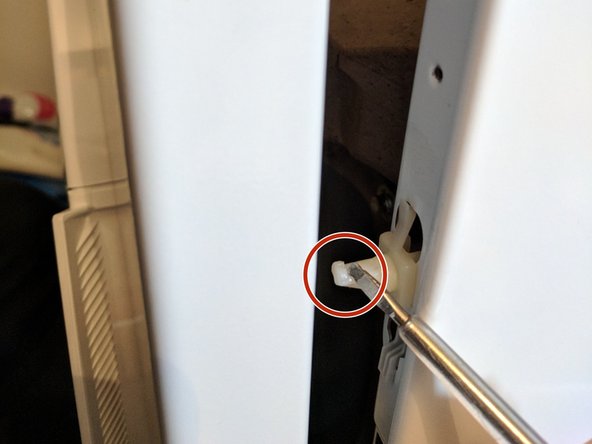
Finally, unlock the connector (e.g. with your nails or a flat-blade screwdriver) and pull it out.
-
Put the control panel aside.
The connector is held in place with a notched tab underneath. Press this tab down before attempting to disconnect the cable.
-
-
-
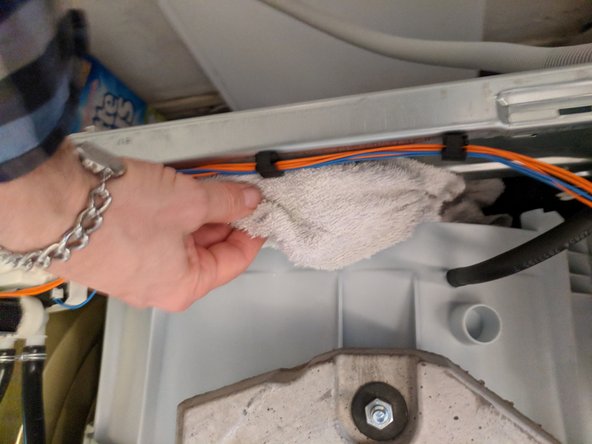
The tumbler unit is freely suspended. Wedge a towel on the rear side behind the tumbler unit to immobilize it. This will prevent damage when tilting the washing machine later on.
-
DO NOT FORGET TO REMOVE THIS when reassembling!
-
-
-
-
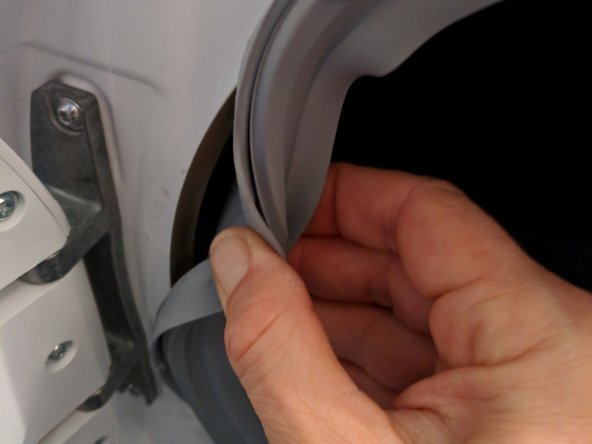
The rubber door seal is attached to the front cover by a metal wire and a spring.
-
Pry out the spring and pull away the wire.
-
Unpeel the seal all the way round, and tuck it inside.
Excellent guide, very helpful, Thank you.
I’m just going to add that re-ritting the inner retaining ring can be a little tricky as the spring is very strong. I finally did it by first setting the wire ring in place at the bottom, the left and the right; the ring was then short at the top; so, still pressing my thumb against the spring on the left (to stop it popping out of place) I used a screwdriver to lever the wire into place at the top right; then I slid the screwdriver around the seal, towards my thumb holding the spring on the left (this forced the wire ring into place without allowing it to pop out elsewhere).
-
-
-
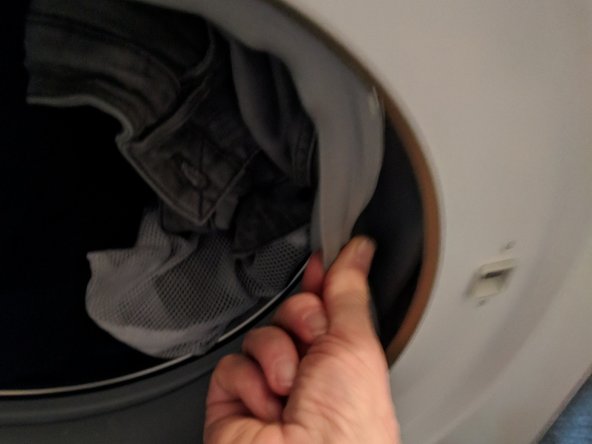
The round door (front bottom right) for the drain tube and filter can be removed, by opening it completely, and gently pulling out the left side of the hinge.
-
DRAIN ANY REMAINING WATER.
-
Unscrew two T20 screws.
-
-
-
Unscrew two (T20) screws at the top.
-
Tilt the whole washing machine towards its rear side to expose the front bottom. Lean it against a wall.
-
Unscrew two (6mm hex-head) screws on the bottom.
-
-
-
The front cover is held in place by plastic hooked pins. Slightly lift the front cover to unhook it.
-
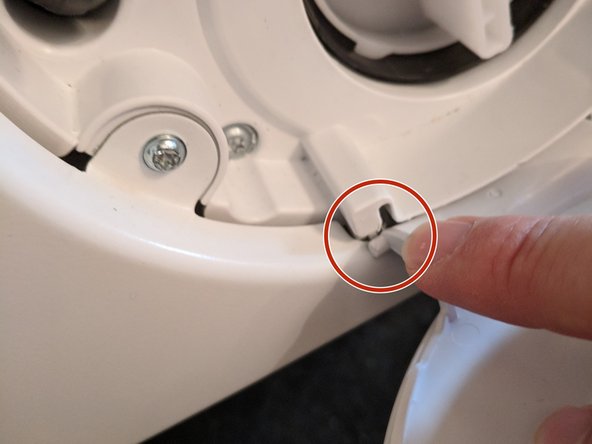
On the inside, unclip something, and pull out a connector (for the door lock). The plastic emergency door release comes out easily. The image shows this when clip and connector are already disconnected.
-
DO NOT FORGET TO PUT ALL THIS BACK on reassembly!
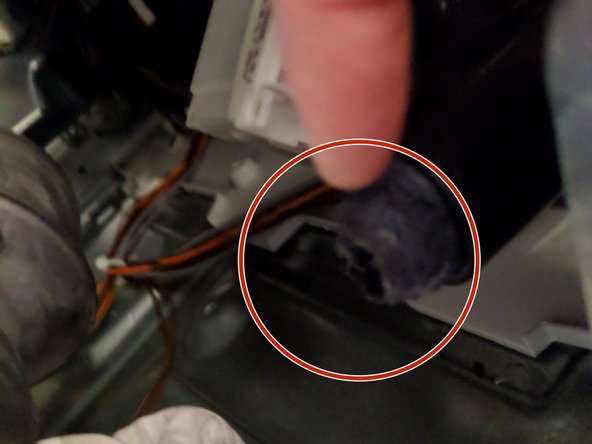
REMINDER: Restore THREE things! Emergency release cable, door lock connector, and some unidentified attachment (the finger points there).
You can most easily access that unidenfied attachment through the door opening, by pushing back the rubber seal on that side. The connector however is hidden behind a plastic plate, and needs to be accessed from the outside at the right. Maybe undoing the attachment allows you to bend back that cover enough to access the connector through the door opening. (I didn’t try that yet).
-
-
-
Remove the plastic strip that protects the bottom edge.
-
Unhook on the back, and tilt it forwards.
-
Note the guiding notches to help you put it back.
-
-
-
Unscrew one (T20) screw.
-
Tilt the plate back, and lift it. There is a hooked tab, and a guiding pin to help you reassemble the plate.
-
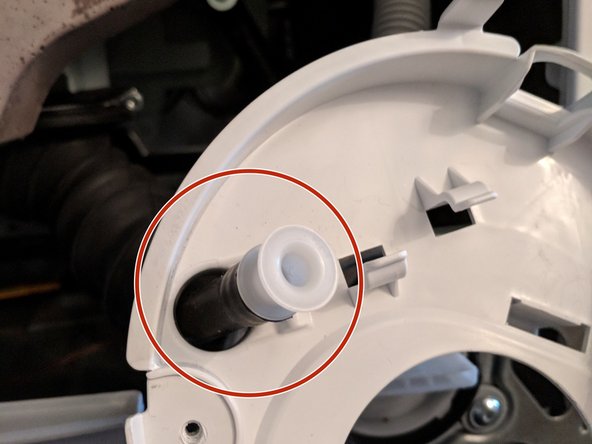
Pull out the drain tube.
-
Put the cover plate aside.
-
-
-
Pull the power connector from the pump.
-
Using pliers, loosen the clamp on the hose from the tumbler and slide it back.
-
Remove the hose.
-
BE PREPARED FOR SOME WATER (use a towel or bowl).
Diconnecting the pump cable is only necessary when you want to take the pump out in its entirety.
-
-
-
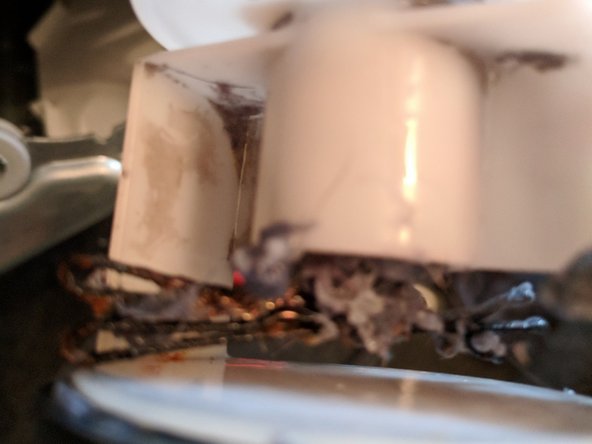
In my case, the pump inlet (where we just removed the hose coming from the tumbler) was clogged with debris and some cloth.
-
This prevented draining, and even prevented removal of the filter. Thus, requiring disassembly. But we are not done yet.
-
-
-
Unscrew four T2 screws.
-
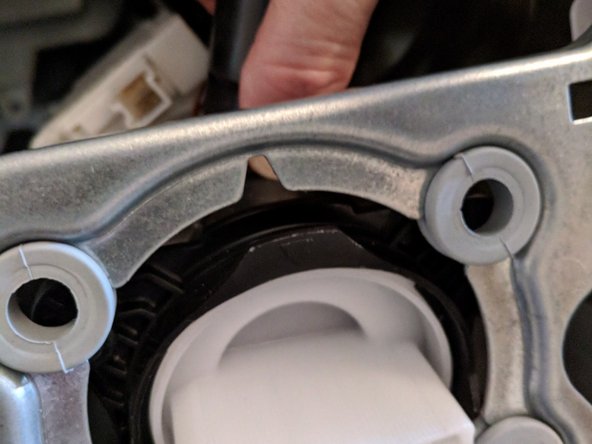
Tilt the filter/pump unit (note the tab at the top), and pull it out from the back.
Only do this if you need to take out the pump (because otherwise you cannot clean it, or if you want to replace it).
-
-
-
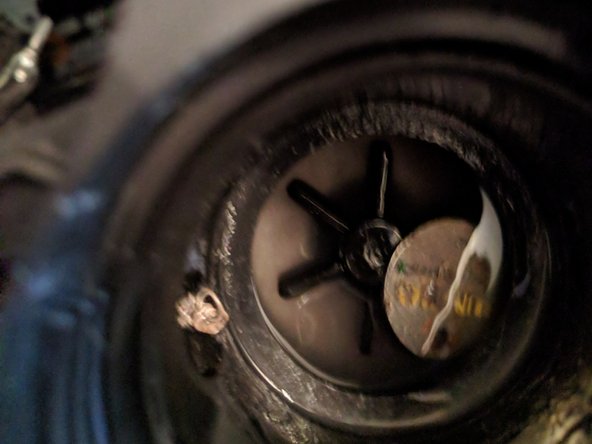
At his point you can clean the water inlet, the filter, and the pump. The propellor should move freely. The pump itself can also be removed to replace it (but I did not do that).
-
In my case, a significant amount of cloth got stuck in the water inlet, including a necklace. In the filter, there were some hairpins, and inside the pump itself, a coin and a pendent. LESSON: CLEAN THE FILTER MORE OFTEN, while you can stil remove it without disassembling the machine.
Had to do it for a second time. Again, a piece of cloth got sucked in enough to block the filter, preventing unscrewing.
What is meant with ‘the propellor should move freely’? Is it if you spin it that it keeps spinning? If I move the propellor it moves a quarter at the time and stops before I push it further
great instruction btw
It means that you should feel no significant resistance when rotating the propellor manually. If you push the blades to make them rotate, then they should continue moving by themselves, at least for a little bit. (I am not sure if this depends on the specific brand of the pump.)
-


To reassemble your device, follow these instructions in reverse order.
To reassemble your device, follow these instructions in reverse order.
Annulation : je n'ai pas terminé ce tutoriel.
8 autres ont terminé cette réparation.
4 commentaires
Perfect! It helped me to disassemble this same model to find out that our pump was jammed with a thin thread. Had to replace the pump, but that was the easy part once the machine was disassembled!
Awesome guide, many thanks Tom. Took just over an hour to have it back up and running (cleaned our pump with underwire and a cotton ball). Hardest part was that clip on the right of the sensor panel. and getting the rubber seal back on. Many thanks again!
Fantastic. Amazing resource. Saved me so much time, money, hassle.
Found my fault, a simple disconnected pipe and re connected it.
Thanks Tom, what an excellent guide, really appreciate the effort you've made in creating it.
All done in under an hour, I didn't break anything and didn't end up with any screws left at the end for a change.
The hoop and spring that holds the rubber around the door was the only bit that I struggled with as it's a very, very strong spring.