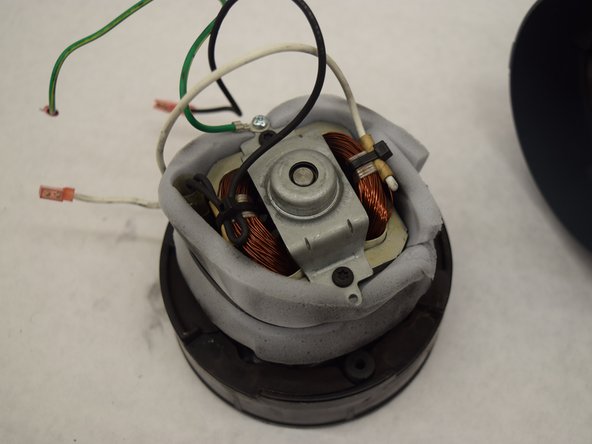
Aller au contenu principal

World Dryer Airforce J4-973A3 Motor Replacement

Ce dont vous avez besoin

  1. World Dryer Airforce J4-973A3 Motor Replacement, Motor: étape 1, image 1 de 3 World Dryer Airforce J4-973A3 Motor Replacement, Motor: étape 1, image 2 de 3 World Dryer Airforce J4-973A3 Motor Replacement, Motor: étape 1, image 3 de 3
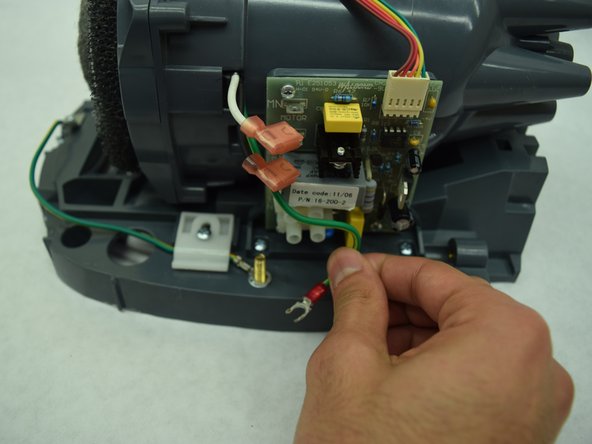
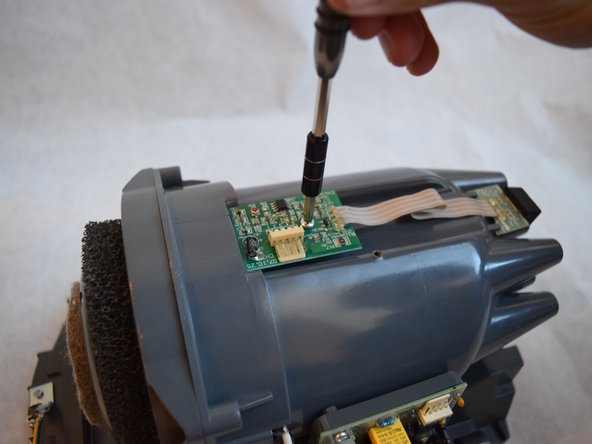
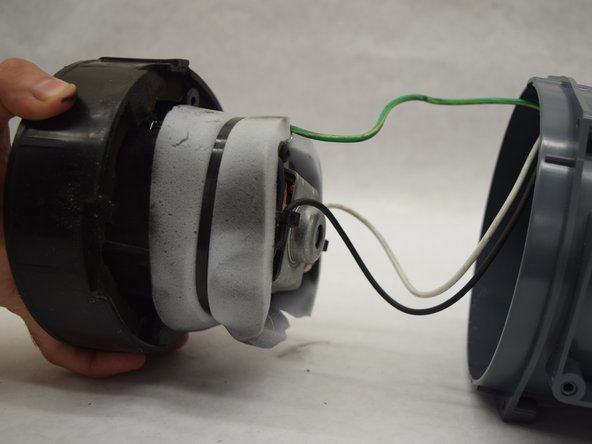
    • To change the motor, start by removing the metal casing.

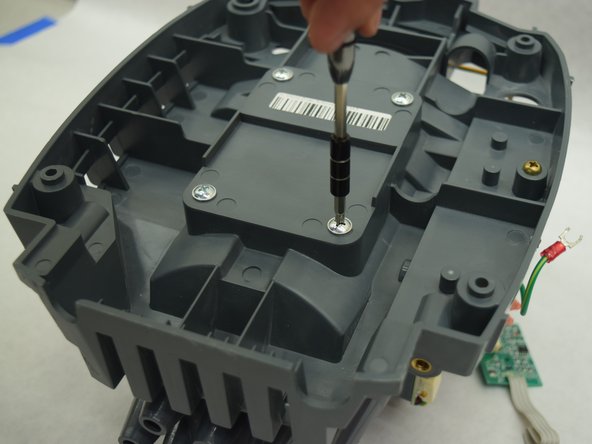
    • Using the special bit, remove the large screws at the bottom of the casing.

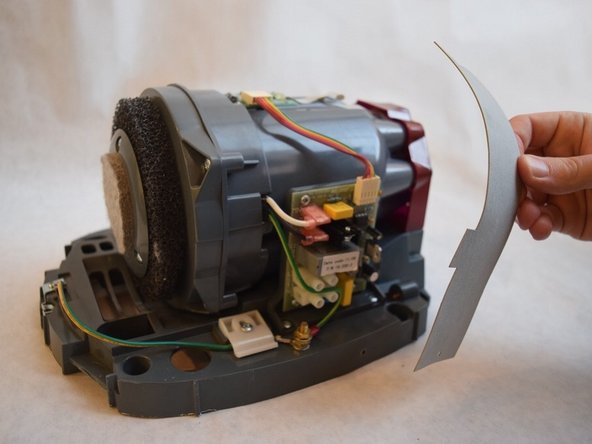
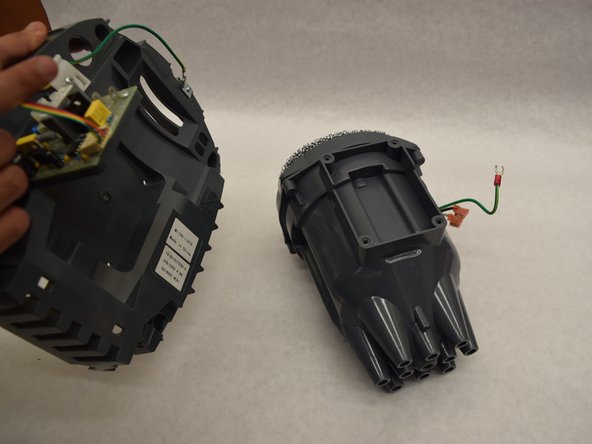
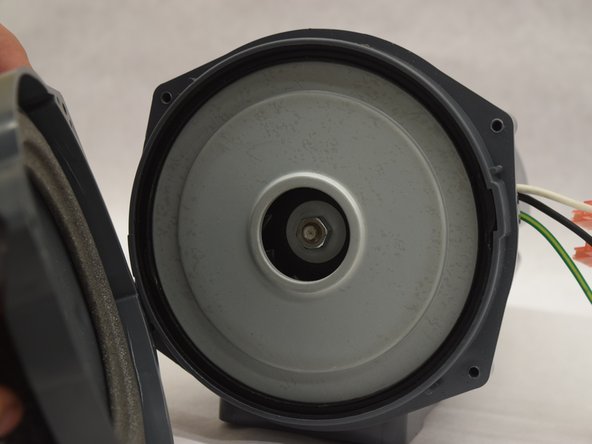
    • To remove the case, lift the indicated spot with your hands.

    • The direction for turning the screws is different than what was indicated on the small sticker above the hole.

  2. World Dryer Airforce J4-973A3 Motor Replacement: étape 2, image 1 de 3 World Dryer Airforce J4-973A3 Motor Replacement: étape 2, image 2 de 3 World Dryer Airforce J4-973A3 Motor Replacement: étape 2, image 3 de 3
    • Remove the three 1/2" Ph1 screws at the bottom of the red fan cap.

    • Turn over the device.

    • Push the red tabs on the back of the unit with medium to heavy pressure, using a small prier.

    • Carefully remove the cap, to prevent damage to the sensor.

  3. World Dryer Airforce J4-973A3 Motor Replacement: étape 3, image 1 de 2 World Dryer Airforce J4-973A3 Motor Replacement: étape 3, image 2 de 2
    • Remove both 3/8" Ph2 screws attached to the grey belt at the top and bottom.

    • Lift the grey belt away. This gives access to the server board.

  4. World Dryer Airforce J4-973A3 Motor Replacement: étape 4, image 1 de 1
    • Use a plastic opening tool to remove the two pink capped wires in the upper left corner of the server board.

  5. World Dryer Airforce J4-973A3 Motor Replacement: étape 5, image 1 de 3 World Dryer Airforce J4-973A3 Motor Replacement: étape 5, image 2 de 3 World Dryer Airforce J4-973A3 Motor Replacement: étape 5, image 3 de 3
    • Remove the brass nut from its bolt using a 10mm wrench.

    • Once the nut is free, disconnect the green wire.

  6. World Dryer Airforce J4-973A3 Motor Replacement: étape 6, image 1 de 3 World Dryer Airforce J4-973A3 Motor Replacement: étape 6, image 2 de 3 World Dryer Airforce J4-973A3 Motor Replacement: étape 6, image 3 de 3
    • Remove the rainbow ribbon cable using a plastic opening tool.

    • Remove the 1/2" Ph1 screw from the center of the circuit board.

  7. World Dryer Airforce J4-973A3 Motor Replacement: étape 7, image 1 de 3 World Dryer Airforce J4-973A3 Motor Replacement: étape 7, image 2 de 3 World Dryer Airforce J4-973A3 Motor Replacement: étape 7, image 3 de 3
    • Remove the four 3/4" Ph2 screws from the back of the device body.

    • Separate the motor housing from the device body.

    • Ensure that all wires connecting the motor housing and motherboard are disconnected before removing the component.

  8. World Dryer Airforce J4-973A3 Motor Replacement: étape 8, image 1 de 3 World Dryer Airforce J4-973A3 Motor Replacement: étape 8, image 2 de 3 World Dryer Airforce J4-973A3 Motor Replacement: étape 8, image 3 de 3
    • Remove the four 1/2" Ph2 screws from the filter.

    • Pull the filter plate away to reveal the motor.

  9. World Dryer Airforce J4-973A3 Motor Replacement: étape 9, image 1 de 3 World Dryer Airforce J4-973A3 Motor Replacement: étape 9, image 2 de 3 World Dryer Airforce J4-973A3 Motor Replacement: étape 9, image 3 de 3
    • Pull the motor out of the housing.

    • Be sure to feed the wires through the slot as you pull the motor out.

Conclusion

To reassemble your device, follow these instructions in reverse order.

Eli Forbes

Membre depuis le 09/17/18

172 Réputation

1 tutoriel rédigé

Équipe

Washington State, Team S1-G6, Hope Fall 2018 Membre de l'équipe Washington State, Team S1-G6, Hope Fall 2018

WSU-HOPE-F18S1G6

4 membres

4 tutoriels rédigés

0 commentaires

Ajouter un commentaire

Nombre de vues :

Dernières 24 heures : 0

7 derniers jours : 2

30 derniers jours : 5

Total : 267