
Xiaomi Mi 2 Screen Replacement Replacement

koppie007 et
Dernière mise à jour le 7 mai 2024
Vues: 3,6 k
Afficher les statistiques :
- Dernières 24 heures :
- 3
- Sept derniers jours :
- 29
- Trente derniers jours :
- 94
- Total :
- 3 646
Commentaires: 4
4 commentaires de tutoriel.
Aller aux commentaires de tutorielTerminé: 6 7
6 personnes ont marqué ce tutoriel comme « terminé ». Serez-vous la prochaine ?
7 personnes ont marqué ce tutoriel comme « terminé ». Dont vous — super travail !
Favoris: 0 1
Personne n'a mis ce tutoriel en favori (ni ne s'y est abonné). Serez-vous le premier ?
1 personne a mis ce tutoriel en favori (et s'y est abonnée) – et c'est vous !
Tutoriel réalisé par la communauté
Un membre tout à fait remarquable de notre communauté a réalisé ce tutoriel. Il n'a pas été créé par l'équipe iFixit.
Introduction
Allez à l'étape 1 ↓Hi all,
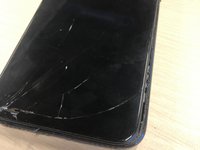
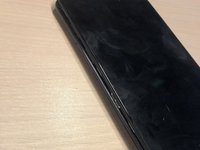
Follow this guide to replace your screen for the Xiaomi Mi A2.
Note: It’s possible that you’ll need to transfer the backplate from the screen to the new screen. For some screens you need to transfer the bracket, backplate and small parts too. This guide only shows how to replace the full screen with all the small parts on it.
New adhesive is required to attach the bracket/earpiece/earpiece dust filter again if needed.
Ce dont vous avez besoin
Outils


-
-
-
Remove the 2 Pentalobe screws.
-
Remove the sim card(s) from the phone.
 Demander à FixBot
-
-
-
Insert the opening pick in the middle of the phone.
-
The 2nd image shows you where to put the opening pick in. You'll see that the screen will get loosen. There is lightly adhesive holding the screen.
-
Now take another opening pick and slide it around the whole screen.
-
-
-
-
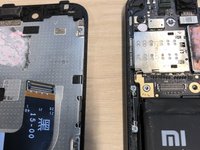
The screen is now loose from the phone.
-
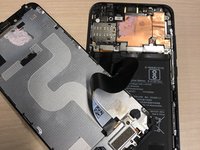
Just flip the screen carefully. The cable is short so please be careful! The ribbon cable can break easily. You could also hold the screen with your hand to be sure.
-
-
Outil utilisé dans cette étape :Tweezers$4.99
-
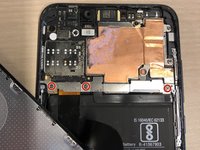
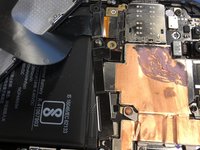
Remove the 3 PH00 screws from the battery holder plate.
-
Now remove the battery holder plate with your tweezers carefully.
-
-
-
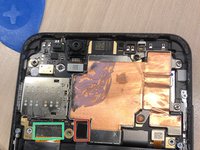
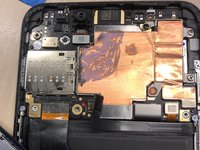
Now you will see multiple cables attached to the motherboard.
-
Remove the battery ribbon cable first. This will prevent the phone from turning on accidentally by pressing the button. Please remove it straight out of it's socket with your finger nail or spudger (circled red).
-
Now remove the LCD ribbon cable straight out of it's socket with your finger nail or spudger (circled green).
-
-







To reassemble your device, follow these instructions in reverse order.
Don’t forget: It’s possible that you need to transfer the backplate and/or bracket and/or small parts! How to transfer those items are NOT included in this guide.
Note: New adhesive is required to attach the bracket/earpiece/earpiece dust filter again if needed.
Annulation : je n'ai pas terminé ce tutoriel.
6 autres ont terminé cette réparation.

4 commentaires de tutoriel
Hi!
Depends on how your new screen came in. Some of them do not have the frame where it fits in, so you need to transfer the frame from the old one.
It’s glued, so you need to heat it to detach the screen from the frame and need to glue it to the new screen. Then follow the guide in reverse order to reassemble it.
Note: The silver plate is attached to the frame, be carefull for it and also for the small parts on it.
