Aller au contenu principal

Xiaomi Redmi Note Motherboard Replacement

Ce dont vous avez besoin

  1. Xiaomi Redmi Note Motherboard Replacement, Battery: étape 1, image 1 de 1
    • Make sure the Xiaomi Redmi Note is powered off before removing the battery.

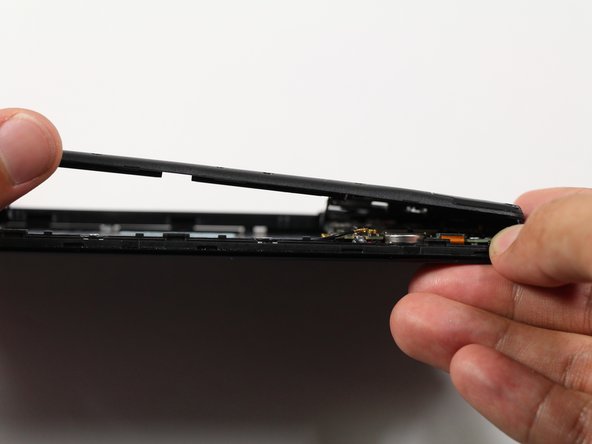
    • Insert the plastic opening tool between the charging port and the rear case.

    • Pry the end of the rear case up from the charging port.

  2. Xiaomi Redmi Note Motherboard Replacement: étape 2, image 1 de 2 Xiaomi Redmi Note Motherboard Replacement: étape 2, image 2 de 2
    • Run the plastic opening tool along the seam on the side of the phone to remove the rear casing.

  3. Xiaomi Redmi Note Motherboard Replacement: étape 3, image 1 de 2 Xiaomi Redmi Note Motherboard Replacement: étape 3, image 2 de 2
    • Locate the indentation at the bottom of the battery.

    • Place a finger in the indentation and lift up to remove the battery.

  4. Xiaomi Redmi Note Motherboard Replacement, Midframe: étape 4, image 1 de 2 Xiaomi Redmi Note Motherboard Replacement, Midframe: étape 4, image 2 de 2
    • Remove twelve 3.5mm Phillips #00 screws from the midframe.

  5. Xiaomi Redmi Note Motherboard Replacement: étape 5, image 1 de 2 Xiaomi Redmi Note Motherboard Replacement: étape 5, image 2 de 2
    • Insert a plastic opening into the seam between the midframe and the bottom frame of the phone.

    • Run the plastic opening tool along the seam.

    • Pry up the midframe with the plastic opening tool.

    • Once the midframe has been sufficiently lifted with the tool, place a hand underneath the edge to lift the entire component out of the frame.

    • There will be snapping sounds as the clips on the midframe disconnect from the phone.

  6. Xiaomi Redmi Note Motherboard Replacement, Front-Facing Camera: étape 6, image 1 de 3 Xiaomi Redmi Note Motherboard Replacement, Front-Facing Camera: étape 6, image 2 de 3 Xiaomi Redmi Note Motherboard Replacement, Front-Facing Camera: étape 6, image 3 de 3
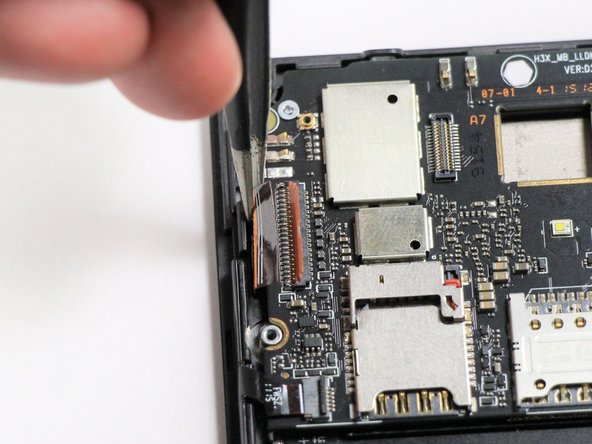
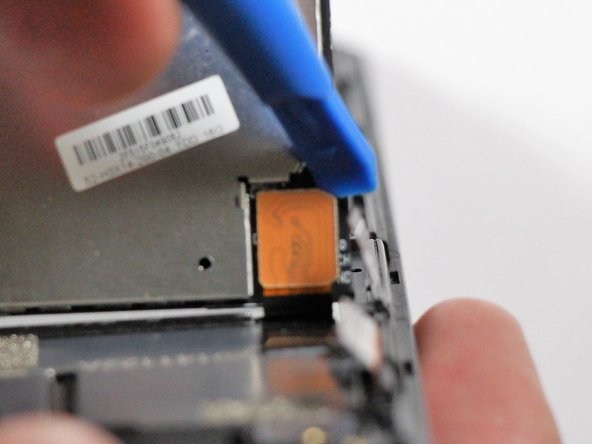
    • Use tweezers to lift the retaining flap of the zero insertion force (ZIF) connector to the upright position.

    • Use tweezers to pull the ribbon cable out of the ZIF connector.

    • Remove the front-facing camera from the motherboard.

  7. Xiaomi Redmi Note Motherboard Replacement, Rear Camera: étape 7, image 1 de 2 Xiaomi Redmi Note Motherboard Replacement, Rear Camera: étape 7, image 2 de 2
    • Disconnect the rear-facing camera from the motherboard by pulling out the press-fit connector to its left.

  8. Xiaomi Redmi Note Motherboard Replacement, Motherboard: étape 8, image 1 de 1
    • Locate the three ZIF connectors on the motherboard.

  9. Xiaomi Redmi Note Motherboard Replacement: étape 9, image 1 de 3 Xiaomi Redmi Note Motherboard Replacement: étape 9, image 2 de 3 Xiaomi Redmi Note Motherboard Replacement: étape 9, image 3 de 3
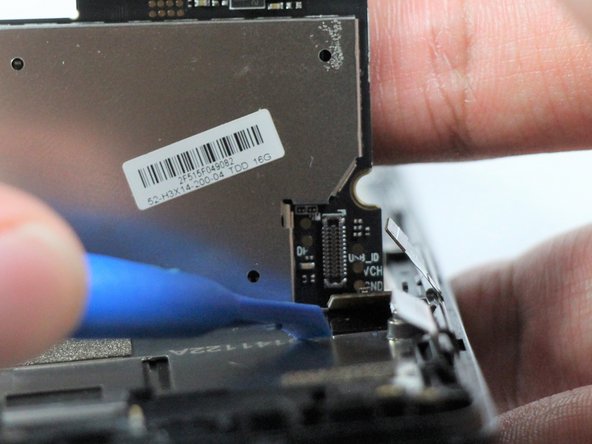
    • Use tweezers to lift the retaining flap on the ZIF connector to the upright position.

    • Pull the ribbon cable out of the connector by pulling to the left.

    • Repeat these steps for the other two ZIF connectors.

  10. Xiaomi Redmi Note Motherboard Replacement: étape 10, image 1 de 3 Xiaomi Redmi Note Motherboard Replacement: étape 10, image 2 de 3 Xiaomi Redmi Note Motherboard Replacement: étape 10, image 3 de 3
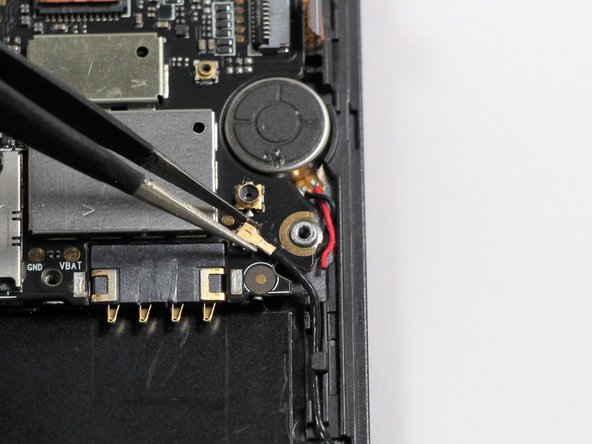
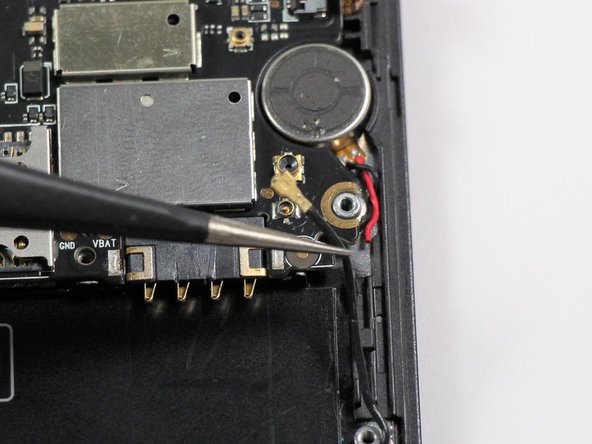
    • Locate the antenna cable on the bottom right of the motherboard and use tweezers to lift the cable off of the motherboard.

  11. Xiaomi Redmi Note Motherboard Replacement: étape 11, image 1 de 2 Xiaomi Redmi Note Motherboard Replacement: étape 11, image 2 de 2
    • Remove the two 2.9mm Philips #00 screws.

  12. Xiaomi Redmi Note Motherboard Replacement: étape 12, image 1 de 3 Xiaomi Redmi Note Motherboard Replacement: étape 12, image 2 de 3 Xiaomi Redmi Note Motherboard Replacement: étape 12, image 3 de 3
    • Flip over the motherboard to reveal the back.

    • Use a plastic opening tool to pry off the snap fit connector, located on the bottom right off of the motherboard.

  13. Xiaomi Redmi Note Motherboard Replacement: étape 13, image 1 de 2 Xiaomi Redmi Note Motherboard Replacement: étape 13, image 2 de 2
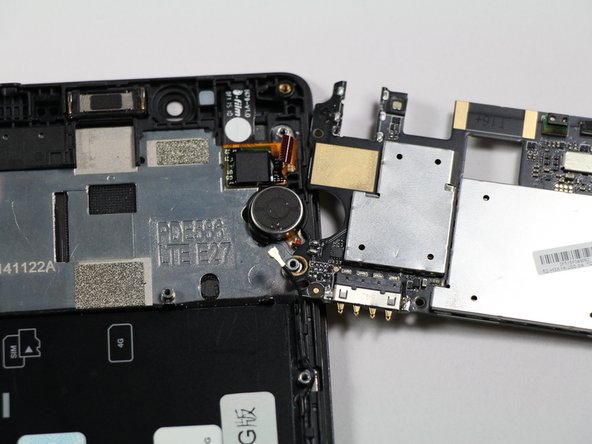
    • Lift up the motherboard and turn it over to place it by the side of the phone.

    • Do not attempt to remove the motherboard at this stage. Pulling on the board can damage its connection to the vibrating motor.

  14. Xiaomi Redmi Note Motherboard Replacement: étape 14, image 1 de 3 Xiaomi Redmi Note Motherboard Replacement: étape 14, image 2 de 3 Xiaomi Redmi Note Motherboard Replacement: étape 14, image 3 de 3
    • Use tweezers to peel the vibrating motor off the frame of the phone.

    • The vibrating motor is glued to the frame, so do not be afraid to use force to dislodge it.

    Can we buy spare motherboard online, what's the price

    sai teja - Réponse

Conclusion

To reassemble your device, follow these instructions in reverse order.

15 autres ont terminé cette réparation.

AJ Beers

Membre depuis le 04/26/17

213 Réputation

2 tutoriels rédigés

Équipe

Cal Poly, Team S22-G4, Livingston Spring 2017 Membre de l'équipe Cal Poly, Team S22-G4, Livingston Spring 2017

CPSU-LIVINGSTON-S17S22G4

4 membres

16 tutoriels rédigés

5 commentaires

Good explanation, but the question is : Where to get Xiaomi replacement motherboards ?

Adriano Fonseca - Réponse

can we shift bords memory to other bord

krishna - Réponse

No we can't get motherboard's memory if it is damaged

sai teja -

Besten Dank an alle für Die Mühe, die sie sich jeweils geben um verständliche Anleitungen zu erstellen,

Oigres Ailgevar - Réponse

Ajouter un commentaire

Nombre de vues :

Dernières 24 heures : 2

7 derniers jours : 11

30 derniers jours : 73

Total : 24,585