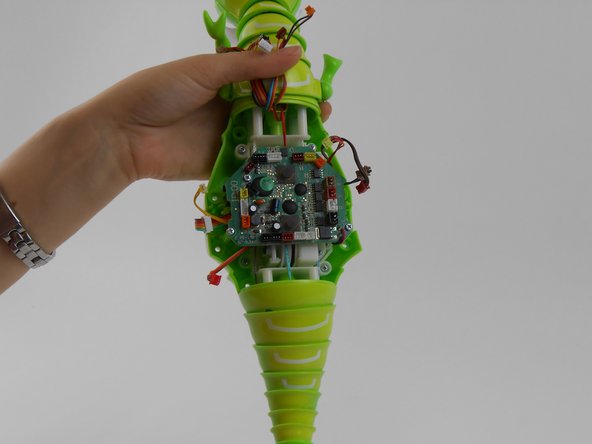
Aller au contenu principal

Zoomer Dino Boomer Main Circuit Board Replacement

Ce dont vous avez besoin

  1. Zoomer Dino Boomer Main Circuit Board Replacement, Back Cover: étape 1, image 1 de 1
    • Power off Zoomer Dino Boomer before disassembly.

    • Remove the eight 9.3mm Phillips #1 screws.

  2. Zoomer Dino Boomer Main Circuit Board Replacement: étape 2, image 1 de 2 Zoomer Dino Boomer Main Circuit Board Replacement: étape 2, image 2 de 2
    • Turn dinosaur over and hold upright.

    • Use the spudger to pry apart the back cover from the remainder of the Zoomer Dino Boomer.

    • Be gentle while removing the back cover. The back cover of the Zoomer Dino Boomer is still connected to the electronic system by a wire.

  3. Zoomer Dino Boomer Main Circuit Board Replacement: étape 3, image 1 de 3 Zoomer Dino Boomer Main Circuit Board Replacement: étape 3, image 2 de 3 Zoomer Dino Boomer Main Circuit Board Replacement: étape 3, image 3 de 3
    • Disconnect the wire that connects the back cover of the dino to the main circuit board by carefully pulling on the orange wire connector with tweezers.

    • Remove back cover.

    • If you are having difficulty removing the connector from its socket, push in the small tabs on the side of the connector with the tweezers. This step may take some work.

    • Do not damage the wires or circuit board.

  4. Zoomer Dino Boomer Main Circuit Board Replacement, Main Circuit Board: étape 4, image 1 de 3 Zoomer Dino Boomer Main Circuit Board Replacement, Main Circuit Board: étape 4, image 2 de 3 Zoomer Dino Boomer Main Circuit Board Replacement, Main Circuit Board: étape 4, image 3 de 3
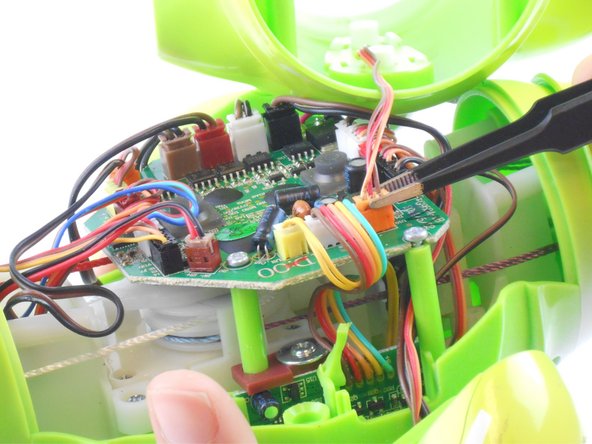
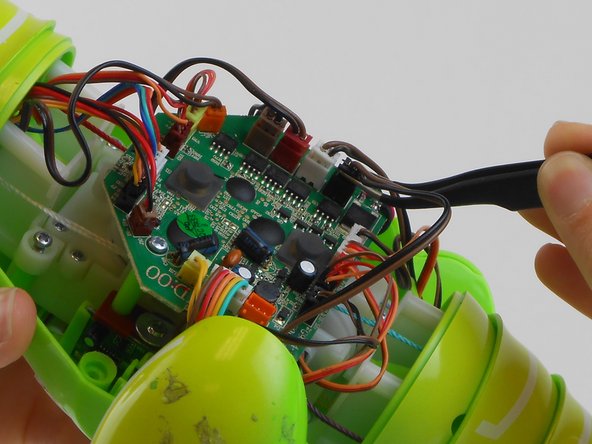
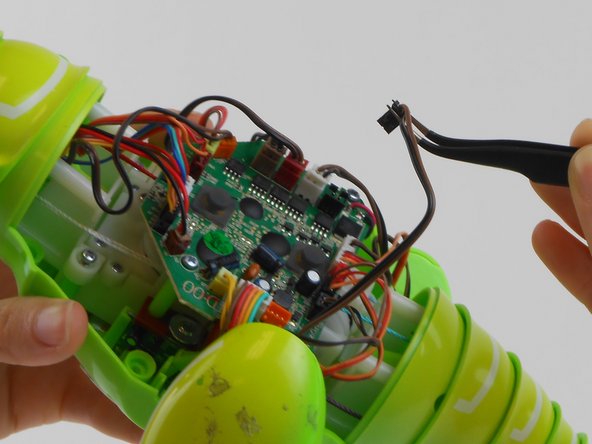
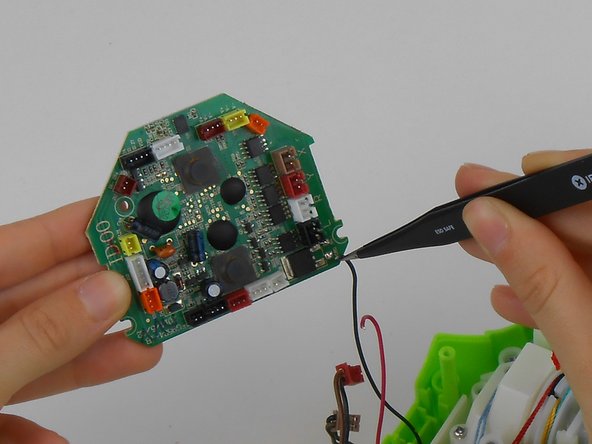
    • Use tweezers to remove all of the colored wire connectors from their sockets on the circuit board.

  5. Zoomer Dino Boomer Main Circuit Board Replacement: étape 5, image 1 de 2 Zoomer Dino Boomer Main Circuit Board Replacement: étape 5, image 2 de 2
    • Remove legs.

  6. Zoomer Dino Boomer Main Circuit Board Replacement: étape 6, image 1 de 1
    • Remove the three 7.2 mm Phillips #0 screws connecting the main circuit board to the body of Zoomer Dino Boomer.

  7. Zoomer Dino Boomer Main Circuit Board Replacement: étape 7, image 1 de 3 Zoomer Dino Boomer Main Circuit Board Replacement: étape 7, image 2 de 3 Zoomer Dino Boomer Main Circuit Board Replacement: étape 7, image 3 de 3
    • Use soldering iron and tweezers to disconnect main circuit board from the black and red wires.

    • Check out iFixit's soldering techniques guide to learn more about soldering and desoldering connections.

    • Remove main circuit board from Zoomer Dino Boomer

Conclusion

To reassemble your device, follow these instructions in reverse order.

5 autres ont terminé cette réparation.

Desiree DesJardins

Membre depuis le 09/02/15

452 Réputation

2 tutoriels rédigés

Équipe

USF Tampa, Team 16-1, Wollert Fall 2015 Membre de l'équipe USF Tampa, Team 16-1, Wollert Fall 2015

USFT-WOLLERT-F15S16G1

3 membres

10 tutoriels rédigés

3 commentaires

can anyone tell me where to get a replacement motherboard?

alan.scott - Réponse

Nah cuz my dino doesn't show any life support at all just the controller and Idek what's the issue. If this is the way to solve it be so for real tell me where to get that new circuit.

Nightmare_Requiem - Réponse

The batteries location?

Tony Beatenbo - Réponse

Ajouter un commentaire

Nombre de vues :

Dernières 24 heures : 0

7 derniers jours : 2

30 derniers jours : 15

Total : 4,419