Cette version peut contenir des modifications incorrectes. Passez au dernier aperçu vérifié.
Ce dont vous avez besoin
-
-
Il est à noter que ces fiches sont écrites sur la base d'un modèle plus récent (2005, 1,42 GHz, DDR). Ils différeront légèrement des anciens modèles d'eMac qui utilisent la RAM PC-133.
-
Posez l'écran de l'eMac sur une surface plane.
-
Dévissez la visse cruciforme de la trappe de la RAM, et mettez la de coté.
-
La vis est attaché à la trappe donc, vous ne pouvez pas la perdre !
-
-
Cette étape n’est pas traduite. Aidez à la traduire
-
You can read more about CRT safety procedures here. If you aren't experienced with working on devices featuring a CRT, it's recommended that you don't proceed any further.
-
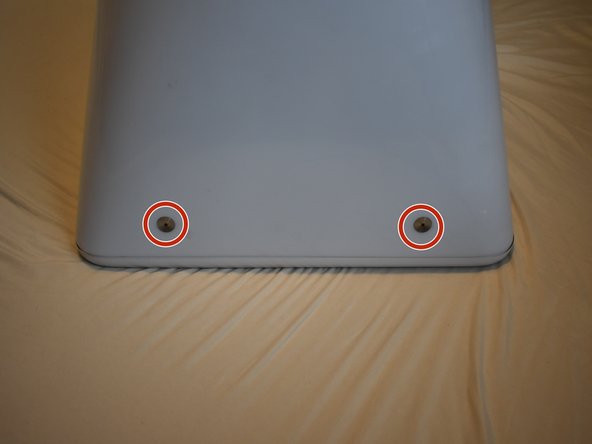
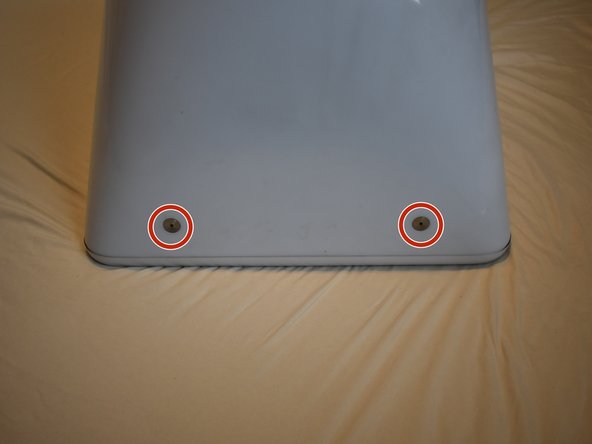
On the bottom side of the eMac, remove the following screws:
-
A single 2.5mm hex screw
-
Two #2 phillips screws
-
-
Cette étape n’est pas traduite. Aidez à la traduire
-
Remove two 2.5mm hex screws from each of the other sides of the computer.
-
-
Cette étape n’est pas traduite. Aidez à la traduire
-
Now, the shell can almost be separated from the computer.
-
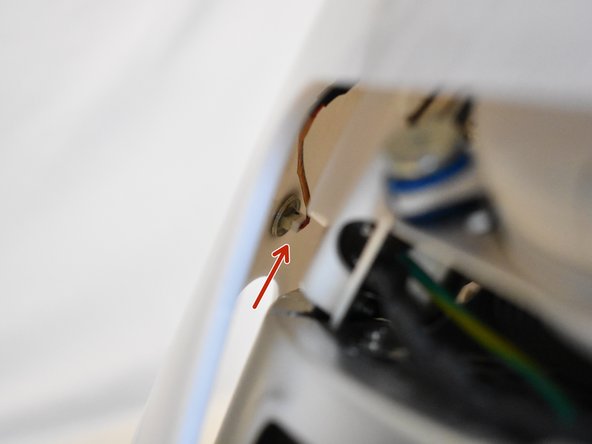
Lift the housing enough to allow you to fit your hand through the access door, and disconnect the cable at the power button.
-
-
-
Cette étape n’est pas traduite. Aidez à la traduire
-
Now the entire shell can be removed from the computer.
-
-
Cette étape n’est pas traduite. Aidez à la traduire
-
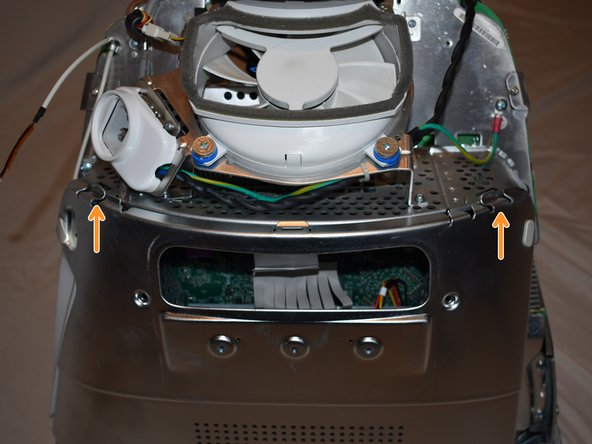
The motherboard access panel is held on by 4 phillips #2 screws.
-
Remove the screws, then use your fingers to pull on the top tabs to separate the panel from the computer frame.
-
-
Cette étape n’est pas traduite. Aidez à la traduire
-
To remove the fan assembly, several cables must be disconnected first:
-
3-pin fan cable
-
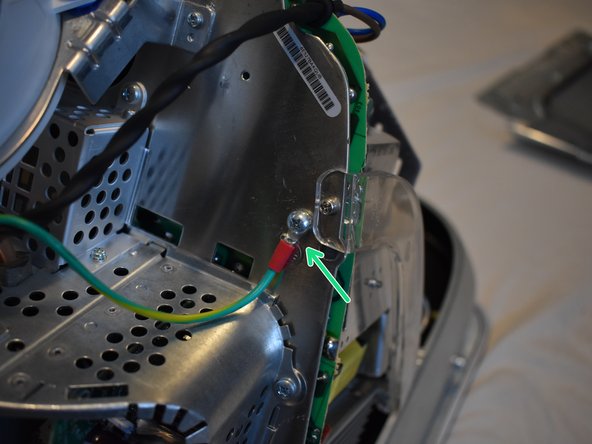
Ground wire, requires phillips #2 screwdriver
-
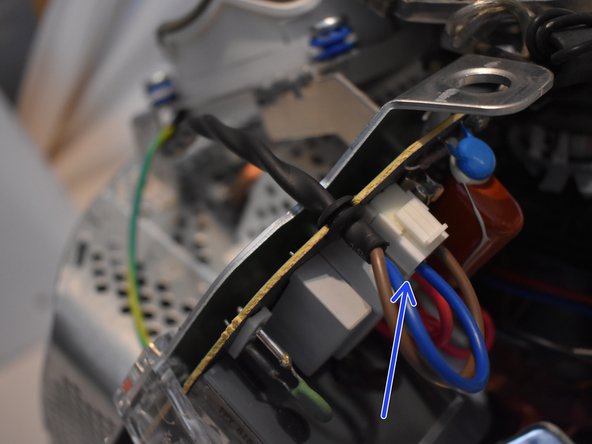
2-pin AC cable to power supply
-
-
Cette étape n’est pas traduite. Aidez à la traduire
-
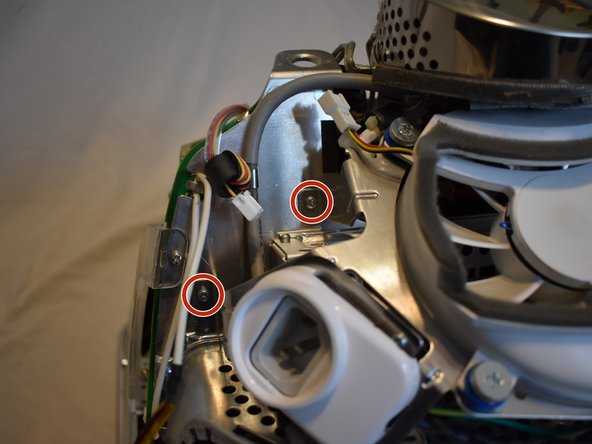
Now remove the following screws securing the fan assembly:
-
3x coarse thread phillips #2
-
1x machine thread phillips #2
-
-
Cette étape n’est pas traduite. Aidez à la traduire
-
There may be a zip tie holding another cable to the fan assembly, cut it to remove the fan assembly.
-
-
Cette étape n’est pas traduite. Aidez à la traduire
-
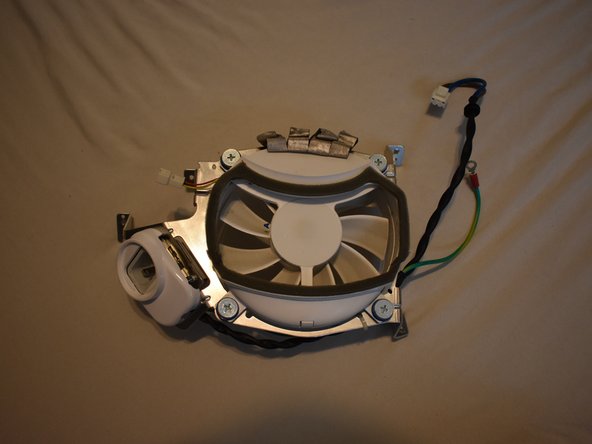
You should now be able to remove the fan assembly.
-


Annulation : je n'ai pas terminé ce tutoriel.
2 autres ont terminé cette réparation.

Équipe

Un commentaire
Does anyone know the names of connectors for the fan? I would like to power one externally if possible.
Thanks :)