Aller au contenu principal

iBook G3 14" LCD Cover Replacement

Conditions préalables uniquement
Ce tutoriel est uniquement destiné à être utilisé comme prérequis d'autres tutoriels. Il ne se suffit pas à lui-même.

Ce dont vous avez besoin

  1. iBook G3 14" LCD Cover Replacement, LCD Cover: étape 1, image 1 de 2 iBook G3 14" LCD Cover Replacement, LCD Cover: étape 1, image 2 de 2
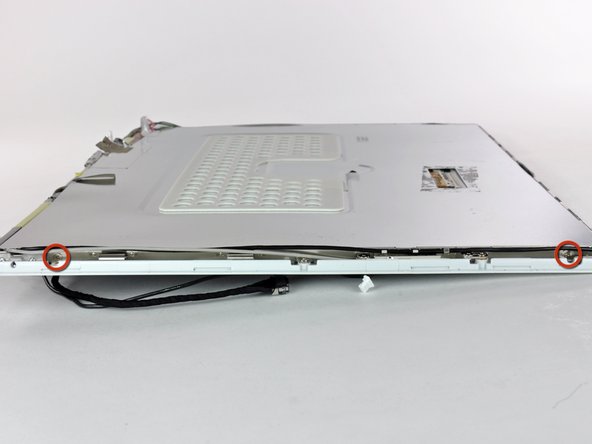
    • Remove the pieces of readily removable tape from around the perimeter of the display.

    • Carefully remove the aluminum tape covering the display data cable connection.

  2. iBook G3 14" LCD Cover Replacement: étape 2, image 1 de 2 iBook G3 14" LCD Cover Replacement: étape 2, image 2 de 2
    • Remove the single screw inserted through the piece of EMI tape near the bottom edge of the display.

    • Use the tip of a spudger to remove the small washer under the screw you just removed.

  3. iBook G3 14" LCD Cover Replacement: étape 3, image 1 de 1
    • Peel the aluminum/EMI tape off the cast aluminum frame of the clutch hinges.

    • It is not necessary to peel the tape off the thin steel LCD cover.

  4. iBook G3 14" LCD Cover Replacement: étape 4, image 1 de 2 iBook G3 14" LCD Cover Replacement: étape 4, image 2 de 2
    • Remove the two Phillips screws securing each side of the LCD to the clutch hinge frame (four screws total).

  5. iBook G3 14" LCD Cover Replacement: étape 5, image 1 de 1
    • Lift the thin steel LCD cover off the LCD.

Conclusion

To reassemble your device, follow these instructions in reverse order.

Une autre personne a terminé cette réparation.

0 commentaires

Ajouter un commentaire

Nombre de vues :

Dernières 24 heures : 0

7 derniers jours : 0

30 derniers jours : 0

Total : 42