Cette version peut contenir des modifications incorrectes. Passez au dernier aperçu vérifié.
Ce dont vous avez besoin
-
Cette étape n’est pas traduite. Aidez à la traduire
-
Unscrew the two 9.0 mm screws with the Phillips #1.
-
Remove the translucent bottom plastic piece.
-
-
Cette étape n’est pas traduite. Aidez à la traduire
-
Remove the two 9.0mm screws on the back of the iHome with the Phillips #1 screwdriver.
-
Repeat the previous step for the two 9.0mm screws on the bottom.
-
-
-
Cette étape n’est pas traduite. Aidez à la traduire
-
Remove the aluminum bracket by loosening the two nuts and removing the 8.0mm bolts with your hand.
-
-
Cette étape n’est pas traduite. Aidez à la traduire
-
Remove the two 12.0mm screws that hold the motherboard with the Phillips #1 screwdriver.
-
Slide the motherboard gently out.
-
-
Cette étape n’est pas traduite. Aidez à la traduire
-
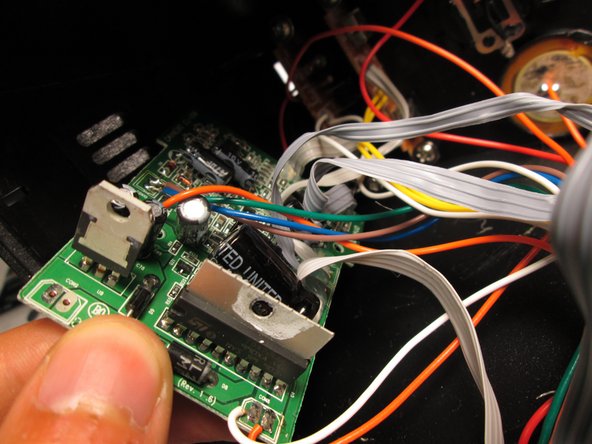
Remove the two 9.0 mm screws with the Phillips #1 screwdriver, then slide the circuit board for the AC adapter out.
-
Repeat the previous step by removing the two 9.0mm screws with the Phillips #1 screwdriver for the circuit board for the on/off switch.
-
-
Cette étape n’est pas traduite. Aidez à la traduire
-
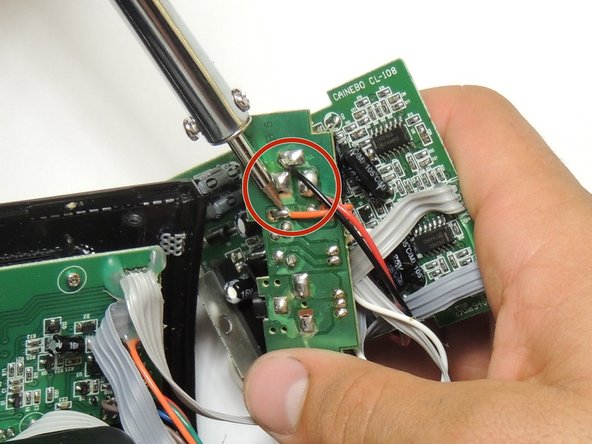
Unsolder the main connections holding the AC adapter to the circuit board.
-
Solder new adapter in same position with same connections.
-


Annulation : je n'ai pas terminé ce tutoriel.
2 autres ont terminé cette réparation.

Équipe

Cal Poly, Team 14-9, Maness Spring 2013 Membre de l'équipe Cal Poly, Team 14-9, Maness Spring 2013
CPSU-MANESS-S13S14G9
5 membres
5 tutoriels rédigés