Aller au contenu principal

iHome iBT230 Screen Replacement

Ce dont vous avez besoin

  1. iHome iBT230 Screen Replacement, Screen: étape 1, image 1 de 1
    • Remove the four 5.5 mm Phillips Head #00 screws from the bottom of the iBT230.

  2. iHome iBT230 Screen Replacement: étape 2, image 1 de 2 iHome iBT230 Screen Replacement: étape 2, image 2 de 2
    • Grip the top of the iBT230 by placing your thumb on the back of the iBT230, where the USB port is located. Pull up, and you should notice different colored wires connected to the Main Motherboard.

  3. iHome iBT230 Screen Replacement: étape 3, image 1 de 2 iHome iBT230 Screen Replacement: étape 3, image 2 de 2
    • Unplug the connectors from all sides of the iBT230, and unplug the wire that is connected to the screen.

  4. iHome iBT230 Screen Replacement: étape 4, image 1 de 1
    • Unscrew the four 5.5 mm Phillips #00 face panel screws from the front screen.

  5. iHome iBT230 Screen Replacement: étape 5, image 1 de 2 iHome iBT230 Screen Replacement: étape 5, image 2 de 2
    • Once the four 5.5 mm Phillips #00 face panel screws come out, slide the screen out vertically. Set the screen aside.

    • Disconnect the blue tipped ribbon, from the back of the screen.

Conclusion

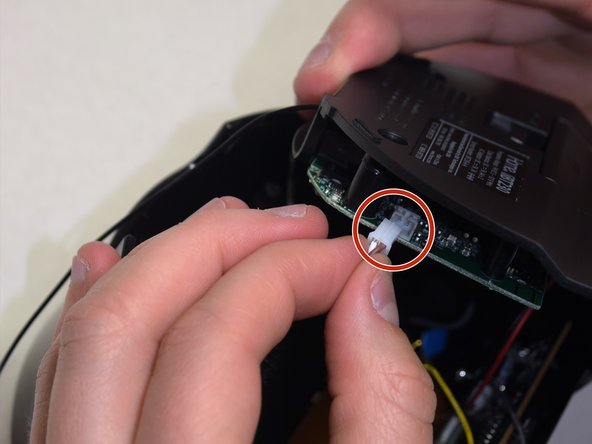
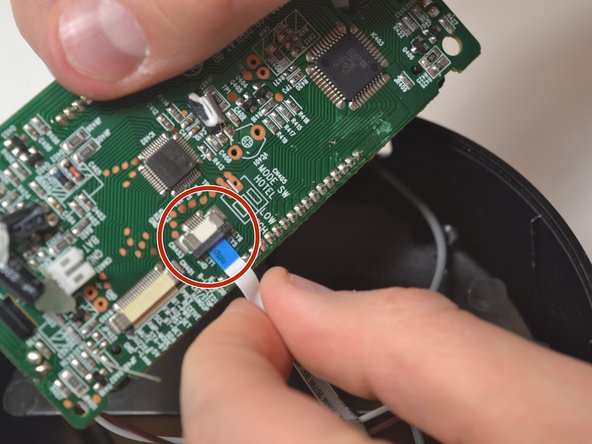
To reassemble your device, follow these instructions in reverse order.

Une autre personne a terminé cette réparation.

Bilal Siddiqui

Membre depuis le 04/10/17

376 Réputation

3 tutoriels rédigés

Équipe

UW Tacoma, Team S3-G6, Liner Spring 2017 Membre de l'équipe UW Tacoma, Team S3-G6, Liner Spring 2017

UWT-LINER-S17S3G6

4 membres

3 tutoriels rédigés

0 commentaires

Ajouter un commentaire

Nombre de vues :

Dernières 24 heures : 0

7 derniers jours : 0

30 derniers jours : 1

Total : 360