Aller au contenu principal

iHome iH27B iPod Adapter Replacement

Ce dont vous avez besoin

  1. iHome iH27B iPod Adapter Replacement, Adapter: étape 1, image 1 de 1
    • Set the IHome on a surface facing upward.

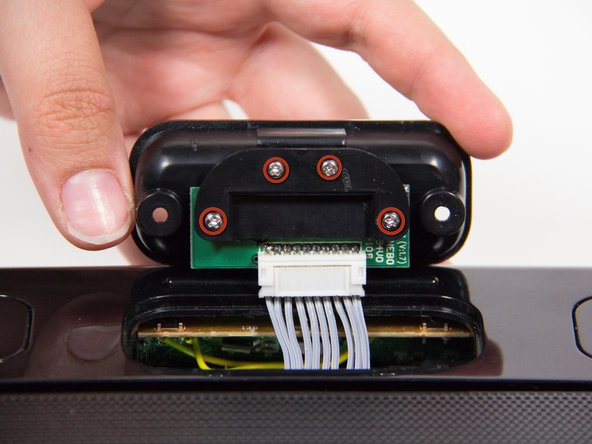
    • Locate the two screws on the docking station adapter.

    • Remove the following screws:

    • Two 10 mm Phillips #0

  2. iHome iH27B iPod Adapter Replacement: étape 2, image 1 de 1
    • Grip the plastic adapter case and pull upwards with a medium amount of force. You will have to twist forward a little so that the connections are visible.

    • The adapter will still be connected with wires, so make sure not to pull too hard.

  3. iHome iH27B iPod Adapter Replacement: étape 3, image 1 de 3 iHome iH27B iPod Adapter Replacement: étape 3, image 2 de 3 iHome iH27B iPod Adapter Replacement: étape 3, image 3 de 3
    • Remove the following screws:

    • Four 7 mm Phillips #0

    • Lift up the two black plastic pieces that have come loose on either side of the circuit board, and set them aside.

  4. iHome iH27B iPod Adapter Replacement: étape 4, image 1 de 2 iHome iH27B iPod Adapter Replacement: étape 4, image 2 de 2
    • Carefully pry apart the bundle of white wires connected at the junction with the plastic opening tool.

    • Do this slowly. Be careful not to damage the wires

    • Lift up the circuit board that has become loose.

  5. iHome iH27B iPod Adapter Replacement: étape 5, image 1 de 1
    • Pull out the adapter, and replace it with the new one.

Conclusion

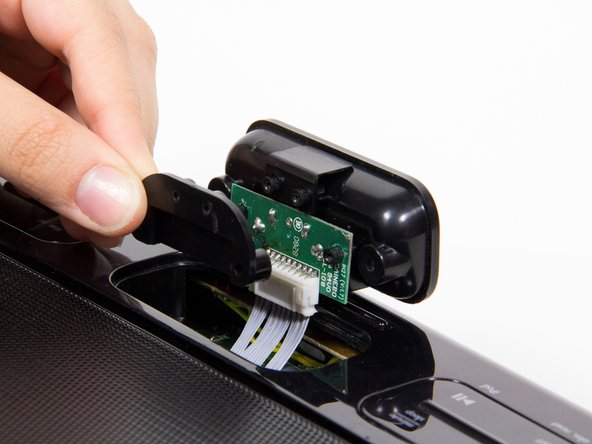
To reassemble your device, follow these instructions in reverse order.

Une autre personne a terminé cette réparation.

John Kraemer

Membre depuis le 10/09/12

76 Réputation

9 tutoriels rédigés

Équipe

Cal Poly, Team 3-21, Amido Fall 2012 Membre de l'équipe Cal Poly, Team 3-21, Amido Fall 2012

CPSU-AMIDO-F12S3G21

4 membres

9 tutoriels rédigés

0 commentaires

Ajouter un commentaire

Nombre de vues :

Dernières 24 heures : 0

7 derniers jours : 1

30 derniers jours : 3

Total : 2,324