Introduction
Utilisez ce tutoriel pour remplacer la batterie de votre iPad Air.
Par mesure de sécurité, videz la batterie de votre iPad avant de commencer, une batterie lithium-ion chargée peut prendre feu ou exploser si elle est accidentellement endommagée. Si votre batterie a gonflé, prenez des précautions supplémentaires.
Les batteries au lithium-ion contiennent des produits chimiques dangereux et peuvent prendre feu et exploser si elles sont percées ou manipulées de manière incorrecte. Soyez prudent.
Certaines parties de ce tutoriel ont été réalisées avec un modèle Wi-Fi et, à ce titre, les composants internes peuvent être légèrement différents de ceux du modèle LTE. La procédure est la même pour les deux modèles, sauf indication contraire.
Avertissement : la méthode d'isolation de la batterie de ce tutoriel est obsolète. Elle peut entraîner des dommages irréversibles aux broches de la batterie et de la carte mère amenant à sa destruction. Si, tout de même, vous choisissez cette méthode pour l'isolation de la batterie, tenez compte de tous les avertissements et travaillez très soigneusement. Si vous choisissez de compléter ce tutoriel sans isoler la batterie, évitez d'utiliser des outils métalliques sauf en cas de nécessité (ex : retrait des vis) pour éviter de court-circuiter la batterie et d'endommager les composants sensibles.
Ce dont vous avez besoin
-
-
Faites chauffez un iOpener et posez-le sur le bord gauche de l'appareil pendant deux minutes.
-
-
-
Pendant que vous attendez que l'adhésif se ramollisse, notez les zones suivantes qui sont sensibles aux manipulations :
-
Caméra frontale
-
Antennes
-
Nappes d'écran
-
-
-
Tirez la poignée bleue vers l'arrière pour débloquer les bras de l'Anti-Clamp.
-
Posez votre iPad sur un objet, afin qu'il soit au même niveau que les ventouses.
-
Positionnez les ventouses au milieu du côté gauche de l'iPad – une dessus, une dessous.
-
Tenez fermement le bas de l'Anti-Clamp et appuyez sur la ventouse supérieure pour que les deux adhèrent.
-
-
-
Tirez la poignée bleue vers l'avant pour bloquer les bras.
-
Tournez la poignée dans le sens des aiguilles d'une montre, de 360 degrés ou jusqu'à ce que les ventouses commencent à s'étirer.
-
Vérifiez que les ventouses restent bien alignées entre elles. Si elles commencent à se décaler, détachez-les pour les réaligner.
-
-
-
Attendez une minute pour que l'adhésif ait le temps de se détendre et d'ouvrir un espace.
-
Si votre écran iPad n'est plus assez chaud, vous pouvez réchauffer le bord gauche avec un sèche-cheveux.
-
Insérez un médiator sous la vitre tactile lorsque l'Anti-Clamp a créé un espace suffisamment grand.
-
Sautez l'étape suivante.
-
-
-
Une fois que l'écran est chaud au toucher, posez une ventouse sur le bord gauche de l'écran et aussi près que possible du bord.
-
Soulevez l'écran à l'aide de la ventouse pour créer un petit espace entre la vitre tactile et le châssis.
-
Insérez un médiator dans l'espace entre la vitre tactile et le châssis.
-
-
-
Insérez un second médiator dans l'espace que vous venez de créer.
-
Faites glisser le médiator vers le coin inférieur gauche de l'appareil pour séparer l'adhésif.
-
Laissez le médiator dans le coin inférieur gauche pour éviter que l'adhésif n'adhère de nouveau.
-
-
-
Faites chauffer un iOpener et posez-le sur le bord supérieur de l'appareil pendant deux minutes.
-
-
-
Faites tourner le médiator autour du coin supérieur gauche de l'appareil pour séparer l'adhésif.
-
-
-
Faites glisser le médiator le long du bord supérieur de l'appareil, en vous arrêtant juste avant d'atteindre la caméra frontale.
-
-
-
Faites chauffer un iOpener et posez-le sur le bord droit de l'appareil pendant deux minutes.
-
-
-
Faites tourner le médiator autour du coin supérieur droit de l'appareil pour séparer l'adhésif.
-
-
-
Insérez un nouveau médiator et faites-le glisser jusqu'au milieu du bord droit de l'iPad.
There are sensitive display/digitizer cables no less than five inches from the bottom edge of the iPad. Insert the pick further down than this, or deeper than 1mm beyond this point and you risk irreparably damaging these cables.
Three inches is much too far down this side of the iPad to use picks.
-
-
-
Faites chauffer un iOpener et posez-le sur le bord inférieur de l'appareil pendant deux minutes.
-
-
-
Faites glisser le médiator inférieur gauche vers le coin inférieur gauche pour séparer l'adhésif.
-
Laissez le médiator dans le coin inférieur gauche avant de passer à l'étape suivante.
-
-
-
Insérez un nouveau médiator dans l'espace que vous venez de créer sur le bord inférieur de l'iPad.
-
Faites glisser le médiator sur l'antenne, en vous arrêtant juste avant le bouton home.
-
Laissez le médiator à gauche du bouton home avant de continuer.
-
-
-
Faites chauffer un iOpener et posez-le sur le bord droit de l'appareil pendant deux minutes.
-
-
-
Tout en soutenant la vitre tactile, glissez un médiator entre les deux nappes de l'écran pour séparer la dernière partie de l'adhésif.
-
-
-
Une fois que toute la colle a été séparée, ouvrez la vitre tactile comme un livre et posez-la à côté de l'iPad.
While reassembling, REALLY make sure the display cables and the home button cable won't be folded / bent while closing the digitizer. I'm not exactly sure what I did, but I broke the home button and touch ID since I bent the home button cable to the point that it broke. These ribbon cables are SUPER fragile.
-
-
-
Utilisez l'extrémité plate d'un spudger pour extraire l'écran LCD juste assez de son espace pour l'attraper avec vos doigts.
-
Retournez l'écran LCD de l'iPad comme la page d'un livre, en le saisissant près de la caméra et le faisant pivoter autour du côté bouton home de la coque arrière.
-
Posez l'écran LCD à l'envers pour accéder aux nappes de l'écran.
Pictures that better indicate the difference between the remaining adhesive and the two mylar cables (the very cables you are trying to avoid damaging!) would be much appreciated. On my unit the two were very hard to distinguish
-
-
-
-
Retirez la seule vis cruciforme de 2,3 mm fixant le connecteur de la batterie sur la carte mère.
-
Laissez le bloqueur en place pour empêcher les fils du connecteur de batterie d'entrer en contact jusqu'à ce que vous ayez terminé vos réparations.
The could recommend me since I did not put the wedge first in the connection of the battery and it heated the logic card a couple of minutes, q´l recommend to solve it since it does not turn on
The battery isolation pick didn’t come with my kit. I made my own using one of the regular picks and a pair of scissors.
Would it not be important to note that you are not really “disconnecting” the conduit of the battery from the logic board, but rather isolating the connection?
@dlcatftwin I’m not sure I understand the distinction you’re making. You are fully disconnecting the battery, by opening the circuit and wedging a big insulator in there to keep it from closing again accidentally.
Hello Jeff,
Thank you for responding. one may regard “disconnecting” as actually unplugging or unsocketing a cable connection as actually disconnecting, like in step 37. I could picture a person tugging on the pick thinking that the battery connector actually had to be lifted away from the board.
Probably over-thinking it! ;-)
Regards,
DLC
@dlcatftwin 100% on point. That’s exactly why I’m reading this comment right now. I’ve never heard of a “Battery Isolation Pick” and I was trying to get the connector loose, before realizing it wasn’t coming easy and therefore reading the comments for more info.
Ergo, there is some confusion here that should be noted in the primary instructions.
-
-
-
Retirez les trois vis cruciformes de 1,4 mm fixant le cache de la nappe de l'écran.
-
-
-
Utilisez l'extrémité plate d'un spudger pour tirer délicatement le cache de la nappe d'écran vers le haut et l'enlever de la carte mère.
My iPad Air2 is configured differently from that in these photos. The battery connector is next to the display cable connection, and the LCD/glass panel are integral, so that they lift out of the frame together.
-
-
-
Retirez toute bande adhésive qui recouvre le connecteur de la nappe du bouton home.
-
-
-
Utilisez l'extrémité plate d'un spudger pour retourner la languette du connecteur ZIF de la nappe du bouton home vers le haut.
-
Retirez avec précaution la nappe du bouton home tout droit hors du connecteur ZIF.
On reassembly take note of the flap lock on that connection. Sadly I failed to operate it correctly and now have a defunct home button.
-
-
-
Utilisez l'extrémité plate d'un spudger ou votre ongle pour soulever délicatement les deux connecteurs de la nappe du la vitre tactile de leur prise.
When reversing with the new screen , this was the hardest part for me.
The cables needs to fit under the LCD screen, and they kept going out of place when I tried to close the screen in the end.
That meant that I had to remove the LCD again with one hand while holding the digitizer/glass with the other - all while I had already exposed the adhesives.
for me the cables of the new screen were longer that the old one. So even if i put everithing under the lcd, the digitizer didnt close properly. After everything was put back togheter, this side of the digitizer keep popping out.
I do have the same problem.
Anne -
In step 41 - what is the name of the connector in the first picture which he is trying to open
It is a ZIF socket. (Zero insertion force)
Zach -
-
-
-
Retirez l'ensemble panneau frontal.
-
Si vous rencontrez des problèmes d'entrée tactile "fantôme" avec votre nouvel écran, vous pouvez y remédier en ajoutant une couche de ruban isolant très fin, tel que du ruban Kapton (polyimide), sur les zones mises en évidence au dos de l'écran. Les écrans iFixit sont dotés de l'isolation appropriée et ne devraient pas nécessiter l'ajout de ruban adhésif.
After removing the glass, I'd suggest scraping off any remaining black adhesive off of the iPad's frame. Get every speck. This may be time consuming if you have lost glass integrity and have sticky, splintered shards around the edge of the frame, but you need the frame completely clean of adhesive before you put the new front panel down or else it won't lay correctly in the frame.
This was not as hard as I expected it. I think I was lucky since the adhesive wasn’t properly working anymore, and my display wasn’t too shattered. Took me a about 40 minutes to remove the display. Unfortunately I noticed that my battery had expanded so ordered a new one, waiting for it to arrive before I put it all back together.
-
-
-
Utilisez une pincette pour détacher et enlever le morceau de ruban adhésif qui recouvre le connecteur de la nappe de la carte SIM sur la carte mère.
-
-
-
Retirez les vis suivantes, fixant le support de la nappe des composants supérieurs :
-
Deux vis cruciformes de 2,0 mm
-
Trois vis cruciformes de 1,4 mm
-
-
-
Utilisez l'extrémité plate d'un spudger pour débrancher le connecteur de la caméra frontale de sa prise sur la carte mère.
-
-
-
Utilisez l'extrémité plate d'un spudger pour débrancher délicatement la nappe de la prise casque de sa prise sur la carte mère.
-
Encore une fois, écartez délicatement cette deuxième nappe pour accéder à plus de connecteurs en dessous.
There is tape on the LTE model adhering this socket to the frame underneath.
-
-
-
Utilisez l'extrémité plate d'un spudger pour débrancher le câble de l'antenne cellulaire primaire d'interconnexion de sa prise sur la carte mère.
I accidentally broke the 's' interconnector. where can I buy the replace? Or can i use something similar ? F.e. old antenna in other iphone ? Thank you !
-
-
-
Utilisez l'extrémité plate d'un spudger pour écarter délicatement le support du câble de l'antenne cellulaire primaire d'interconnexion vers le haut.
I accidentally broke the 's' interconnector. where can I buy the replace? Or can i use something similar ? F.e. old antenna in other iphone ? Thank you !
-
-
-
Répétez l'étape précédente pour décoller le deuxième morceau de bande, juste en dessous, fixant le câble de l'antenne Wi-Fi gauche.
-
Si vous avez accidentellement décollé d'un bloc les deux morceaux de ruban adhésif, décollez-les et séparez-les soigneusement avant de passer à l'étape suivante.
-
-
-
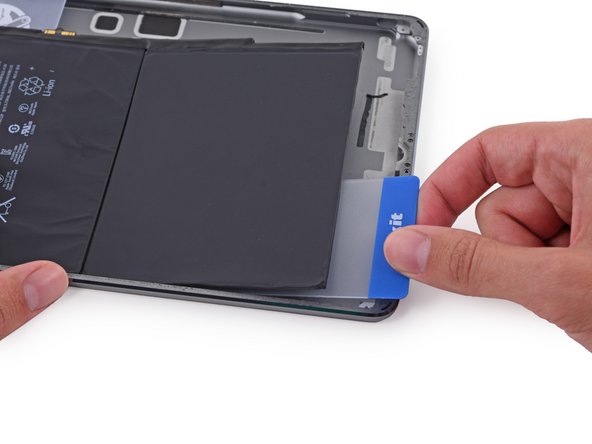
Retirez la médiator d'isolement de la batterie.
-
Insérez une carte en plastique sous la carte mère, au niveau du connecteur de la batterie.
-
Faites glisser la carte tout le long de la carte mère, pour faire céder l'adhésif le long du bord extérieur.
-
-
-
Tirez le connecteur de charge Lightning tout droit hors de son emplacement dans la coque arrière.
Remove the two screws from the inside of the connector first!
Hi George, thanks for pointing that out. I believe the screws you’re talking about are removed in step 70, is that correct? Let us know if we missed some screws!
-
-
-
Réchauffez l'iOpener au micro-ondes pendant 30 secondes.
-
Placez l'iOpener chauffé au centre de l'arrière de l'iPad. Laissez-le agir pendant 90 secondes pour ramollir l'adhésif de la batterie.
-
Déplacez l'iOpener vers la droite (loin de la caméra arrière) et laissez-le agir pendant 90 secondes supplémentaires.
-
Enfin, déplacez l'iOpener sur le bord droit de l'iPad pendant 90 secondes.
-
-
-
Insérez une carte en plastique sous la batterie inférieure, dans le coin en bas à droite.
Did you skip Step 46 through 100, then this is for you: Because the logic board is still in, you will have less space to loosen the battery pack. Be extra careful not to bend it. Work from the sides that are more accessible like in Step 113 and slowly work your way underneath the battery pack to loosen it all over. As I was loosening the battery I had the heated iOpener underneath the part I was working on. This really helped a lot. And be patient. You do not want to force it.
First of all, thanks @marcelflueeler and everyone else who gave advice on skipping ahead. This is definitely the way to go if you're just changing a battery! Once you've unstuck the battery you'll find you can't pull it out because it's stuck at the terminal though. Don't try and force it here! You'll need to return to step 88 and soften the logic board adhesive so you can pry it up about a cm, then you can lift the battery terminal up and over the locking post that's holding it in place. I didn't realise this and broke a piece of plastic off the old battery terminal, which got lodged under the logic board and prevented a good battery contact until I realised and retrieved it.
-
-
-
Saisissez fermement les deux cartes et tournez-les pour soulever la batterie hors de la coque arrière.
-
Retirez la batterie de la coque arrière.
Finally done !
It took me nearly 3hrs, but i finally made it. Thanks for the great instructions
REASSEMBLY TIPS:
The adhesive strips that come with the iFixit battery have no labels to say which goes where. Look at them carefully and one side has a blue protective cover that runs the length of each strip. This faces up and is to be removed at the last moment when you’re ready to stick the screen down permanently. One strip has a narrowed section in the long length to clear the glass touch screen cables, so stick this one down first to avoid mistakes.
Before removing the protective strips, close the touch screen and boot the iPad. Test both cameras, wifi and speakers. (I found the rear facing camera connector hadn’t bedded properly which was easily fixed). Clean the screen and remove dust from LCD before bedding in touch screen.
The iFixit site has updated battery calibration instructions which differ from the card packed with the battery:
Charge it to 100% and keep charging it for at least 2 more hours.
Then use your device until it shuts off due to low battery.
Finally, charge it uninterrupted to 100%.
Great tip to boot the iPad before removing the adhesive from the battery. There are quite a few comments here about faulty batteries. Fortunately, mine worked just fine.
The iFixit battery replacement kit worked great! The repair guide is very good also. So glad I didn’t just try buying the battery. While testing everything after finishing the battery replacement, the digitizer, volume controls and the sleep button did not work. I was very happy when I went back in and found the cable connections had just come loose. My wife couldn’t believe I fixed her iPad.
The guide was pretty good but a few comments:
I didn’t liked the iOpener that much. I used an heat gun with good temperature control instead.
Any advice on how to remove the old glue residu would have been welcome. I used a combination of physical scraping and cleaning afterward with isopropyl alcohol.
An extra guide on how to apply the new adhesive strips would also be nice.
Fixed!....The guide is very clear and well laid out. I also had issues with the iOpener not working, I needed more heat, used heat gun with temp control. Also used floss to remove the logic board. Would have appreciated more clearer instructions on adding the adhesive strips.....Thanks
The iOpener is really bad. It isnt hot enough to keep the iPad that cools down to roomtemperature in a few seconds. I used an hair dryer which was also not warm enough but at least made it warm enough to create a gap where I was able to fit my pics under. Unfortunately my Digitizer still died. Battery works but I cannot turn off my iPad now lol
Very good guide to a very tedious project! Thank you for the detailed description of the digitizer separation. I didn’t sever any cables. The iOpener isn’t bad; it’s just too small. This project really requires the Anti-clamp, the acetone/isopropanol adhesive softener, and a heat gun that can be used at a low heat setting. I didn’t try a hair dryer, but I think that it might be too windy. Like other fixers,I skipped steps 47 thru 100 something and took my chances manhandling the battery. I opted to insulate the digitizer with Kapton tape. I only have a wide roll of Kapton, so I stuck it to the stiff plastic backing for the battery, then cut narrow strips and peeled them off the backing. Finally, I’d like to see a show of hands of the people who forgot to put in the four corner screws for the display. Maybe I’m the only one …
I successfully replaced the battery in my A1954. But I stopped at step 40 and then I just pried the old battery with the plastic cards that came with the new battery and some isopropyl alcohol. Next step I pried the logic board upwards with a blue pick around the screw area. The board needs to flex upwards more than you're comfortable with in order to make room for the new battery connector to slide underneath the pick but over the screw hole underneath the logic board. I dint't really feel like gutting the entire housing of all the parts but I was risking damaging both the logic board and the new battery. So do it at your own risk.
-


Pour réassembler votre appareil, suivez ces instructions dans l'ordre inverse.
Pour réassembler votre appareil, suivez ces instructions dans l'ordre inverse.
Annulation : je n'ai pas terminé ce tutoriel.
10 autres ont terminé cette réparation.
Merci à ces traducteurs :
100%

Annika Faelker nous aide à réparer le monde ! Vous voulez contribuer ?
Commencez à traduire ›


2 commentaires
The battery replacement went off without a hitch, I’ll be honest, at step 50 I started to look at things with a real tech eye. I stopped disconnecting and removing components and took my hairdryer to the back, the battery came up quite easily so I stopped, popped in the new battery right then. After reconnecting everything, using iso to clean the lcd and inside glass, I “dry fit” everything back together, powered it up… nice. Completed new adhesive install and all is good.
Great tutorial, but if you have a good tech background, you can knock off an hour and do it in just over an hour. PS - Hair dryer is a must - take your time on this, once you get past the initial opening of the left side, the rest is a breeze.