Aller au contenu principal

iPad Air Screen Replacement

Tutoriel Archivé
Ce tutoriel est conservé uniquement à des fins de suivis historiques. Utilisez la version actuelle du tutoriel pour effectuer votre réparation.

Ce dont vous avez besoin

  1. iPad Air Screen Replacement, Screen: étape 1, image 1 de 1
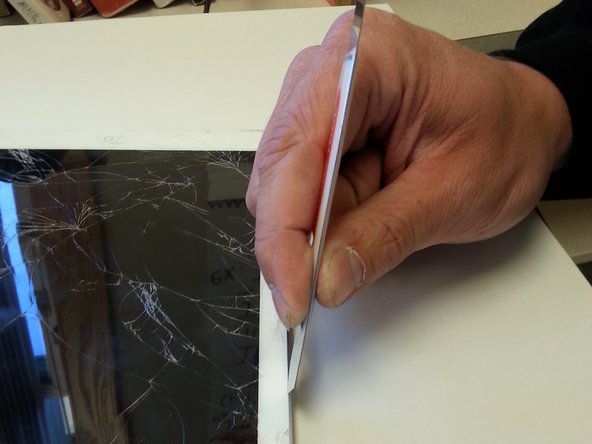
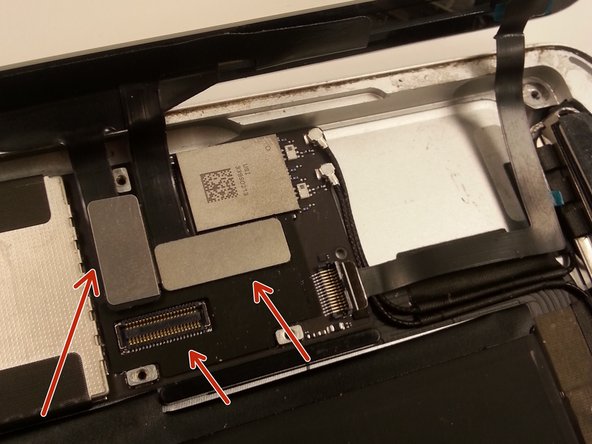
    • To start off make sure the iPad home button is to the right of you before starting.

    • Take your hair dryer and slowly move it back and forth on the the edges of the screen. This heats up the glue that is holding the screen together allowing you to be able to pry it open.

  2. iPad Air Screen Replacement: étape 3, image 1 de 1
    • Once the screen is fairly heated up take your prying tool and find the little crack between the frame of the iPad and the iPad's screen. Once you've located the crack place your tool between the crack and press down to cut through the glue.

  3. iPad Air Screen Replacement: étape 4, image 1 de 1
    • After you've gone through follow the crack to loosen up the rest of the glue. Make sure when you are cutting around the iPad that you don't open it up just yet.

  4. iPad Air Screen Replacement: étape 5, image 1 de 1
    • When you have all the edges lossened up take the right side of the iPad screen and open it like a book.

  5. iPad Air Screen Replacement: étape 6, image 1 de 1
    • Once you've opened up the screen you will see a screw on each corner of the iPad. Take those out and remove the black screen out of the way for now.

  6. iPad Air Screen Replacement: étape 7, image 1 de 1
    • After you've lifted up the black screen you should notice in the upper right corner a plate that has two screws on the bottom and one screw on the top of it holding it in place. Take your Philip screw driver and take that apart.

  7. iPad Air Screen Replacement: étape 8, image 1 de 1
    • Underneath their should be three wires take those apart and you should have the old screen completely taken off now

  8. iPad Air Screen Replacement: étape 9, image 1 de 1
    • Connect the wires back into their slots with the new screen and screw back on the protective cover.

  9. iPad Air Screen Replacement: étape 10, image 1 de 1
    • Once you've put the black screen into place take your 4 screws and screw back the screen into the frame.

  10. iPad Air Screen Replacement: étape 11, image 1 de 1
    • Now to make sure your new screen stays on the frame of your iPad take some Elmer's clear glue and put a little glue on the sides of the iPad to ensure your screen doesn't fall off when in use.

    • After you've put the glue on put back the new screen and take a heavy object to lay on the screen while it drys. Wait about 30-50 minutes for the glue to dry up and you should have a new screen on your iPad air!

Conclusion

To reassemble your device, follow these instructions in reverse order.

3 autres ont terminé cette réparation.

Tyler

Membre depuis le 03/22/18

339 Réputation

1 tutoriel rédigé

Équipe

Vegas Room H9 Membre de l'équipe Vegas Room H9

Community

13 membres

17 tutoriels rédigés

0 commentaires

Ajouter un commentaire

Nombre de vues :

Dernières 24 heures : 0

7 derniers jours : 0

30 derniers jours : 0

Total : 3,530