Il est possible que cette traduction ne reflète pas les dernières mises à jour du tutoriel source. Aidez à mettre à jour la traduction ou bien consultez le tutoriel source.
Introduction
Utilisez ce guide pour remplacer le connecteur de dock complet, ce qui inclut le connecteur de dock ainsi que le microphone inférieur.
Ce dont vous avez besoin
-
-
Sur le boîtier arrière de votre iPhone, vous trouverez deux vis cruciformes #000 ou des vis "Pentalobe" 5 points Apple. Vérifiez de quelles vis il s'agit et prévoyez un tournevis adapté pour les enlever.
-
Retirez les deux vis de 3,6 mm Pentalobe ou cruciformes #000 près du connecteur de dock.
-
-
-
Poussez la vitre arrière vers le haut de l'iPhone.
-
-
-
Enlevez l'unique vis cruciforme de 1,5 mm qui attache le connecteur de la batterie à la carte mère (s'il y en a une).
you do not need to take the battery out as chuck said so you dont run the risk of braking the battery connector socket from the logic board
Won't you need the battery removed to access the large-headed screws on the side which hold the front display?
Unfortunately the battery screw was already stripped probably from original assembly. We used a pair of nail clippers as pliers to grab a hold of the screw by the edges to turn it. If it hadn't have been for the stripped screw it would have taken us about 10 minutes, as it was it took us 30-40 minutes if you count searching for solutions for removing the stripped screw.
-
-
-
A l'aide d'un outil en plastique, faites délicatement levier pour soulever le connecteur de la batterie hors de son emplacement sur la carte mère.
-
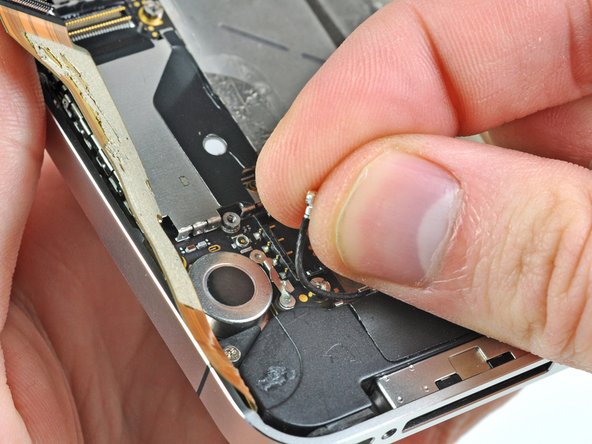
Retirez le cache métallique qui couvre le connecteur de l'antenne.
-
-
-
Tirez sur la languette en plastique transparent pour décoller la batterie de l'adhésif qui l'attache à l'iPhone.
-
Retirez la batterie.
-
Si votre batterie de rechange a été livré dans un enveloppe en plastique, retirez celle-ci en la tirant dans la direction opposée de la nappe.
-
Nettoyez les point s de contact métal-sur-métal avec un nettoyeur dégraissant avant le remontage. Le sébum de vos doigts peu causer des problèmes d'interférence sans fil.
-
Effectuez une réinitialisation matérielle (Hard Reset) après le remontage. Cela peut résoudre des problèmes.
Note that the pull tab is not actually attached to the battery. It is attached to the iPhone chassis, and is only used to separate the battery from the adhesive. (Don't expect it to come out with the battery!)
Also, the adhesive is VERY strong. I had to use my plastic opening tool to assist in prying the battery loose. This is probably the most nerve-wracking part of the job.
It is much easier to slightly WARM the battery with a HAIRDRYER not a HEAT GUN to soften the adhesive. DO NOT GET BATTERY HOT AND DO NOT USE HEAT GUN
Joe -
I just did this today. Everything was as scripted. Mine had lots of adhesive and had to use plastic spudger to go around battery to loosen up. Do not use plastic tab until you can see under battery a little bit. Great instructions. Took less than 10 minutes.
The adhesive is very strong and I was initially worried about damaging the phone by prying so much. There are a couple of places below the volume switch where you can pry between the metal of the case and the battery. If you lift the battery just a little, wiggle the pry bar further in and then start moving down the case. Don't worry about bending the battery, its dead anyway.
Do not pry on the left side (circuit board side) and do not use the pull tab until the adhesive is broken loose.
I tried this at first with a plastic pry tool, and the adhesive was so strong that I broke the tool. I then used a large screwdriver and applied pressure very slowly along various places on the outer side of the battery. That eventually did the trick.
-
-
-
Retirez les deux vis cruciformes de 1,8 mm fixant le cache de la nappe du connecteur de dock à la carte mère.
-
Retirez le cache métallique de la nappe du connecteur de dock.
-
-
-
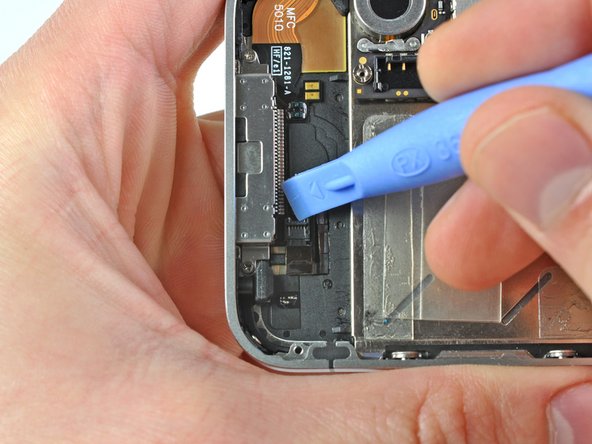
Avec le bout plat d'un outil en plastique, soulevez la nappe de dock pour la débrancher de sa prise sur la carte mère.
This repair went well overall, but I thought I would add a couple comments on this step. Once I got my iPhone back together, it would not charge and the home button didn't work. I took it back apart and realized that the dock cable was not seated. After many attempts, I finally got it seated correctly and you can feel it "click" into place. The metal rectangle that holds it on should sit FLAT and not have any bulge. If you have a bulge, that means the dock cable is not seated correctly.
-
-
-
-
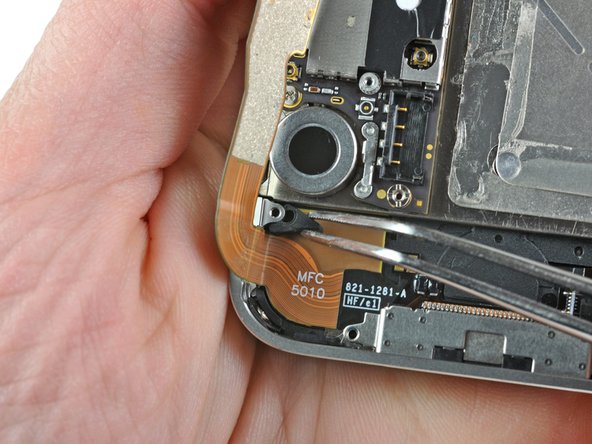
Retirez le petit bout de bande adhésive (s'il y en a) qui couvre une des vis du connecteur de dock.
-
-
-
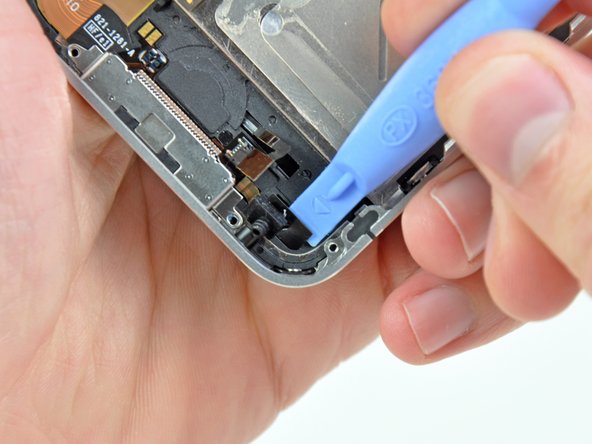
Utilisez le bord d'un outil en plastique pour décoller le connecteur de dock et sa nappe du boîtier en plastique noir de l'iPhone.
A new Dock connector may come with several pieces of plastic covering various adhesive surfaces so be sure to remove them before replacing.
Made the repair new dock connector and battery. Phone powers up and is charging. Wi-Fi is fine. However the cell is not working the carrier status in the upper left corner say searching and I can't make calls. Any thoughts?
-


Pour remonter votre appareil, suivez les étapes dans l'ordre inverse.
Pour remonter votre appareil, suivez les étapes dans l'ordre inverse.
Annulation : je n'ai pas terminé ce tutoriel.
117 autres ont terminé cette réparation.
Merci à ces traducteurs :
92%


Ces traducteurs nous aident réparer le monde ! Vous voulez contribuer ?
Commencez à traduire ›

5 commentaires
So I attempted once to fix the dock connector and failed. A month later I took the phone apart again. The first thing I noticed when taking off the dock connector from the logic board is that it wasn't seated properly. I attached it properly and now the iPhone charges and home button works perfectly!
What about it was not seated properly? any specific contact point? was it not screwed in well if it wasn't seated properly? I just replaced on a friends 4, but it has not turned on yet, and I can't figure it out. It just stopped charging one day so I figured it was a bad port from corrosion or something and replaced it. The swap was easy enough so I'm confused as to why it isn't turning on yet.
Matthew -
New part from IFixit works great. Some tips from my installation:
- PH000 screwdriver works well, but takes some finesse. A little pressure to get the screw going, and don't try to over tighten on the way back in. If you happen to round one out, a 00 or 0 PH screwdriver might get enough bite to get it going.
- Plastic pieces are covering the adhesive on numerous parts of the new dock connector. These are to be removed prior to installation.
- Battery does not have to be removed, so I avoided the risk of breaking something else.
I completed this guide, but unfortunately my phone is in no better shape than it was before the dock replacement. Apparently, this was not the problem. The device won't restore in iTunes. It just sits with the Apple logo and an empty status bar on the screen. Now when I unplug it from the computer, I get a black screen, with just a touch of backlight, but no display otherwise. Before the dock replacement, it always said "Connect to iTunes" but would not restore either. Any thoughts on what else I could try now?
Pra descarregar a bateria, antes de fazer o serviço, isso serve pra qualquer celular?
Gilmar Dutra - Réponse