Il est possible que cette traduction ne reflète pas les dernières mises à jour du tutoriel source. Aidez à mettre à jour la traduction ou bien consultez le tutoriel source.
Introduction
Eine komplizierte Reparatur für ein winziges Problem. Lerne, wie man den Bildschirm und die Kamera entfernt, damit man an die Innenseite des Kamerarings herankommt, um den Ring herauszudrücken und diesen durch eine neue Linse und einen neuen Ring zu ersetzen.
Ce dont vous avez besoin
-
-
Entferne die beiden 3,4 mm P2 Pentalobe Schrauben an der Unterseite des iPhones links und rechts vom Lightning-Anschluss.
-
-
-
Wenn du keine Anti Clamp hast, folge den nächsten drei Schritten, um stattdessen einen Saugheber zu verwenden.
-
Optional kannst du die Unterkante des iPhones mit einem iOpener oder einem Haartrockner für etwa eine Minute leicht erwärmen.
-
-
-
-
Öffne das iPhone, indem du das Home Button-Ende des Front Panels vom hinteren Gehäuse wegklappst und dabei die Oberkante des Mobiltelefons als Scharnier verwendest.
-
Öffne das Display um ca. 90 Grad und lehne es gegen etwas, damit es abgestützt ist, während du am Gerät arbeitest.
-
Befestige das Display mit einem Gummiband, während du arbeitest. Das verhindert ein ungewolltes Dehnen der Displaykabel.
-
-
-
Entferne die beiden Kreuzschlitzschrauben von der Kabelabdeckung des Akkuanschlusses. Sie haben folgende Längen:
-
Eine 2,9 mm Schraube
-
Eine 2,2 mm Schraube
-
-
-
Entferne die folgenden vier Kreuzschlitzschrauben, die die Kabelhalterung befestigen:
-
Drei 1,2 mm Schrauben
-
Eine 2,8 mm Schraube
-
-
-
Entferne die Displayeinheit.
-
Halte beim Zusammenbau hier an, wenn du die Klebestreifen an den Kanten des Displays ersetzen willst.
-
-
-
Verwende das flache Ende eines Spudgers, um die Rückkamera aus ihrem Anschluss auf dem Logic Board zu lösen.
-
-
-
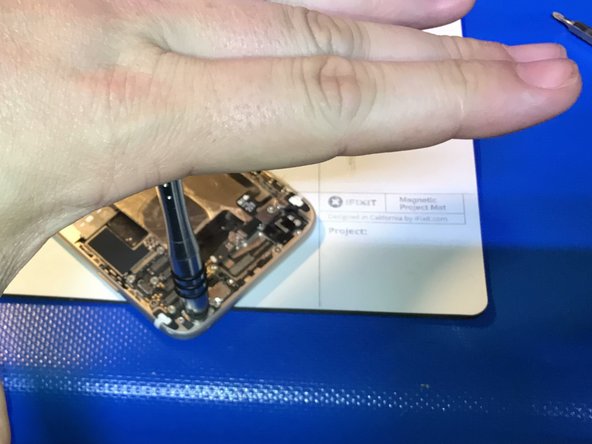
Entferne das Glas, indem du es von der Innenseite des Rahmens herausdrückst
-


Um dein Gerät wieder zusammenzubauen, befolge die Anweisungen in umgekehrter Reihenfolge.
Um dein Gerät wieder zusammenzubauen, befolge die Anweisungen in umgekehrter Reihenfolge.
Annulation : je n'ai pas terminé ce tutoriel.
43 autres ont terminé cette réparation.
Merci à ces traducteurs :
81%


Ces traducteurs nous aident réparer le monde ! Vous voulez contribuer ?
Commencez à traduire ›

5 commentaires
sometimes it becomes a pain to remove old ring, some devices has rolled ring so it much harder to remove carefully
I bent the frame and distorted the back panel where it started to come out trying to “pop-out” the lens ring. The lens ring was attached to an inner piece that holds the camera by a metal piece, this wasn’t described in these instructions.
Be careful of this!
You’re right! I used a previous guide that shows up until the camera is removed, then my own starts after I’ve already removed this flexible metal bracket. This bracket is used as a alignment guide and stabilizer for the camera so hard hits don’t rattle the sensitive internal magnets that stabilize the camera lenses. With a fine screwdriver, pop the 4 points that this is welded to the lens up then remove the bracket. It may get mangled a bit but it can usually be straightened back out to re-use upon camera reinstall.
The only way to get the ring out for me without damage or strain other components ,board or case was to take a 7.5mm drill and drill out the ring from the back and when the inner bracket came lose you know you are deep enough .
A little dot of CA applied with a toothpick to glue the lens inplace and a little glue on the inside to fix that bracket.
Tip: if just the lens glass piece is broken and there is no damage to the ring try to source and buy the glass lens without the ring alot easier to
repair ,you don’t have to take the screen and camera if no glass made it to the camera.
Just make sure that the ring and the rim where the glass is seated is clean and free of glass splinters and glue .
Again add a little CA with a toothpick pop in the lens and done.
Few minutes of work and no risk of breaking somthing in the proces.
first iPhone repair for me… I was trembling when I switched it back on. I was worried I didn’t put the screen and front camera connectors in place properly (it’s hard). But it went all well! Thanks for the guide, but I think it’d be really good to add the steps about the square metal thingy between the camera and the ring.