Cette version peut contenir des modifications incorrectes. Passez au dernier aperçu vérifié.
Ce dont vous avez besoin
-
Cette étape n’est pas traduite. Aidez à la traduire
-
Use a spudger to pry up the white plastic hold switch.
-
-
Cette étape n’est pas traduite. Aidez à la traduire
-
The following step can be challenging and time consuming. Be sure to go slowly and have patience to prevent damaging your iPod.
-
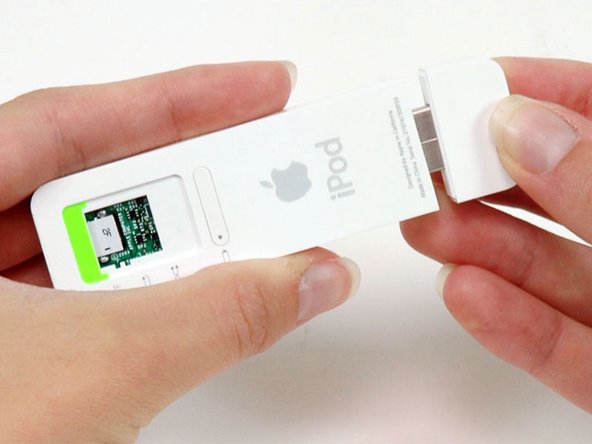
Use an Exacto knife to separate the glue holding the USB port on the iPod. Run the knife along the seam between the two sections of the iPod until the glue is separated. Expect to run the knife along this edge 20-30 times before the glue will be entirely freed.
-
-
Cette étape n’est pas traduite. Aidez à la traduire
-
Continue to run the knife around all four edges of the USB port until the glue is released. You may be able to gently wiggle the knife from side to side to help release the glue.
-
-
Cette étape n’est pas traduite. Aidez à la traduire
-
Use a spudger to push on the headphone jack and slide the USB port out of its housing.
-
-
-
Cette étape n’est pas traduite. Aidez à la traduire
-
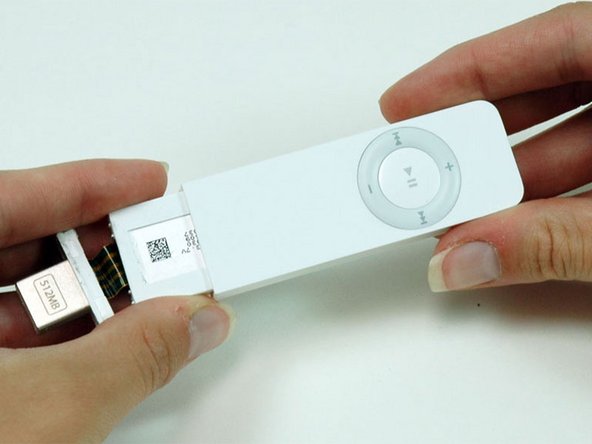
After the USB port comes free, carefully slide it out of its housing. Don't pull it out too far because there's still a ribbon cable connecting it to the logic board.
-
-
Cette étape n’est pas traduite. Aidez à la traduire
-
Continue to slide the iPod out of its casing by using a spudger to push on the logic board near the headphone jack.
-
-
Cette étape n’est pas traduite. Aidez à la traduire
-
Turn the iPod so that the click wheel is facing up. This will prevent the battery indicator from falling out.
-
Slide the iPod out of its casing.
-
-
Cette étape n’est pas traduite. Aidez à la traduire
-
Use a spudger to flip up the black plastic tab holding the USB port ribbon in place. The black tab will rotate up 90 degrees, releasing the ribbon cable.
-
-
Cette étape n’est pas traduite. Aidez à la traduire
-
Carefully peel the yellow USB ribbon up from the battery.
-
-
Cette étape n’est pas traduite. Aidez à la traduire
-
Slide the USB ribbon out of its connector.
-
Lift the USB port and detached ribbon cable out of the iPod.
-
-
Cette étape n’est pas traduite. Aidez à la traduire
-
Gently pull back the white plastic framework to free the left edge of the logic board. Pull up on the logic board slightly to prevent the logic board from falling back into place.
-
-
Cette étape n’est pas traduite. Aidez à la traduire
-
Repeat the same procedure on the opposite side to free the logic board from the white plastic casing.
-
-
Cette étape n’est pas traduite. Aidez à la traduire
-
Lift the logic board up to disconnect it from the memory board beneath. Don't remove the logic board from the iPod yet, because it's still connected to the battery.
-
-
Cette étape n’est pas traduite. Aidez à la traduire
-
Turn the iPod over and use your finger to push the battery through the hole in the casing. The battery is attached to the plastic framework with a mild adhesive.
-
Lift the battery and logic board out of the iPod.
-
Annulation : je n'ai pas terminé ce tutoriel.
44 autres ont terminé cette réparation.
5 commentaires
It would be helpful if the board images of the soldering process were included for these procedures. I have not tried the removal process and installation of the battery. And, why can’t we see an Ipod mini shuffle Gen 2? I can send you the one I own..
Not hard,i believe in u
Thanks, for this guide
Toll, die Anleitung erklärt nur 2/3 des Weges hin zu einer neuen Batterie.
Sehr anschaulich aber völlig wertlos. Jetzt habe ich einen säuberlich
zerlegten iPod und weiß nicht weiter.


