Aller au contenu principal

iRobot Roomba 870 Bumper Sensor Replacement

Ce dont vous avez besoin

  1. iRobot Roomba 870  Bumper Sensor Replacement, Bumper Sensor: étape 1, image 1 de 2 iRobot Roomba 870  Bumper Sensor Replacement, Bumper Sensor: étape 1, image 2 de 2
    • Flip the iRoomba over so that the underside is facing up.

    • Using the Phillips #0 screwdriver, remove the 4.0 mm screw in the center of the yellow side brush.

    • Remove the yellow side brush.

  2. iRobot Roomba 870  Bumper Sensor Replacement: étape 2, image 1 de 3 iRobot Roomba 870  Bumper Sensor Replacement: étape 2, image 2 de 3 iRobot Roomba 870  Bumper Sensor Replacement: étape 2, image 3 de 3
    • Remove the two 3.5 mm Phillips screws that hold the battery cover onto the Roomba with a Phillips #0 screwdriver.

    • Remove the battery cover.

  3. iRobot Roomba 870  Bumper Sensor Replacement: étape 3, image 1 de 3 iRobot Roomba 870  Bumper Sensor Replacement: étape 3, image 2 de 3 iRobot Roomba 870  Bumper Sensor Replacement: étape 3, image 3 de 3
    • Remove the two remaining 3.5 mm Phillips #0 screws that attach the base-plate to the bottom of the Roomba.

    • Remove the entire base-plate from the bottom of the Roomba.

  4. iRobot Roomba 870  Bumper Sensor Replacement: étape 4, image 1 de 3 iRobot Roomba 870  Bumper Sensor Replacement: étape 4, image 2 de 3 iRobot Roomba 870  Bumper Sensor Replacement: étape 4, image 3 de 3
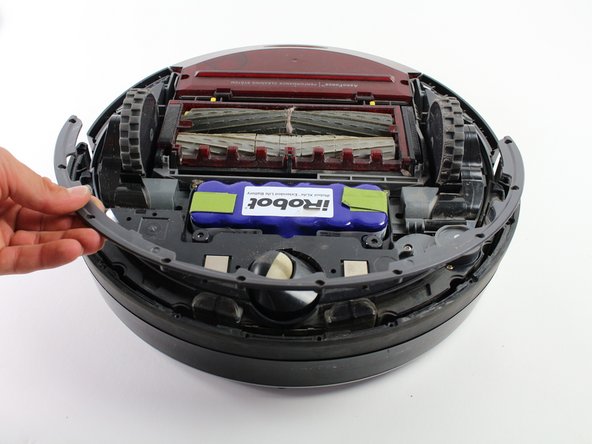
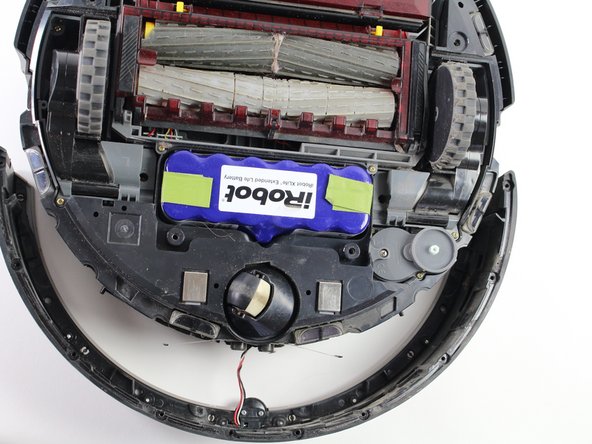
    • Remove the ten 3 mm screws that attach the bumper guard to the bumper with a Phillips #1 screwdriver.

    • Remove the bumper guard.

  5. iRobot Roomba 870  Bumper Sensor Replacement: étape 5, image 1 de 2 iRobot Roomba 870  Bumper Sensor Replacement: étape 5, image 2 de 2
    • Be careful when removing the bumper from the Roomba to prevent damage to the sensor wires. Remove slowly!

    • Lift up the Roomba so that its bumper is not resting on anything, and slowly separate the bumper from the device.

  6. iRobot Roomba 870  Bumper Sensor Replacement: étape 6, image 1 de 3 iRobot Roomba 870  Bumper Sensor Replacement: étape 6, image 2 de 3 iRobot Roomba 870  Bumper Sensor Replacement: étape 6, image 3 de 3
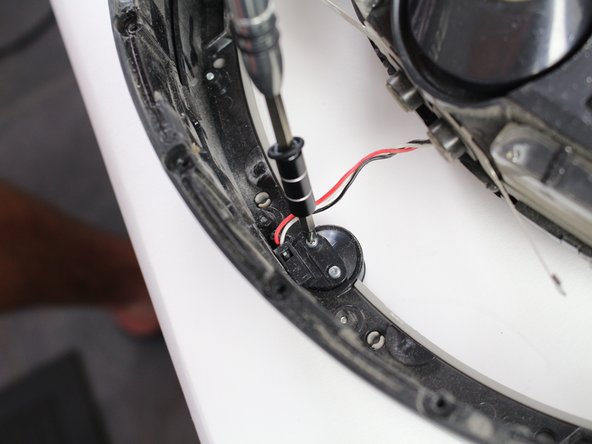
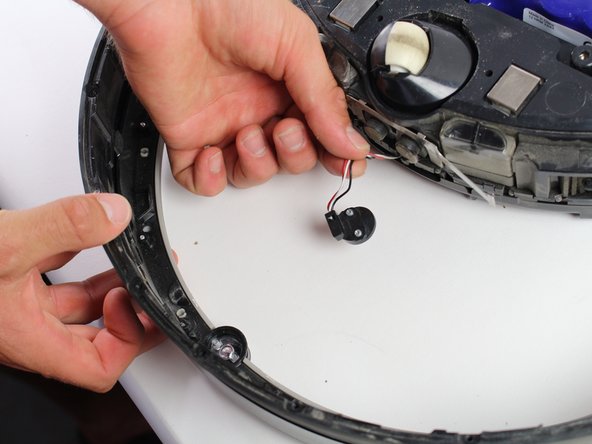
    • Remove the two 3 mm screws that attach the sensor connector to the bumper/sensor with a #1 Phillips Screwdriver.

    • Carefully detach the sensor connector from the bumper and the sensor.

  7. iRobot Roomba 870  Bumper Sensor Replacement: étape 7, image 1 de 2 iRobot Roomba 870  Bumper Sensor Replacement: étape 7, image 2 de 2
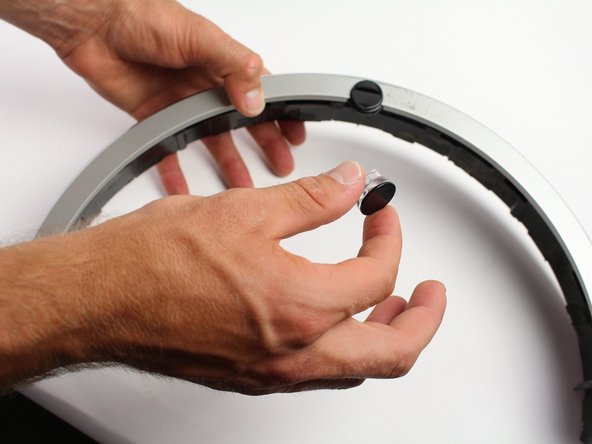
    • The sensor is now loose on the bumper. Be careful not to rapidly move the bumper for fear of dislodging the sensor and breaking it.

    • Flip the bumper over, ensuring the sensor remains inside the sensor compartment.

    • Gently remove the bumper from the black infrared sensor.

Conclusion

To reassemble your device, follow these instructions in reverse order.

13 autres ont terminé cette réparation.

Jacob Lindberg

Membre depuis le 04/19/17

449 Réputation

1 tutoriel rédigé

Équipe

Cal Poly, Team S14-G3, Banghart Spring 2017 Membre de l'équipe Cal Poly, Team S14-G3, Banghart Spring 2017

CPSU-BANGHART-S17S14G3

4 membres

10 tutoriels rédigés

3 commentaires

Can not get to the plug-in area on the board to replace sensor this way. DOES NOT work this way.

jkeysgate - Réponse

man kommt nicht an den Stecker. Die Anleitung bringt überhaupt nichts.

Reinhard Totzauer - Réponse

Incomplete. This NEEDs to explain how to access the plug on the board.

Ed T. - Réponse

Ajouter un commentaire

Nombre de vues :

Dernières 24 heures : 0

7 derniers jours : 3

30 derniers jours : 72

Total : 7,738