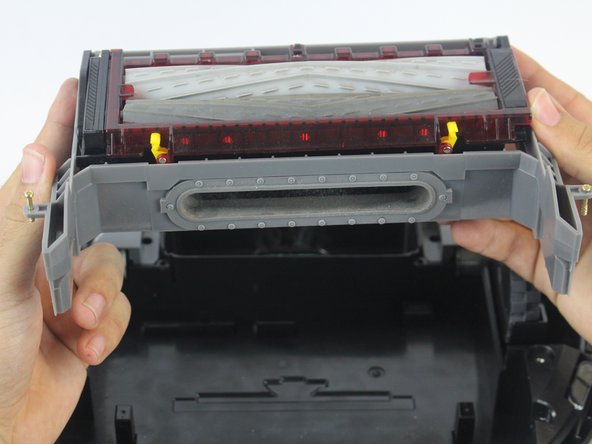
Aller au contenu principal

iRobot Roomba 980 Brush Module Replacement

Ce dont vous avez besoin

  1. iRobot Roomba 980 Brush Module Replacement, Battery: étape 1, image 1 de 1
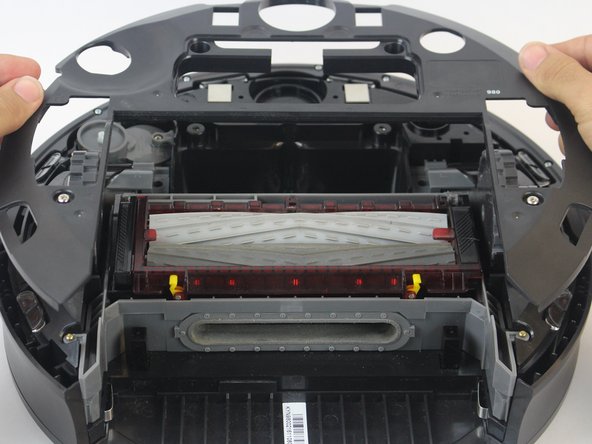
    • Flip over the device and remove the two 11.5 mm screws using the Phillips #1 screwdriver.

  2. iRobot Roomba 980 Brush Module Replacement: étape 2, image 1 de 2 iRobot Roomba 980 Brush Module Replacement: étape 2, image 2 de 2
    • Unscrew the back plate using a Phillips #1 screwdriver.

    • Carefully lift the panel up once the screws are removed.

  3. iRobot Roomba 980 Brush Module Replacement: étape 3, image 1 de 2 iRobot Roomba 980 Brush Module Replacement: étape 3, image 2 de 2
    • With both hands, grab the two black tabs on each end of the battery.

    • Pull the tabs upwards to remove the battery.

  4. iRobot Roomba 980 Brush Module Replacement, Brush Module: étape 4, image 1 de 3 iRobot Roomba 980 Brush Module Replacement, Brush Module: étape 4, image 2 de 3 iRobot Roomba 980 Brush Module Replacement, Brush Module: étape 4, image 3 de 3
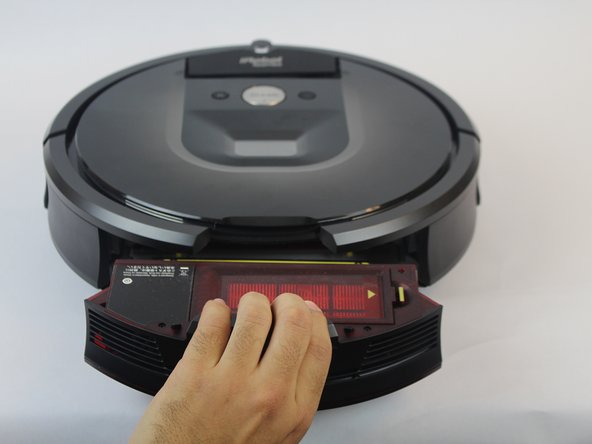
    • Press down on the button on the rear of the device.

    • Pull bin towards you to remove it.

  5. iRobot Roomba 980 Brush Module Replacement: étape 5, image 1 de 2 iRobot Roomba 980 Brush Module Replacement: étape 5, image 2 de 2
    • Loosen the screw holding the side brush in place.

    • The screw is attached to the side brush and does not come out completely.

    • Lift the side brush.

  6. iRobot Roomba 980 Brush Module Replacement: étape 6, image 1 de 2 iRobot Roomba 980 Brush Module Replacement: étape 6, image 2 de 2
    • Remove the (2) 11.5mm Phillips #1 screws holding down the bottom plate.

    • Carefully lift the bottom plate.

  7. iRobot Roomba 980 Brush Module Replacement: étape 7, image 1 de 1
    • Remove the (4) 15.8mm Phillips #1 gold screws around the brush module.

  8. iRobot Roomba 980 Brush Module Replacement: étape 8, image 1 de 2 iRobot Roomba 980 Brush Module Replacement: étape 8, image 2 de 2
    • Lift the brush module carefully using both hands.

Conclusion

To reassemble your device, follow these instructions in reverse order.

2 autres ont terminé cette réparation.

Équipe

USF Tampa, Team S14-G2, Boczar Fall 2017 Membre de l'équipe USF Tampa, Team S14-G2, Boczar Fall 2017

USFT-BOCZAR-F17S14G2

4 membres

5 tutoriels rédigés

0 commentaires

Ajouter un commentaire

Nombre de vues :

Dernières 24 heures : 1

7 derniers jours : 8

30 derniers jours : 25

Total : 4,398