Traduction de l’étape 6
Étape 6


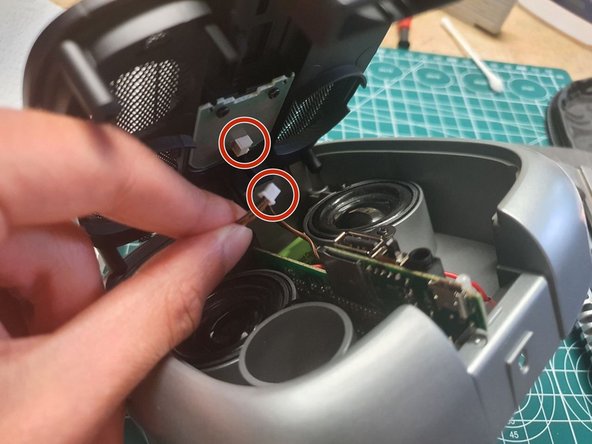


Unscrewing the front mesh
-
Remove the four screws holding the front mesh
-
Separate the black plastic from the silver part
-
Disconnect the brown cable from the small PCB to fully remove the black plastic
Vos contributions sont faites dans le cadre de la licence open source Creative Commons.