Aller au contenu principal

W-King X10 Battery Replacement

Info : Vous modifiez un tutoriel prérequis. Toutes les modifications apportées affecteront les 3 tutoriels qui comprennent cette étape.

Anglais
Français

Traduction de l’étape 6

Étape 6
W-King X10 Battery Replacement: étape 0, image 1 de 3 W-King X10 Battery Replacement: étape 0, image 2 de 3 W-King X10 Battery Replacement: étape 0, image 3 de 3
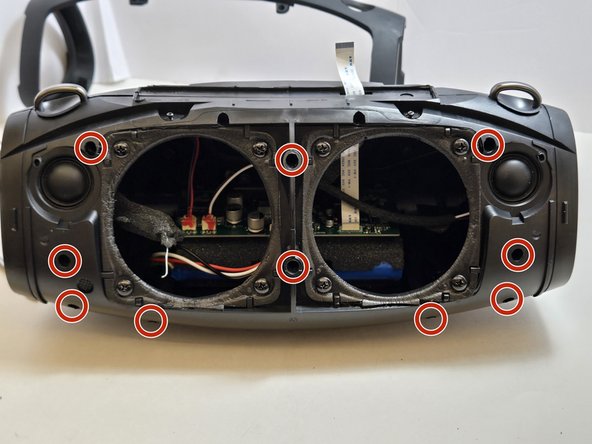
  • Use a 2.5 millimeter hex key to remove the ten 17.5 mm screws that connect the two halves of the X10 casing.

  • Several of these hex screws are in deep, narrow holes in the casing. We recommend using a full-length hex key rather than a hex bit at the end of a driver.

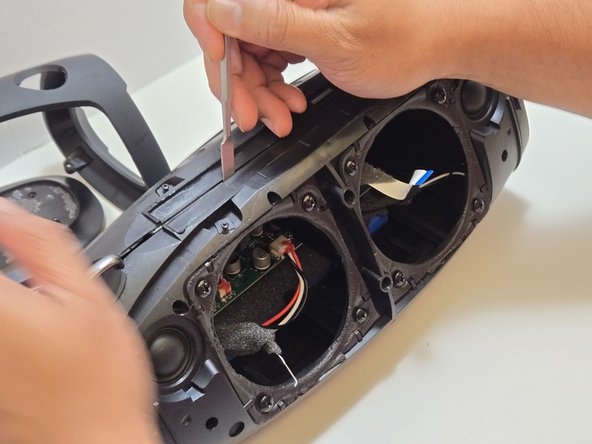
  • Separate the two halves of the casing using the metal spudger to pry apart the 10 connection arms that form the structure of the casing.

  • If this is the first time opening the casing of this X10, there will be glue around the seam of the casing. Use the spudger to split the glue to loosen the seam.

Insérez ici votre traduction

Insérez ici votre traduction

Insérez ici votre traduction

Insérez ici votre traduction

Vos contributions sont faites dans le cadre de la licence open source Creative Commons.