Traduction de l’étape 3
Étape 3


-
Now we have access to the internals of the laptop, pretty neat
-
If the battery is away from you, the hard drive should be closer towards you on the left
-
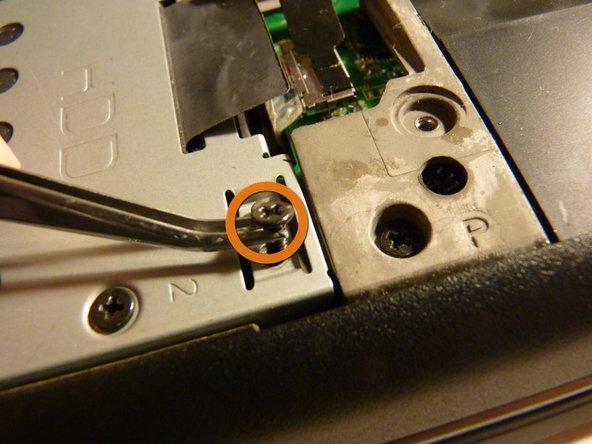
Start by removing the screws holding the caddy into the chassis
-
These screws have a more rounded top, and are longer
-
Once loosened, you can remove with your fingers or tweezers, and then set them aside
Vos contributions sont faites dans le cadre de la licence open source Creative Commons.