Traduction de l’étape 3
Étape 3


-
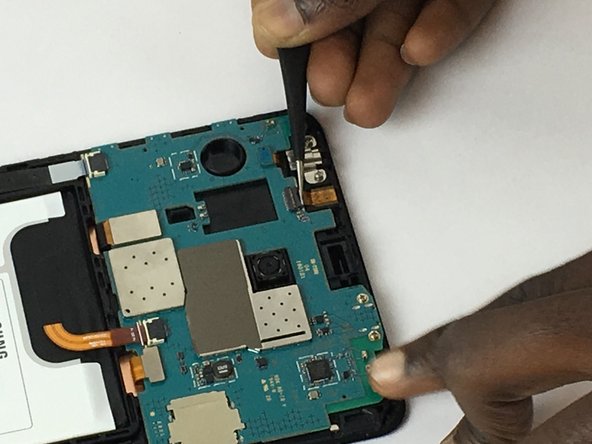
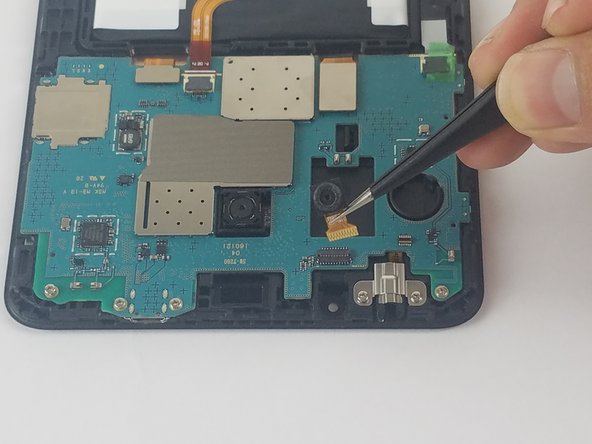
Using tweezers, at the end of the gold wire, gently lift the black tab locking the wire connecting the camera to the motherboard.
-
Pull the wire from the connector, disconnecting the camera from the device entirely.
| - | [* red] Using tweezers, at the end of the gold wire, gently lift the black tab locking the wire connecting the camera to the motherboard. |
|---|---|
| + | [* red] Using [product|IF145-020|tweezers], at the end of the gold wire, gently lift the black tab locking the wire connecting the camera to the motherboard. |
| [* black] Pull the wire from the connector, disconnecting the camera from the device entirely. |
Vos contributions sont faites dans le cadre de la licence open source Creative Commons.