Aller au contenu principal
Pour réparer ensemble - Je crée un compte

samsung xcover 3 digitizer replacement Replacement

Ce dont vous avez besoin

  1. samsung xcover 3 digitizer replacement Replacement, remove battery and backcover: étape 1, image 1 de 3 samsung xcover 3 digitizer replacement Replacement, remove battery and backcover: étape 1, image 2 de 3 samsung xcover 3 digitizer replacement Replacement, remove battery and backcover: étape 1, image 3 de 3
    • use a spudger and remove the back cover.

    • remove the battery

    Demander à FixBot

    Ajouter un commentaire

  2. samsung xcover 3 digitizer replacement Replacement: étape 2, image 1 de 3 samsung xcover 3 digitizer replacement Replacement: étape 2, image 2 de 3 samsung xcover 3 digitizer replacement Replacement: étape 2, image 3 de 3
    Outil utilisé dans cette étape :
    Plastic Cards
    $2.99
    • now you have to heat up the screen using a heat gun or hairdryer.

    • use the hair dryer or heatinggun not to close to the screen ( +- 15 cm from the screen and go up and down. )do it 2 min , stop and see that the adhesive is coming loose.) if not repeat this step.

    • Use a spudger and "peel" or "slide" the spudger under the digitizer, watch out for the lcd screen). Once you're under the digitizer use a credit card or plastic cards to slide between the adhesive and the digitizer. If the adhesive is still to hard , heat again.

    • The guys of smartfastfix ( youtube) link : https://www.youtube.com/watch?v=QLNTUO-f... did a well job on this.

    Demander à FixBot

    Ajouter un commentaire

  3. samsung xcover 3 digitizer replacement Replacement: étape 3, image 1 de 3 samsung xcover 3 digitizer replacement Replacement: étape 3, image 2 de 3 samsung xcover 3 digitizer replacement Replacement: étape 3, image 3 de 3
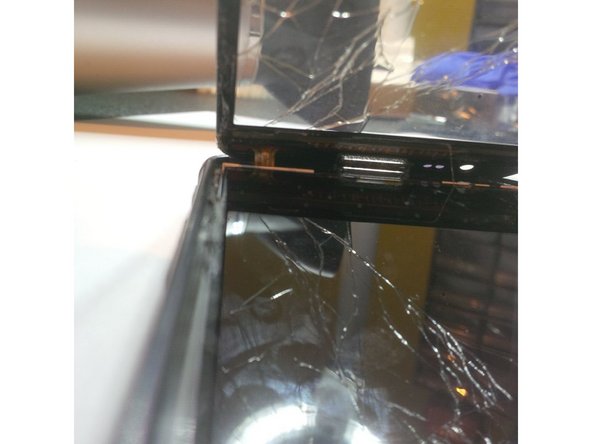
    • removing the digitizer.

    • when you put the digitizer in a 90 degrees position , you'll see a flex cable. You can cut it with pliers.

    • the digitizer is loose.

    Demander à FixBot

    Ajouter un commentaire

  4. samsung xcover 3 digitizer replacement Replacement, heating the lcd. step 1: étape 4, image 1 de 3 samsung xcover 3 digitizer replacement Replacement, heating the lcd. step 1: étape 4, image 2 de 3 samsung xcover 3 digitizer replacement Replacement, heating the lcd. step 1: étape 4, image 3 de 3
    • again heat the Phone to loose the adhesive under the lcd screen.

    • heat the Phone also at the back.

    • again don't heat to much...

    Demander à FixBot

    Ajouter un commentaire

  5. samsung xcover 3 digitizer replacement Replacement, heating the lcd and removing it step 2: étape 5, image 1 de 2 samsung xcover 3 digitizer replacement Replacement, heating the lcd and removing it step 2: étape 5, image 2 de 2
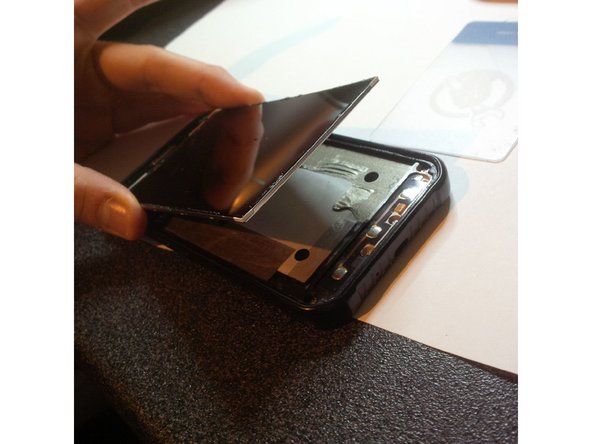
    • use a spudger to go under the screen but do this very very gently. Take your time.

    Demander à FixBot

    Ajouter un commentaire

  6. samsung xcover 3 digitizer replacement Replacement: étape 6, image 1 de 3 samsung xcover 3 digitizer replacement Replacement: étape 6, image 2 de 3 samsung xcover 3 digitizer replacement Replacement: étape 6, image 3 de 3
    • put the lcd in a 90 degrees position. You'll see in picture 1 there is a plastic lid and a tiny screw. remove the screw and the plastic lid.

    • under the lid there is a flex cable. use a spudger to remove the cable.

    Demander à FixBot

    Ajouter un commentaire

  7. samsung xcover 3 digitizer replacement Replacement: étape 7, image 1 de 3 samsung xcover 3 digitizer replacement Replacement: étape 7, image 2 de 3 samsung xcover 3 digitizer replacement Replacement: étape 7, image 3 de 3
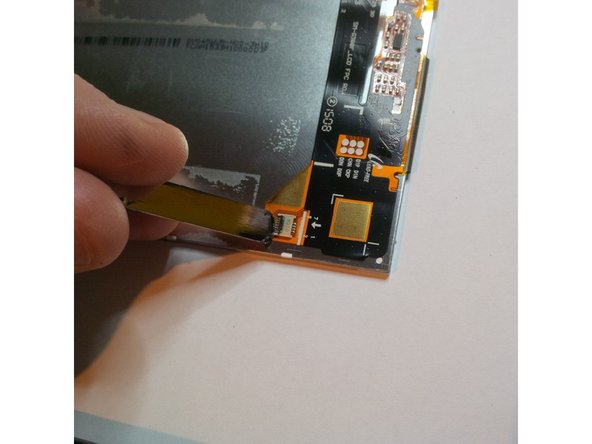
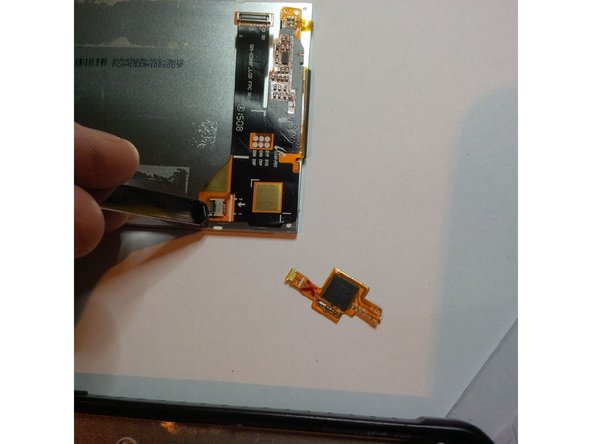
    • a few steps ago you had to cut the cable from the digitizer. now you see that piece is still on the board at the lcd screen. use a spudger to open the connector's lid and remove the rest of the cable.

    Demander à FixBot

    Ajouter un commentaire

  8. samsung xcover 3 digitizer replacement Replacement: étape 8, image 1 de 3 samsung xcover 3 digitizer replacement Replacement: étape 8, image 2 de 3 samsung xcover 3 digitizer replacement Replacement: étape 8, image 3 de 3
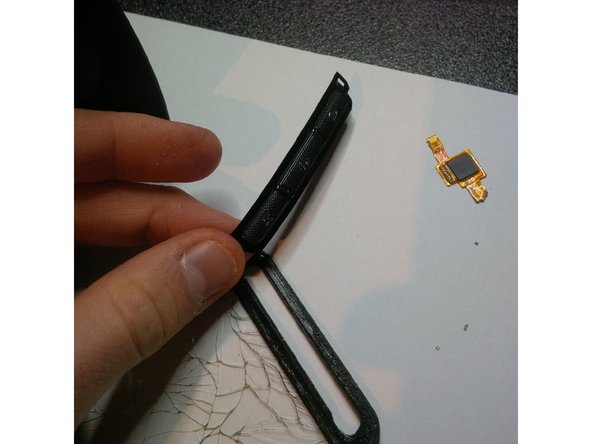
    • take the old broken digitizer and remove the plastic/rubber buttons., there is adhesive so you have to use the spudger to peel it off..

    Demander à FixBot

    Ajouter un commentaire

  9. samsung xcover 3 digitizer replacement Replacement: étape 9, image 1 de 3 samsung xcover 3 digitizer replacement Replacement: étape 9, image 2 de 3 samsung xcover 3 digitizer replacement Replacement: étape 9, image 3 de 3
    • use the buttons to put it in the new digitizer.

    • connect the flex cable to the board of the lcd screen. ( i forgot to take a picture of this , my apologies )

    • connect the flex cable again to the Phone ( where the plastic lid and screw was..)

    • put the digitizer again over the lcd screen. see that it is in the correct place.

    • these are the steps to follow. sometimes it is hard to see things on the pictures so again there is a good youtube movie from the guys from smartfastfix... see link in step 2 or 3 .

    Demander à FixBot

    Ajouter un commentaire

Conclusion

To reassemble your device, follow these instructions in reverse order.

Annulation : je n'ai pas terminé ce tutoriel.

11 autres ont terminé cette réparation.

Kevin D

Membre depuis le 05/02/14

7 550 Réputation

21 tutoriels rédigés

14 commentaires de tutoriel

Is it waterproof after repair?

Gerroe - Réponse Partager

Hey no i dont think it is 100% waterproof

Kevin D - Réponse Partager

Reassembly instructions would have been nice as it's far more difficult to re-fit the screen than take it off. My advice to anyone doing this is to make sure the lcd is fitted in the correct position in the phone before sticking the screen down properly otherwise you might have to start the whole process again to realign the lcd.

Clems - Réponse Partager

Thats true. And my apologies for that. It was late that day and i did it alone so i needed both hands to do this. But your info i correct. thanks for that.

Kevin D - Réponse Partager

Any ideas on where to buy parts? I have tried Aliexpress but ran into quality issues.

James Moloney - Réponse Partager

Ajouter un commentaire

Nombre de vues :

Dernières 24 heures : 0

7 derniers jours : 5

30 derniers jours : 46

Total : 19,005