Aller au contenu principal

iPad Mini CDMA LCD 更换

Info : Vous modifiez un tutoriel prérequis. Toutes les modifications apportées affecteront les 38 tutoriels qui comprennent cette étape.

Anglais
Chinois

Traduction de l’étape 2

Étape 2
iPad Mini CDMA LCD Replacement: étape 0, image 1 de 3 iPad Mini CDMA LCD Replacement: étape 0, image 2 de 3 iPad Mini CDMA LCD Replacement: étape 0, image 3 de 3
  • The LCD is still connected to the rest of the iPad by two wide strips of adhesive tape that run up from the inside of the rear case to the front bottom LCD frame.

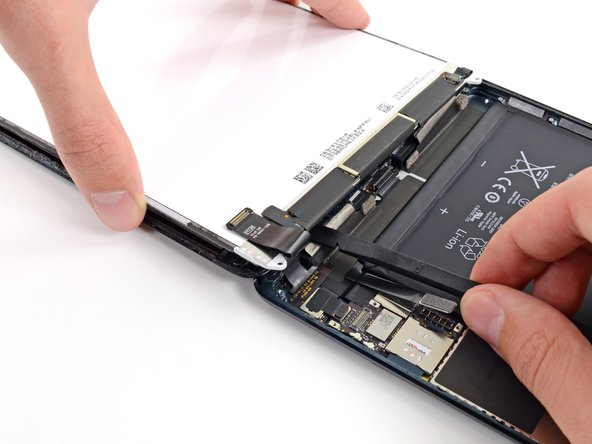
  • While holding the LCD with one hand, insert the flat end of a spudger between the LCD and tape on the iPad's right side.

  • Slide the spudger outward, separating the tape, while gently lifting up on the LCD to pull it away from the tape.

  • It may help to twist the spudger, to spread the gap the rest of the way and separate the LCD from the tape.

LCD此时仍通过下方的两条宽胶带与后壳连接。

一只手握住LCD,将撬棒插入左侧的胶带和LCD之间。

向外滑动撬棒,分离胶带。 将LCD小心向外提起,使其远离胶带。

在分离LCD与胶带的时候,扭动撬棒会更加高效的分离。

Vos contributions sont faites dans le cadre de la licence open source Creative Commons.