Info : Vous modifiez un tutoriel prérequis. Toutes les modifications apportées affecteront les 3 tutoriels qui comprennent cette étape.
Traduction de l’étape 4
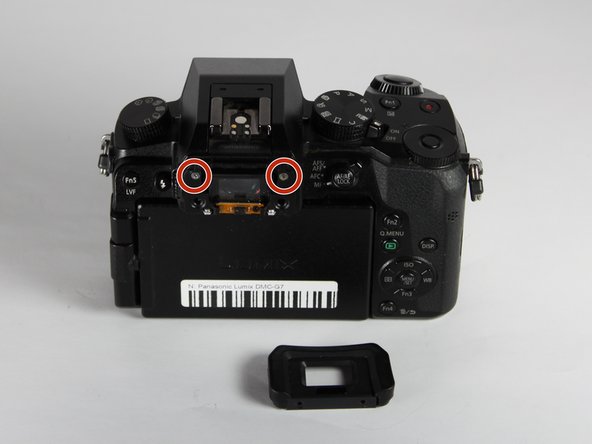
Étape 4


-
Remove the viewfinder eye cup by pulling up and out from the bottom to separate the locking clips from the camera.
-
Remove the two indicated silver 3.5mm long screws adjacent to the viewfinder screen using a PH0 Phillips screwdriver.
Vos contributions sont faites dans le cadre de la licence open source Creative Commons.