Aller au contenu principal

Panasonic Lumix DMC-G7 Mainboard Replacement

Info : Vous modifiez un tutoriel prérequis. Toutes les modifications apportées affecteront les 3 tutoriels qui comprennent cette étape.

Anglais
Français

Traduction de l’étape 6

Étape 6
Panasonic Lumix DMC-G7 Mainboard Replacement: étape 0, image 1 de 3 Panasonic Lumix DMC-G7 Mainboard Replacement: étape 0, image 2 de 3 Panasonic Lumix DMC-G7 Mainboard Replacement: étape 0, image 3 de 3
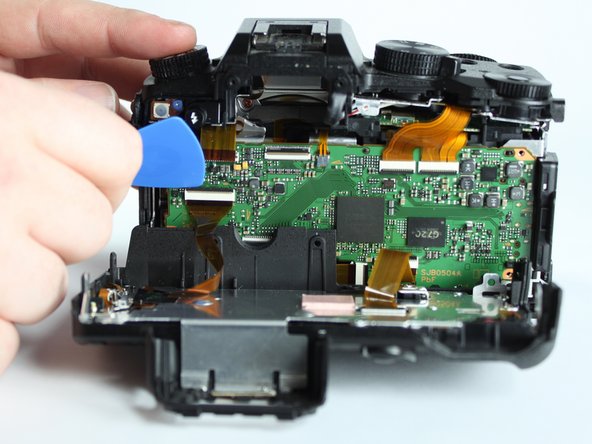
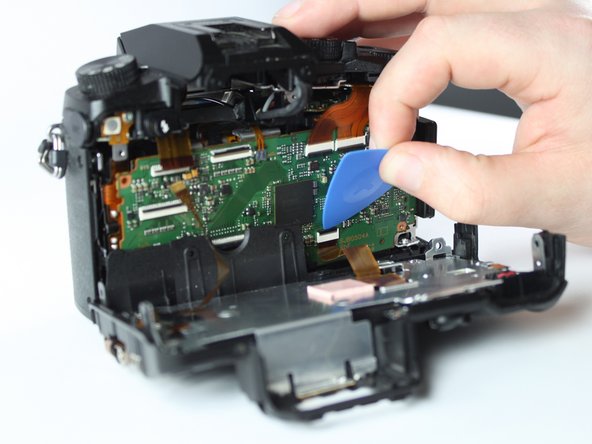
  • Remove the two indicated ribbon cables before separating the two halves of the camera.

  • Using a flat object, pry open the black tabs above the ribbon cable connectors by gently pulling away from the motherboard.

  • An opening pick is recommended, but any equally small and flat object will work.

  • Ribbon cables are fragile, so put as little stress on them as possible.

Insérez ici votre traduction

Insérez ici votre traduction

Insérez ici votre traduction

Insérez ici votre traduction

Vos contributions sont faites dans le cadre de la licence open source Creative Commons.