Aller au contenu principal

Demontage van de Huawei Mate 20 X 5G

Anglais
Néerlandais

Traduction de l’étape 6

Étape 6
Huawei Mate 20 X 5G Teardown: étape 0, image 1 de 3 Huawei Mate 20 X 5G Teardown: étape 0, image 2 de 3 Huawei Mate 20 X 5G Teardown: étape 0, image 3 de 3
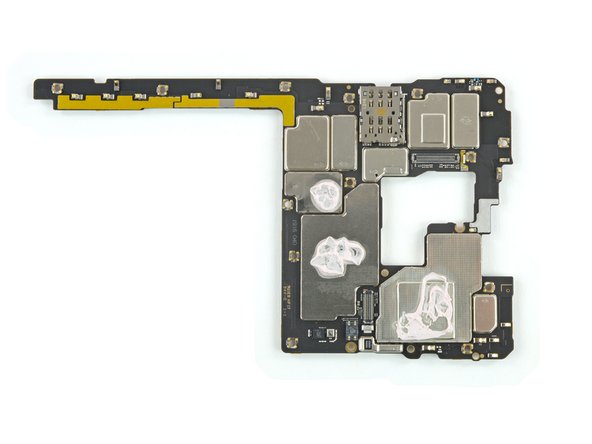
  • Finally, we get to the nitty-gritty of this Mate's iteration—the motherboard:

  • Micron D9WGR (MT53D1G64D8NZ-046 WT:E) 8 GB LPDDR4 with Kirin 980 SoC layered underneath

  • Toshiba THGAF8T1T83BAIR 256 GB NAND flash

  • Samsung K4UHE3D4AA-CGCJ 3 GB LPDDR4X—more on that later

  • Skyworks 78191-11 low-band front-end module for WCDMA/LTE

  • HiSilicon Hi6526 PMU

  • NXP 80T37 (likely NFC controller)

  • For comparison, the smaller board on the lower left belongs to the Mate 20 Pro.

Nu komen we eindelijke aan bij een van de meest vitale organen van dit model van de Mate—het moederbord:

Micron D9WGR (MT53D1G64D8NZ-046 WT:E) 8 GB LPDDR4 met een Kirin 980 SoC eronder

Toshiba THGAF8T1T83BAIR 256 GB NAND flash

Samsung K4UHE3D4AA-CGCJ 3 GB LPDDR4X—waarover later meer

Skyworks 78191-11 low-band front-end module voor WCDMA/LTE

HiSilicon Hi6526 PMU

NXP 80T37 (waarschijnlijk een NFC-controller)

Ter vergelijking, het kleinere bord in de linker onderhoek van de derde foto komt uit de Mate 20 Pro.

Vos contributions sont faites dans le cadre de la licence open source Creative Commons.