Traduction de l’étape 2
Étape 2

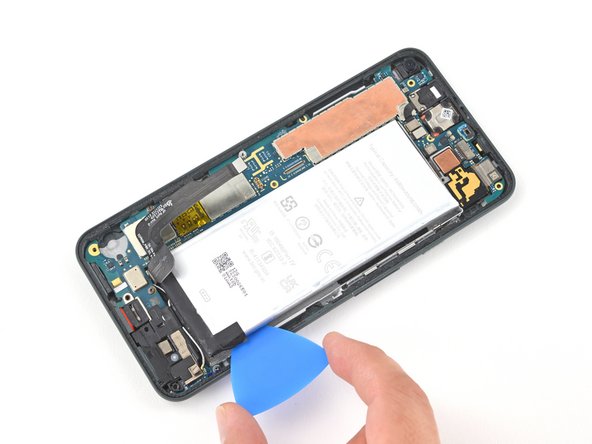


Slice the adhesive
-
Insert a pick into the gap to the right of the battery and slide its tip underneath the battery.
-
Slide the pick along the right side of the battery to slice through the adhesive securing it to the midframe.
-
Once the right side of the battery begins to separate from the midframe, leave an opening pick in the gap to keep the battery slightly raised.
-
Apply a few drops of isopropyl alcohol directly to the adhesive securing the battery to the midframe. Let the isopropyl penetrate the adhesive for 2-3 minutes.
Vos contributions sont faites dans le cadre de la licence open source Creative Commons.