Aller au contenu principal

Reemplazo del conjunto de batería y pantalla del Samsung Galaxy S20 Ultra

Anglais
Espagnol

Traduction de l’étape 3

Étape 3
Samsung Galaxy S20 Ultra Screen and Battery Assembly Replacement, Vibrator reassembly instructions: étape 0, image 1 de 3 Samsung Galaxy S20 Ultra Screen and Battery Assembly Replacement, Vibrator reassembly instructions: étape 0, image 2 de 3 Samsung Galaxy S20 Ultra Screen and Battery Assembly Replacement, Vibrator reassembly instructions: étape 0, image 3 de 3
Vibrator reassembly instructions
  • During reassembly, follow these instructions to reinstall your vibrator:

  • Peel off the vibrator adhesive from its liner and apply the sticky end to the bottom of the vibrator.

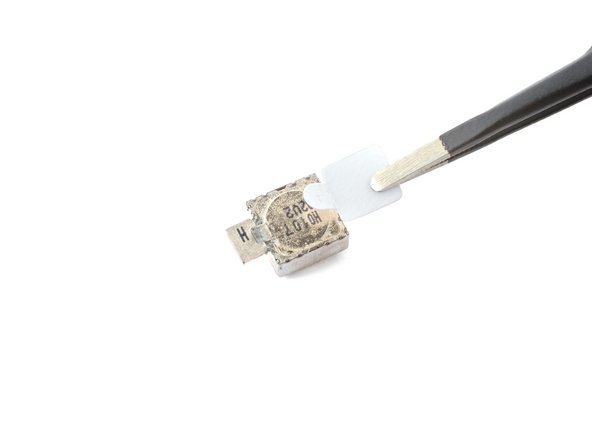
  • Use tweezers, or your fingers, to pull up on the white liner to expose the top layer of adhesive.

  • Insert the vibrator and apply pressure to adhere it to the frame.

  • The adhesive is very thin and hard to distinguish from the liner. Use your fingers to check if the adhesive transferred correctly.

Durante el montaje, sigue estas instrucciones para volver a instalar tu vibrador:

Despega el adhesivo del vibrador de su revestimiento y aplica el extremo adhesivo en la parte inferior del vibrador.

Usa pinzas, o tus dedos, para tirar del revestimiento blanco y exponer la capa superior de adhesivo.

Inserta el vibrador y aplica presión para adherirlo al marco.

El adhesivo es muy delgado y difícil de distinguir del revestimiento. Usa tus dedos para verificar si el adhesivo se transfirió correctamente.

Vos contributions sont faites dans le cadre de la licence open source Creative Commons.