Info : Vous modifiez un tutoriel prérequis. Toutes les modifications apportées affecteront les 2 tutoriels qui comprennent cette étape.
Traduction de l’étape 2
Étape 2

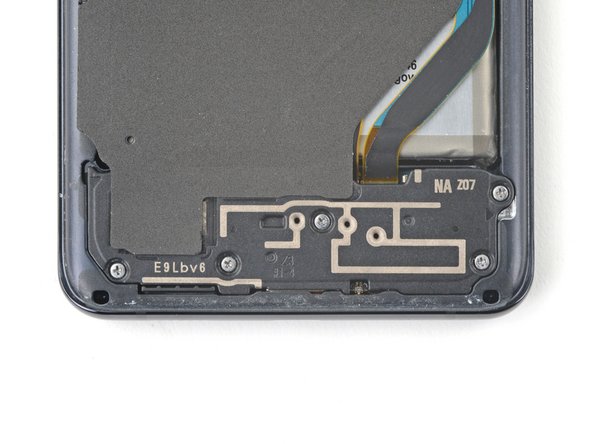


Unfasten the loudspeaker
-
Use a Phillips #00 screwdriver to remove the five 3.9 mm-long screws securing the loudspeaker and lower midframe.
| [title] Unfasten the loudspeaker | |
| [* red] Use a Phillips #00 screwdriver to remove the five 3.9 mm-long screws securing the loudspeaker and lower midframe. | |
| [* icon_note] Throughout this repair, [product|IF145-167-4|keep track of each screw|new_window=true] and make sure it goes back exactly where it came from. | |
| - | [* icon_reminder] If you're reassembling with the Samsung Self-Repair kit, be sure to replace the screws with new ones labeled ***#3373***. |
Vos contributions sont faites dans le cadre de la licence open source Creative Commons.