Info : Vous modifiez un tutoriel prérequis. Toutes les modifications apportées affecteront les 14 tutoriels qui comprennent cette étape.
Traduction de l’étape 8
Étape 8

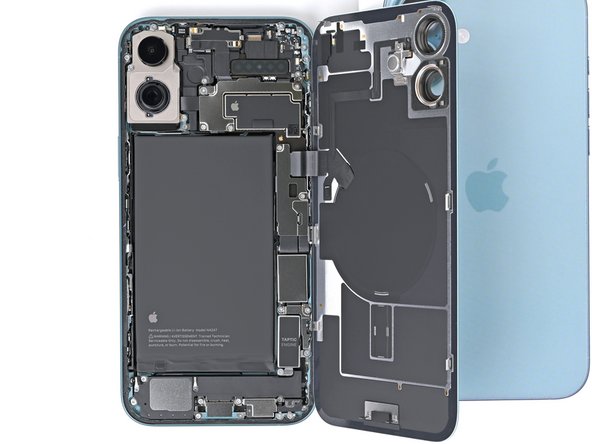


Back glass information
-
There's a delicate cable connecting the back glass to the phone, right next to the volume up button. Don't insert your pick here to avoid slicing the cable.
-
There are multiple spring contacts around the perimeter of the phone. Be extra careful not to insert your pick deeper than suggested in each step to avoid bending these contacts.
Vos contributions sont faites dans le cadre de la licence open source Creative Commons.