Info : Vous modifiez actuellement une condition préalable du tutoriel que vous venez de consulter. Toutes les modifications affecteront les 3 tutoriels qui comprennent cette étape.
Traduction de l’étape 1
Étape 1


-
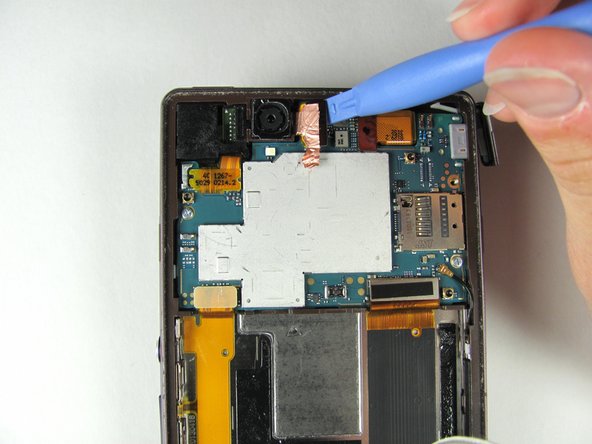
Release the copper tape located at the top middle of the phone with a plastic opening tool. This will take some force since the adhesive is rather strong.
-
With the plastic opening tool, release the pop connector, by lifting up to release it. The pop connector should still be attached to the copper tape.
-
Pull up gently on the copper tape and pop connector to remove the back camera. It should pop out easily.
Vos contributions sont faites dans le cadre de la licence open source Creative Commons.