Aller au contenu principal

iPad Air Wi-Fiモデルの左側アンテナの交換

Info : Vous modifiez un tutoriel prérequis. Toutes les modifications apportées affecteront les 5 tutoriels qui comprennent cette étape.

Anglais
Japonais

Traduction de l’étape 5

Étape 5
iPad Air Wi-Fi Left Antenna Replacement: étape 0, image 1 de 3 iPad Air Wi-Fi Left Antenna Replacement: étape 0, image 2 de 3 iPad Air Wi-Fi Left Antenna Replacement: étape 0, image 3 de 3
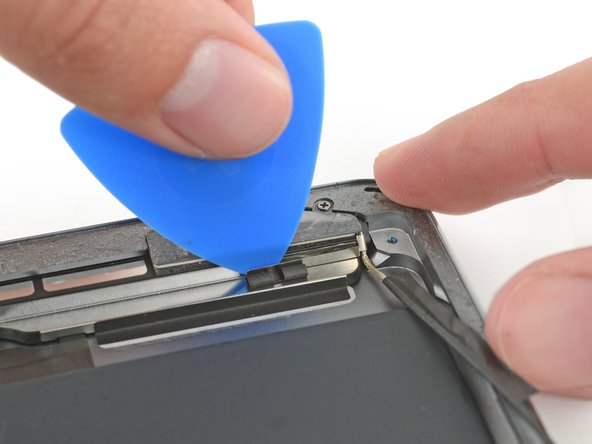
  • There is a bracket crimped onto the antenna cable that is adhered to the speaker enclosure. The adhesive must be severed in order to extract the antenna.

  • Carefully insert an opening pick between the speaker enclosure and the antenna cable bracket.

  • Slide the pick to the right to cut the adhesive.

  • Push the bracket away from the speaker to clear it of the tape under it.

内蔵スピーカーに留められたアンテナケーブルに接続しているブラケットがあります。接着剤はアンテナを取り出すためには切断しなければなりません。

開封ピックを内蔵スピーカーとアンテナケーブルブラケットの間に丁寧に差し込みます。

接着剤を切断するため、ピックを右側にスライドします。

ブラケットの下に留められたテープを剥がすため、ブラケットをスピーカーから押し出して離します。

Vos contributions sont faites dans le cadre de la licence open source Creative Commons.