Traduction de l’étape 9
Étape 9


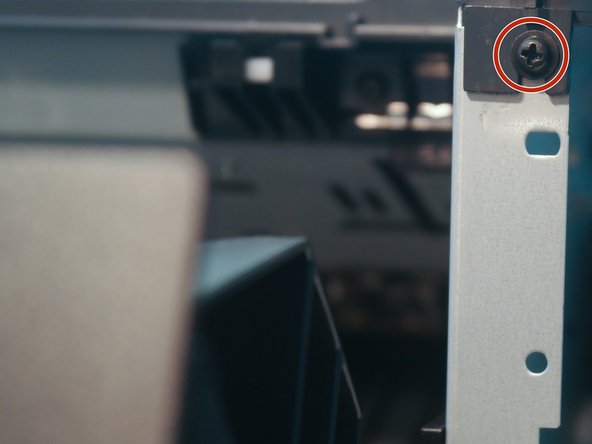


Top Cover
-
Remove 2 screws on the back of the printer, one on the left side, and one on the front.
Vos contributions sont faites dans le cadre de la licence open source Creative Commons.