Info : Vous modifiez un tutoriel prérequis. Toutes les modifications apportées affecteront le tutoriel qui comprend ces étapes.
Traduction de l’étape 8
Étape 8


-
We interrupt this teardown to bring you: more
cowbellteardown! -
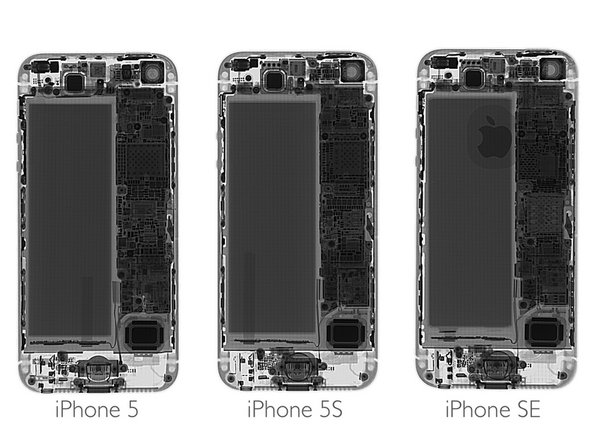
Our friends at Creative Electron have been getting their teardown on, X-ray style!
-
We have for your enjoyment, three generations of iPhone 5 configurations.
-
Really, the only obvious change is the addition of the bi-metal Apple logo.
-
That, and the addition of the Touch ID cable between the 5 and 5s (unfortunate placement still intact in the SE, too).
Vos contributions sont faites dans le cadre de la licence open source Creative Commons.