Aller au contenu principal

Mac mini Mid 2011 Logic Board Replacement

Info : Vous modifiez un tutoriel prérequis. Toutes les modifications apportées affecteront le tutoriel qui comprend ces étapes.

Anglais
Français

Traduction de l’étape 2

Étape 2
Mac mini Mid 2011 Logic Board Replacement: étape 0, image 1 de 3 Mac mini Mid 2011 Logic Board Replacement: étape 0, image 2 de 3 Mac mini Mid 2011 Logic Board Replacement: étape 0, image 3 de 3
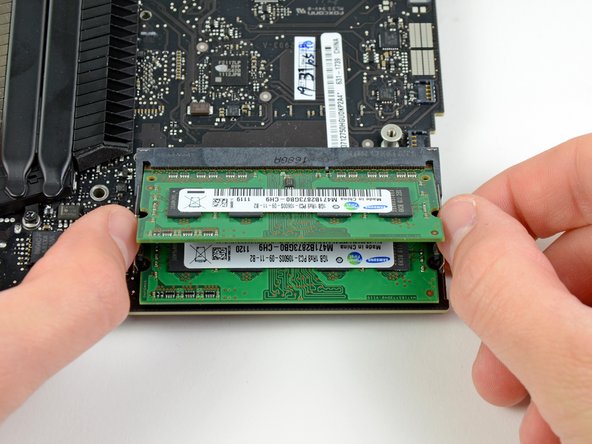
  • Release the tabs on each side of the RAM chip by simultaneously pushing each tab away from the chip.

  • These tabs lock the chip in place and releasing them will cause the chip to "pop" up.

  • After the RAM chip has popped up, pull it straight out of its socket.

  • Repeat this process if a second RAM chip is installed.

Insérez ici votre traduction

Insérez ici votre traduction

Insérez ici votre traduction

Insérez ici votre traduction

Vos contributions sont faites dans le cadre de la licence open source Creative Commons.