Aller au contenu principal

Nintendo Switch Teardown

Anglais
Allemand

Traduction de l’étape 4

Étape 4
Nintendo Switch Teardown: étape 0, image 1 de 3 Nintendo Switch Teardown: étape 0, image 2 de 3 Nintendo Switch Teardown: étape 0, image 3 de 3
  • Let's switch this teardown into gear!

  • The first thing we note is the weird Domino's logo the model number—HAC-001.

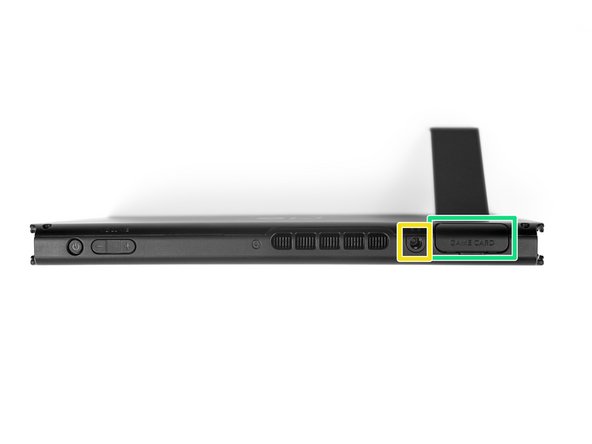
  • Doing a quick turnaround, ports include:

  • MicroSD located underneath the (surprisingly stiff) kickstand

  • USB-C (for the dock)

  • Standard 3.5 mm headphone jack

  • Proprietary Nintendo game card slot

  • The fan vents through the top of the device, and initial reports say the Switch makes heavy use of that cooling channel while docked and pushing 1080p graphics.

Wir switchen um und lassen den Teardown in Gang kommen!

Das erste, was wir bemerken ist das Logo vom Domino Pizzabäcker die Modellnummer—HAC-001

Wir blicken mal schnell auf die Anschlüsse:

MicroSD unter der (überraschend stabilen) Stütze.

USB-C (für den Dock-Anschluss)

Standard 3,5 mm Kopfhörerbuchse

Proprietärer Nintendo Gamekarteneinschub.

Der Lüfter wird seine Wärme an der Oberseite des Geräts los. Erste Berichte sagen, dass die Switch heftig Gebrauch von dieser Entlüftung macht, wenn sie am Dock angeschlossen ist und die 1080p Grafik bedient.

Vos contributions sont faites dans le cadre de la licence open source Creative Commons.