Aller au contenu principal

Canon PowerShot A75 Casing Replacement

Info : Vous modifiez un tutoriel prérequis. Toutes les modifications apportées affecteront les 3 tutoriels qui comprennent cette étape.

Anglais
Coréen

Traduction de l’étape 11

Étape 11
Canon PowerShot A75 Casing Replacement: étape 0, image 1 de 3 Canon PowerShot A75 Casing Replacement: étape 0, image 2 de 3 Canon PowerShot A75 Casing Replacement: étape 0, image 3 de 3
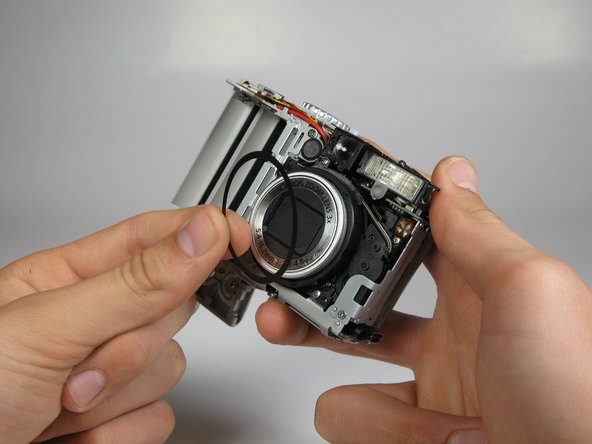
  • Take off the front casing.

  • There is a black rubber washer around the lens that comes out after you take the casing off. Make sure to replace it when putting the camera back together.

Insérez ici votre traduction

Insérez ici votre traduction

Vos contributions sont faites dans le cadre de la licence open source Creative Commons.