Info : Vous modifiez un tutoriel prérequis. Toutes les modifications apportées affecteront les 4 tutoriels qui comprennent cette étape.
Traduction de l’étape 4
Étape 4


-
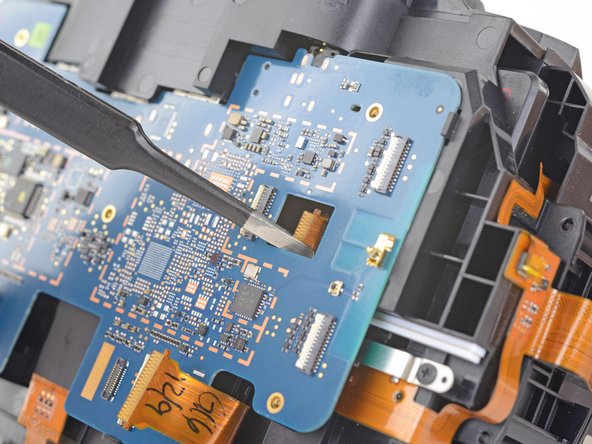
Use a pair tweezers to slightly twist the interconnect cable and press it down until the tabs on either side of the cable clear the hole in the motherboard.
| - | [* black] Use a pair tweezers to slightly twist the interconnect cable and press it down until the tabs on either side of the cable clear the hole in the motherboard. |
|---|---|
| + | [* black] Use a pair [product|IF145-020|tweezers] to slightly twist the interconnect cable and press it down until the tabs on either side of the cable clear the hole in the motherboard. |
| [* icon_reminder] During reassembly, make sure to thread the interconnect cable through its slot in the motherboard. |
Vos contributions sont faites dans le cadre de la licence open source Creative Commons.