Ce dont vous avez besoin
-
-
The underside of the keyboard is affixed by a layer of adhesive that covers the entire surface. There are no screws holding the rear cover in place.
-
-
-
A spludger preferably plastic can be used to pry the rear cover off the keyboard
-
-
-
Open the front end of the keyboard with a prying tool.
-
Using a heat gun on low setting can be used carefully to heat the rear cover and soften the adhesive. Work in sections heating and then gradually prying the sections apart.
-
Avoid using too much heat otherwise you will distort or melt the cover or other plastic parts. Do not use excessive force to remove the cover as the alloy is thin and bends easily. The keyboard will be permanently distorted.
-
-
-
-
The main keyboard backplate is held in by dozens of spot welds, the only way to disassemble further is to remove them with a drill!
-
The logic board is secured with philips head screws. Two ribbon cable connect the keyboard to the logic board. Damage to a cable will result in whole sections of keyboard not functioning.
-
-
-
There are practically no serviceable parts inside the keyboard other than the logic board but even so due to the assembly of the keyboard there are no spare parts available to buy even if you could. There is little practical reason to actually disassemble the keyboard
-
-
-
Cypress CY7C63923 (Low-Speed USB Peripheral Controller)
-
ST 95040W (4kbit EEPROM)
-
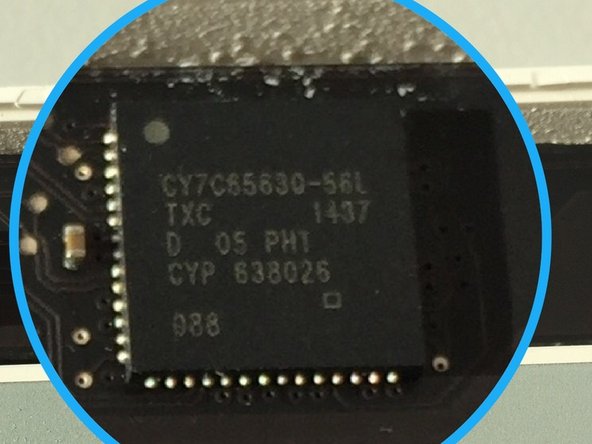
Cypress CY7C65630-56L (Low Power USB 2.0 Hub)
-
Microchip 2026-1YM (Dual-Channel Power Distribution Switch)
-
-
-
The yellow circled element is a Cypress CY7C63923-PVXC, a "Low-Speed USB Peripheral Controller" .
-
The blue circled element is a Cypress CY7C65630, a "Low-Power USB 2.0 Hub Controller".
-


19 commentaires
Any hope of replacement of a defective key switch?
I think I will need to open mine to replace the USB wire.
One day, my keyboard stopped working, keys affected are 5tgb and 6yhn. It guess they are joined inside. No reason at all. No spill. My keyboard is hooked to an unpowered USB hub, which is hooked to my MacbookPro. I use also a logitech wired mouse attached to the USB port. When I arrived last Monday morning to my office with the mac, I plugged everything as described and the problem appeared. Now I don't know that to do to fix it. Some guys recommend springing water on it but it seems some kind of joke. I can't believe I spend so much money in this keyboard and now it doesn't work. A couple of months ago, I realised that the Magic Mouse 2 was another bummer because of it problem tracking the hand movements. I started to doubt about Apple hardware, except for the Macbook Pro, which has 5 years of intense use and never had a problem at all.
Yes, washing these types of aluminum apple keyboards with water will usually resolve the problem, just pure water, and a few days of drying… it doesn’t make sense, but I have fixed a dozen of these that way before! It’s no guarantee, but it could resolve it. The reason the keys went out together is that the buttons’ are organized into columns and rows electronically. When the circuit is connected on the sixth column and the second row, that equals a 5 key. Sixth column third row would be the T key, etc. So your problem is not at the keys, but with the column contacts for those two columns. Whether cleaning them will help is anyones guess. Somehow, you have a break in the circuit for those two columns of the keyboard. It sounds like the problem will be on the logic board of the keyboard. Check for hairs or something shorting out any chips, etc.