Aller au contenu principal

Ce dont vous avez besoin

Cette vue éclatée n'est pas un tutoriel de réparation. Pour réparer votre Car and Drivers Auto HandHeld Vacuum Bagless, utilisez notre manuel de réparation.

  1. Car and Drivers Auto HandHeld Vacuum Bagless Teardown, Car and Drivers Auto HandHeld Vacuum Bagless Teardown: étape 1, image 1 de 3 Car and Drivers Auto HandHeld Vacuum Bagless Teardown, Car and Drivers Auto HandHeld Vacuum Bagless Teardown: étape 1, image 2 de 3 Car and Drivers Auto HandHeld Vacuum Bagless Teardown, Car and Drivers Auto HandHeld Vacuum Bagless Teardown: étape 1, image 3 de 3
    • Locate the four screws locate outer gray shelll

    • ''I REMOVED THE SCREWS WITH PH #OO SCREWDRIVER FROM (IFIXIT)

    • New PLace four screws to the side

  2. Car and Drivers Auto HandHeld Vacuum Bagless Teardown: étape 2, image 1 de 1
    • Here are the four screws from vacuum

  3. Car and Drivers Auto HandHeld Vacuum Bagless Teardown: étape 3, image 1 de 3 Car and Drivers Auto HandHeld Vacuum Bagless Teardown: étape 3, image 2 de 3 Car and Drivers Auto HandHeld Vacuum Bagless Teardown: étape 3, image 3 de 3
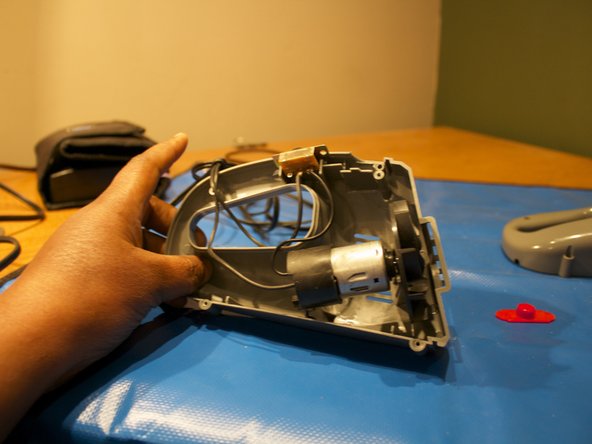
    • Remove the top grey shell of the vacuum

    • Place a red tab to the side

    • Let start looking at the 9volt motor with wire and on/off switch.

    • I remove the outer shell . I remove the motor and wires and on/off switch.

  4. Car and Drivers Auto HandHeld Vacuum Bagless Teardown: étape 4, image 1 de 1
    • This it complete teardown on Car and Driver HandHeld Vacuum bagless!

kempc8

Membre depuis le 11/22/13

899 Réputation

7 tutoriels rédigés

Équipe

K and K Fixit Membre de l'équipe K and K Fixit

Business

1 membre

11 tutoriels rédigés

0 commentaires

Ajouter un commentaire

Nombre de vues :

Dernières 24 heures : 4

7 derniers jours : 7

30 derniers jours : 17

Total : 1,023