Introduction
This fine computing device was recently discovered in an undisclosed warehouse where it was being studied by Top... Men.
What could be lurking inside this heavy metal box? A Golden Idol... The Ark of the Covenant... Giant Ants?
These are all possibilities, but there's only one way to find out for sure.
Ce dont vous avez besoin
-
-
Behold, the power of beige!
-
Tech Specs:
-
933 MHz Pentium III Processor
-
10 GB PATA Hard Disk
-
512 MB of PC133 RAM
-
16x DVD-ROM and 3.5" Floppy Drive
-
Life Experience
-
-
-
Some of these ports belong in a museum:
-
RS-232 Serial
-
DB-25 Parallel
-
PS/2
-
DE-15 VGA (oh, wait...)
-
The antenna is a pretty big clue that this computer has been upgraded at some point.
-
-
-
The various drives are mounted on a single hinge that flips forward. Just pull up and it will click into place.
-
The PCI riser is one of the few things missing a green label. The release button is the silver tab towards the front of the computer.
-
The power supply swivels up and away from the motherboard.
-
-
-
-
The first step in removing the CPU cooler is to unplug the small three pin power cable.
-
The CPU cooler is attached to the socket with metal hooks. Removing it without damaging the CPU requires two distinct motions:
-
Gently push down on the red tab.
-
Squeeze the red tab towards the fan and then lift the cooler.
Umm… On the orange point; You say to push the red tab towards the fan, but the orange arrow in the image points away from it…
Which is it? - I’m trying to remove it, but I’ve tried both ways and I don’t dare to push or bend much more.
Also, the tab seems to suggest that you should indeed "squeeze” it inwards, with it having the ribbed concave texture there.
I can’t seem to figure out how it goes visually…
-
-
-
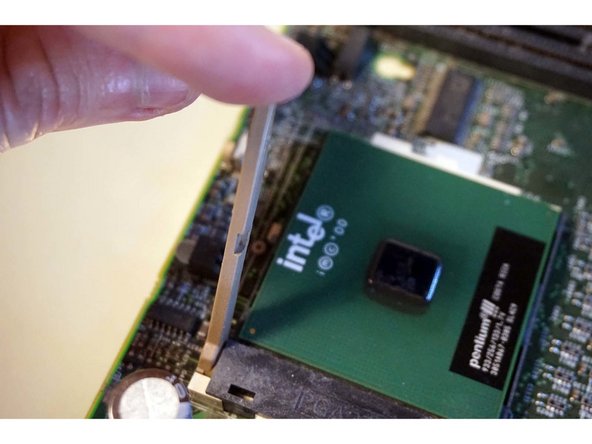
Removing the CPU requires a steady hand and can be slightly intimidating.
-
A beige lever keeps the CPU locked in place. Pull it away from the processor and then up. The processor will move towards the group of capacitors when it is unlocked.
-
The processor can be removed from the socket by gripping the edges and pulling straight up.
-
-
-
That's it. Now we just need to reassemble it before someone realizes it's not in the warehouse.
-
Completely Unofficial Compaq Deskpro EN Repairability Score: 10 out of 10 (10 is easiest to repair)
-
It practically tells you how to disassemble it.
-
Most common repairs can be done with one tool.
-
Faces remain unmelted after removing the cover. (Always a good thing.)
-
Finding replacement parts may require entering a Temple of Doom/RadioShack.
-


5 commentaires
Personally I’d include ease of finding suitable replacement parts in a reparability score, I’ve worked on these things and would rate them at 8.5-9.5 for non-standard motherboard, motherboard mountings, and power supply.
If purchasing rather than leasing, I think the point was retire the first few that break out of warranty, and start parting them out. Compaq was very good about keeping the same line going for a long time so the parts would be compatible.
Awesome! I love these machines. I’m pretty sure these ones will run a Tualatin PIII if you upgrade the BIOS too.
do you know, how to oil noisy power supply fan in this computer? I tried but I can’t open it?
Thanks for the quality
this writing style is funny